


In part one we talked about what branch-based development is and how it works conceptually in Pega.
In this video we get hands-on. Setting up the branch application layer, creating a branch, fixing a bug inside it, doing a code review and merging the change back into the implementation layer.
Setting Up the Branch Application Layer
The first thing you need before any branch development can happen is a branch application layer sitting above your implementation layer.
You do not use the application wizard for this. That wizard creates a lot of supporting rules you do not need here. Instead, you create the application manually using the Create menu, tag it to your implementation application as the built-on layer, and give it its own rule set – typically a development rule set.
Once the layer is created, you need to give your developers access to it by creating an access group that points to the branch application and adding that access group to their operator IDs.
Creating a Branch and Doing Development
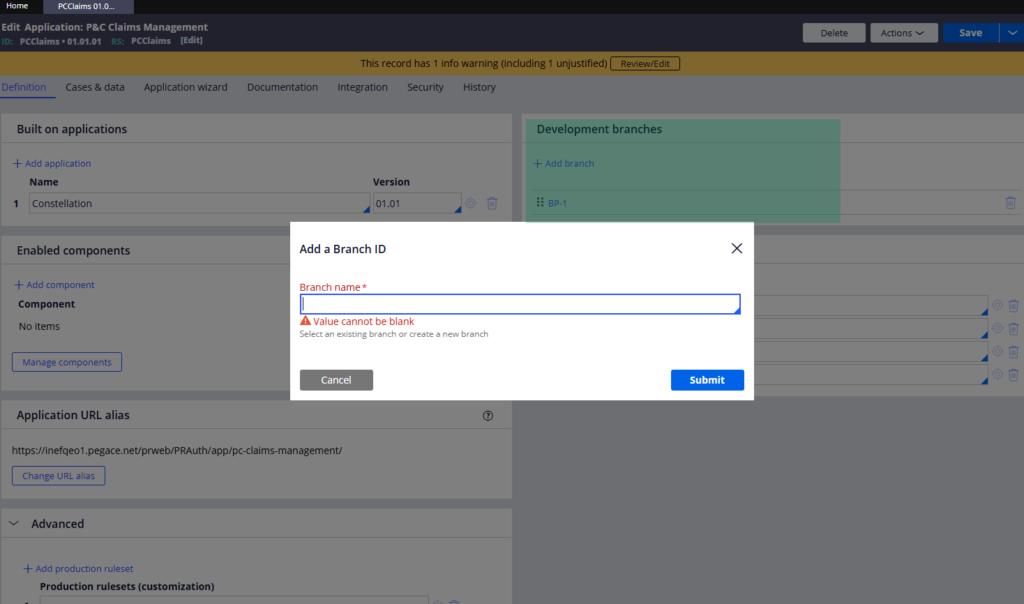
Once your branch application layer is in place, creating a branch is straightforward. Open the application definition, add a branch – name it something meaningful like BugFix or the story reference – and save.
When you want to fix a bug or make a change to an existing rule, you do not edit it directly in the implementation layer. Instead you save a copy of that rule into your branch, make your changes there, and keep the implementation layer clean until you are ready to merge.
One thing to be careful about here – when you save a rule into a branch, make sure the class layer and rule set layer match the original rule exactly. Getting this wrong causes problems at merge time.
Code Review
Once your development is done, Pega has a built-in code review process directly inside the branch explorer.
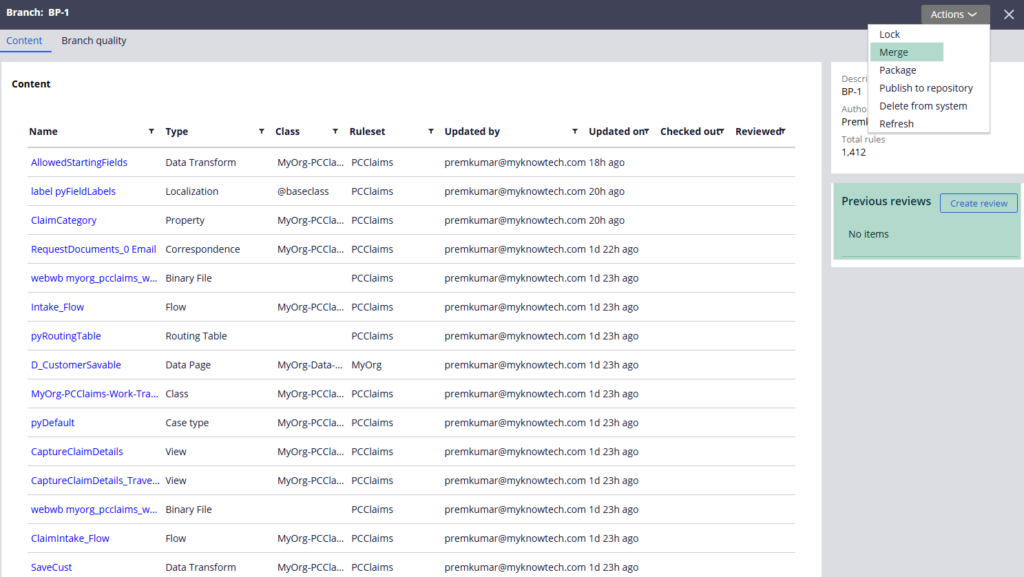
You open your branch, click Create Review, add your reviewer – a team lead or LSA – set a due date if needed, and submit. The reviewer can check the rules, leave comments via Pega Pulse, and close the review once they are satisfied.
Before you even send it for review, check your branch quality score. Guardrail compliance and test coverage are visible right from the branch landing page. Do not send code for review with a poor compliance score and expect it to sail through.
Merging Into the Implementation Layer
Once the review is complete, the final step is merging your changes back into the implementation layer using the merge wizard.
The wizard checks for conflicts, asks if you want to increment the rule set version – always do this for production changes, even a patch increment – and then moves your rules from the branch into the target rule set.
After a successful merge, delete the branch from the system. You do not need it anymore. If you want a backup before deleting, Pega gives you an option to download the branch as a zip file.
Watch the Full Walkthrough
In the video below I walk through every step live – from creating the branch application layer all the way through to merging and deleting the branch after a successful code review.
This is the kind of workflow you will use on every real Pega project. Getting comfortable with it early makes a real difference when you are working in a team environment.

