


If you have ever used a banking website – checking your balance, applying for a mortgage, viewing transactions – everything you interacted with was built from some kind of code.
In Pega, that code is called rules.
Every feature you build in a Pega application – the user interface, the business process, the decisions, the integrations, the security – all of it is configured through rule forms. You do not write Java from scratch. You configure the right rule, in the right place, and Pega’s engine handles the execution.
What Are Rule Types
Pega organises rules into categories based on what they do.
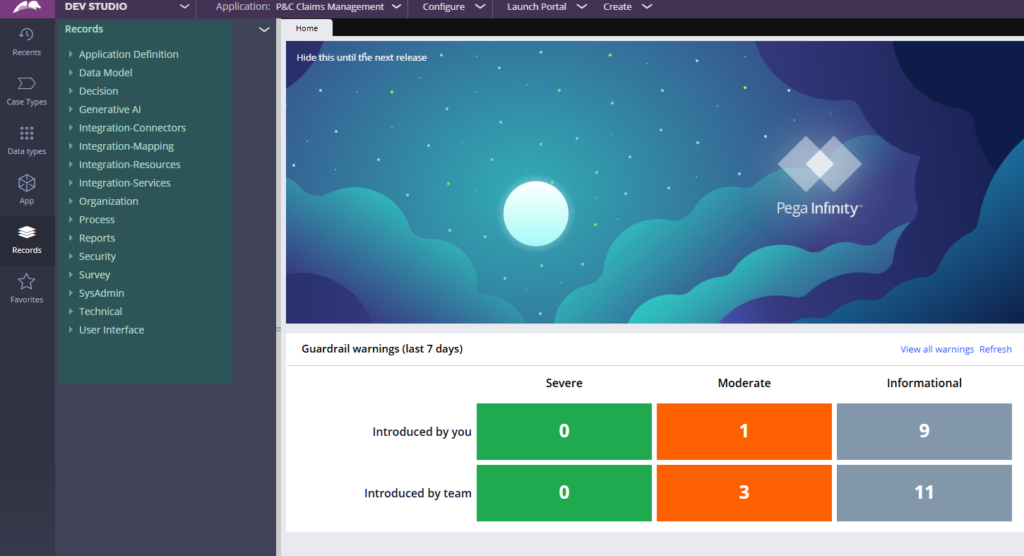
UI rules control the look and feel of your application. Process rules define your case types and workflows. Decision rules handle conditional logic and routing. Security rules manage authentication and authorisation. Data model rules define how information is structured and stored. Integration rules connect your application to external systems. Reporting rules let you build custom reports and dashboards.
Each category has its own rule types, and each rule type has a specialised form with the right configuration options for what it does. An activity rule looks different from a decision table, which looks different from a REST connector – because they each serve a different purpose.
How to Create a Rule?
Whenever you create any rule in Pega, you start with the Create form. This is consistent across all rule types.
In the Create form you give your rule a name, choose the application layer it belongs to, select the class it applies to, and assign it to a rule set. Getting these three placement decisions right – application layer, class layer, rule set – is one of the most important habits to build early in your Pega development career. A rule placed in the wrong layer causes problems that are hard to trace later.
Key Actions on a Rule Form
Once a rule is created, the rule form gives you a set of actions worth knowing.
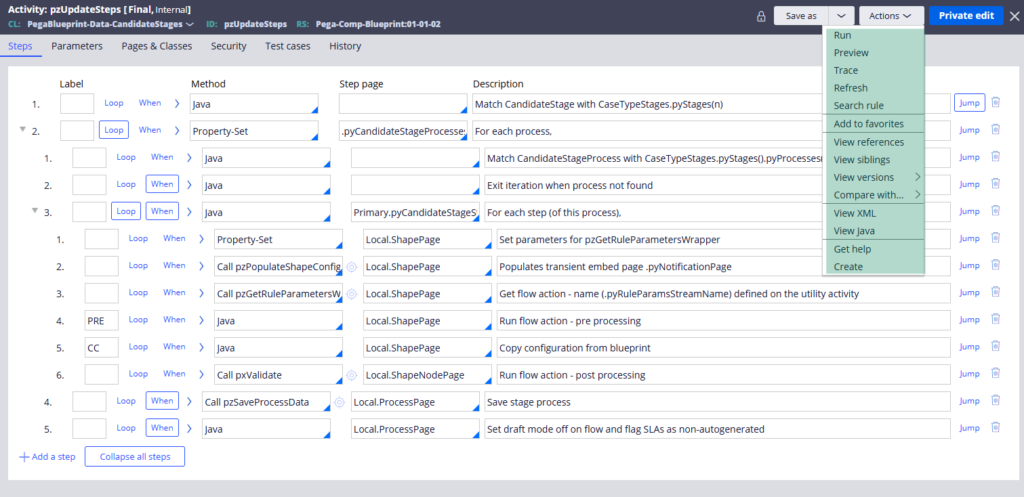
Run lets you execute the rule directly and test it.
Trace runs the rule through the Pega tracer so you can see exactly what is happening at each step.
Preview gives you a readable summary of what the rule does – useful when exploring unfamiliar out-of-the-box rules.
View References shows you everywhere this rule is used across the application – critical before making any changes to shared rules.
View Versions lets you compare different versions of a rule side by side so you can see exactly what changed between versions.
View Java shows the generated Java code for rules like activities – useful if you want to understand what Pega is actually executing under the hood.
Save, Save As and Specialisation
Beyond creating new rules, you can also Save As an existing rule to create a copy under a different name or class. You can specialise a rule by class or rule set – meaning the same rule name can behave differently depending on the context it is executed in. You can also specialise by circumstance, which allows you to run different versions of the same rule based on a condition – for example, executing a different activity for gold customers versus platinum customers.
These specialisation options are what make Pega’s rule resolution system powerful. We will go deeper on rule resolution in a dedicated post.
Watch the Full Walkthrough
In the video below I walk through creating a first rule in Pega, explore the rule form configurations in detail, and demonstrate the key actions – run, trace, view references, view versions and specialisation.
Rules are the foundation of everything in Pega. Getting comfortable with how they work, how they are placed and how they are configured will make every other topic in this series easier to follow.

