


OpenID Connect is the modern standard for authentication, built on top of OAuth 2.0. Where OAuth focuses on authorization, OpenID Connect is purely about authentication, and it pairs very well with Azure Entra ID as the identity provider. In this post we set up an OIDC authentication service in Pega directly from App Studio.
How the OpenID Connect Flow Works
The flow starts when the browser hits the authentication service URL on the web server. The server redirects the user to the identity provider, where the user enters login credentials and gives consent, similar to the SAML flow.
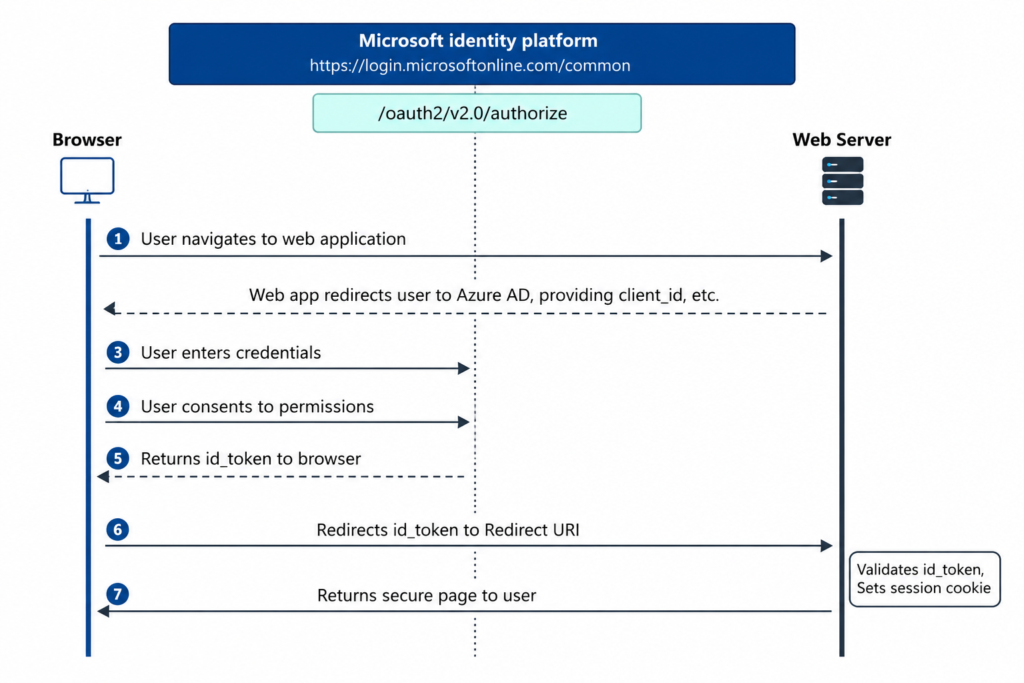
Once the IDP receives the consent, it returns a JSON Web Token (JWT) to the browser, which redirects to the configured redirect URI on the server. The server parses the JWT, matches the key ID against the trusted public keys, and if the signature validates, the user is authenticated.
Setting Up the Service in App Studio and Entra ID
Create the authentication service from App Studio under Users, then Authentication, and choose the OIDC option.
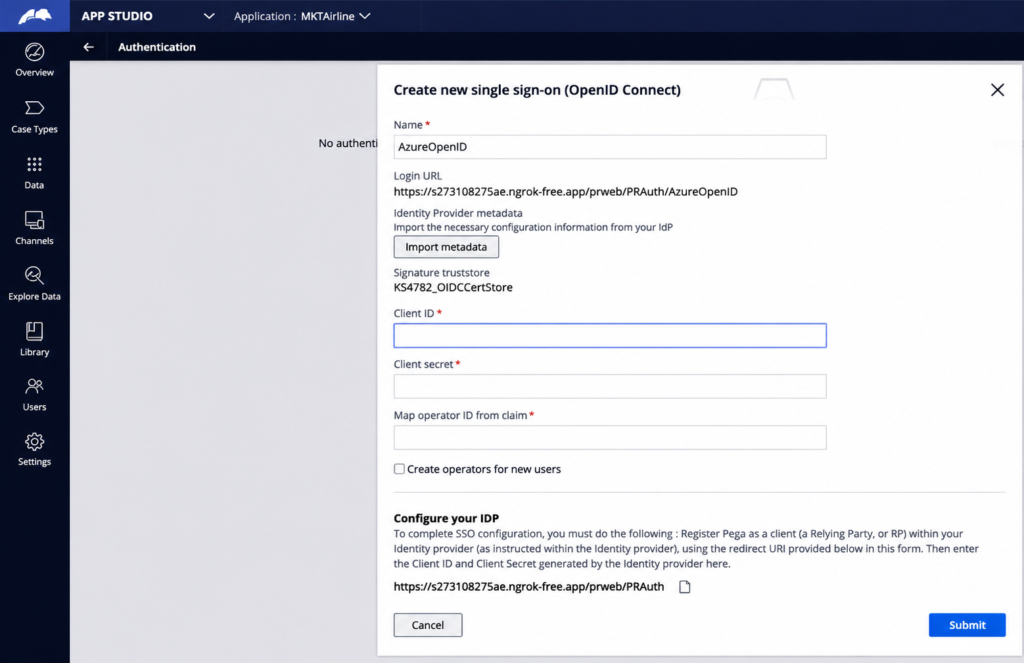
Import the metadata from the OpenID Connect metadata document URL, which you get from the Endpoints section of your app registration in Entra ID, not the enterprise application. Pega pre-populates all the endpoints and even creates the signature truststore automatically.
Then add the client ID and client secret from the app registration, map the email claim as the operator ID, enable operator provisioning if you want it, and register the Pega redirect URI back in Entra ID. On a successful login, the operator gets created automatically with the mapped access group and organization details.
Watch the Full Walkthrough
The video covers the complete configuration click by click, including the Entra ID screens, the operator mapping and a live login test.
Set this up once in a sandbox with your own tenant and the whole OIDC flow, from consent to token validation, becomes much easier to reason about.

