

APIs and services in Pega are packaged inside Service Package instances. Understanding which service package holds which APIs is one of those foundational things every Pega developer should have clarity on before working with integrations.
The four important OOTB service packages
- Application – Contains all the Constellation-related DX APIs, packaged under the service package named “Application”.
- API – Covers the more traditional APIs, which may include some overlap with Constellation APIs such as case creation, but extends well beyond that. DevOps-related, System Management, and Privacy-related APIs are all housed here.
- Dev – Holds APIs specifically useful for developers working on Constellation-based UI development.
- Prediction Studio – Dedicated to CDH projects. Use these OOTB APIs for model updates, analysing predictions, and related tasks.
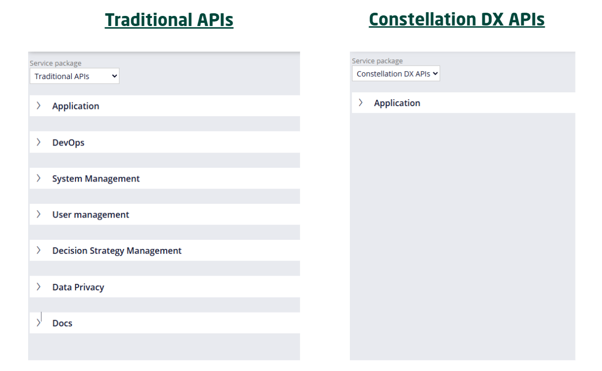
Note: A detailed comparison of Traditional DX API vs Constellation DX API can be found in a separate article
So we have the service packages and the APIs – but where do you go to understand the endpoints, the request/response structure, and actually test them without writing a single line of code?
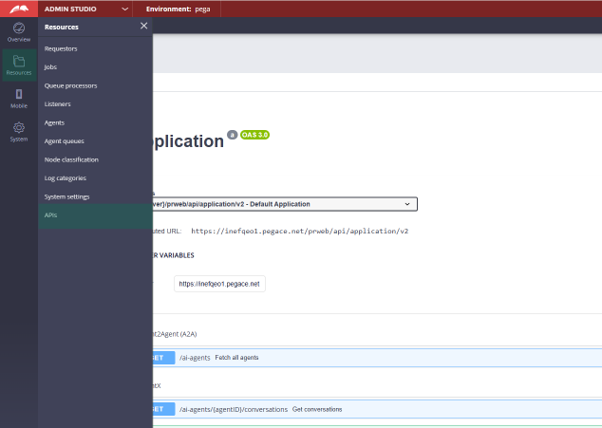
That is exactly what the Pega Admin Studio API landing page is built for.
Pega embeds Swagger landing pages for all the OOTB APIs, giving you a ready-to-use documentation and testing interface right inside the platform.
What is a Swagger API Landing Page?
A Swagger API Landing Page is an interactive documentation portal that allows developers to explore, understand, and test available REST APIs from a single interface.
It presents API endpoints, request/response formats, authentication methods, and sample payloads – everything you need to understand and consume an API without hunting through separate documentation.
The Swagger UI project is licensed under Apache 2.0, which permits commercial use. Pega has adopted this open-source model and embedded Swagger UI directly into Admin Studio, providing a centralised catalogue of all available OOTB APIs.
In short, it is a documentation and testing tool built into the platform – no external setup required.
Let’s start by exploring the first service package Constellation DX APIs.
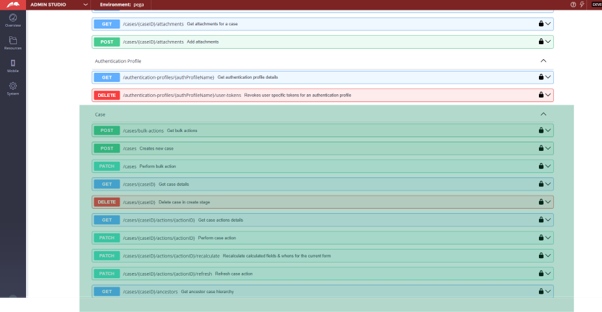
In the Constellation DX APIs, there is only one category – Application. You can already see the endpoint format reflecting the service package name “Application”.
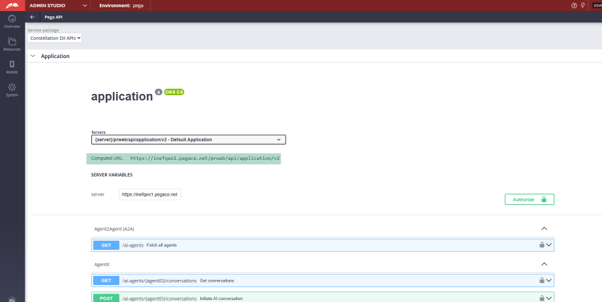
For reference, you can also open the Application service package instance in Dev Studio alongside this. Every API visible on the Swagger landing page maps directly to what is listed there – a useful cross-check.
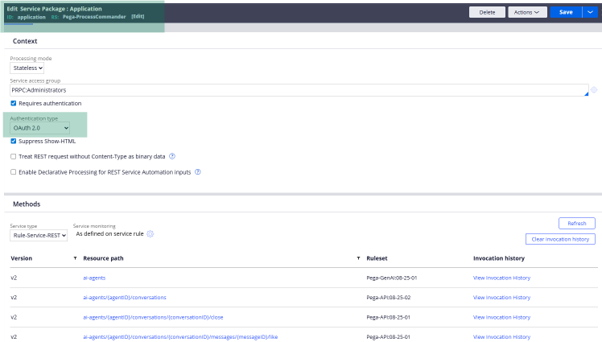
One important thing to note about Constellation DX APIs: they use OAuth 2.0 authentication exclusively. Basic authentication is not supported here.
This means that before you can test any endpoint, you need a valid OAuth 2.0 client registration configured inside Pega. Let’s set that up first.
Setting Up OAuth 2.0 Client Registration for Constellation DX API Access
Step 1: Create a new OAuth 2.0 Client Registration instance.
Navigate to Security and complete the creation form to create a new one.
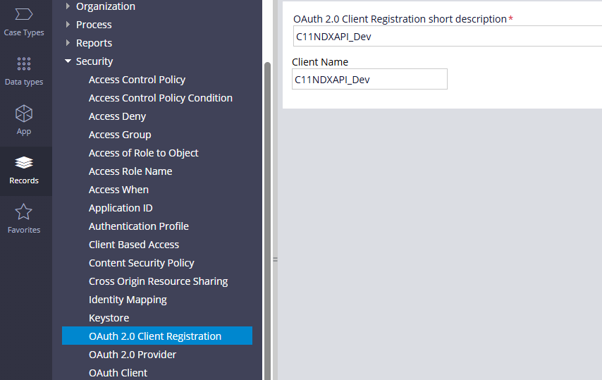
Step 2: Configure the grant type as Client Credentials for dev access. Make sure to download and securely store the client secret – you will need it to authenticate from the Swagger landing pages.
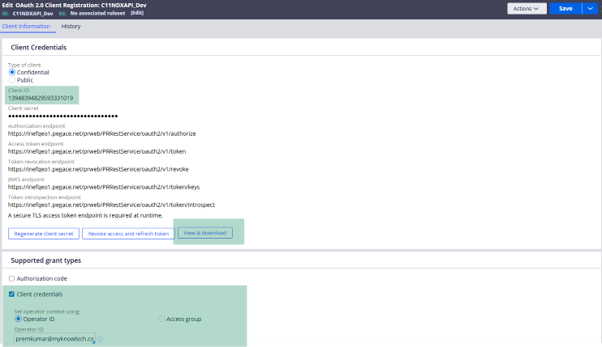
With that in place, go back to the Admin Studio Constellation DX APIs.
Click on any of the lock icons on the APIs and enter your client credentials to authorise. Once authenticated, you will have full access to test the Constellation DX APIs.
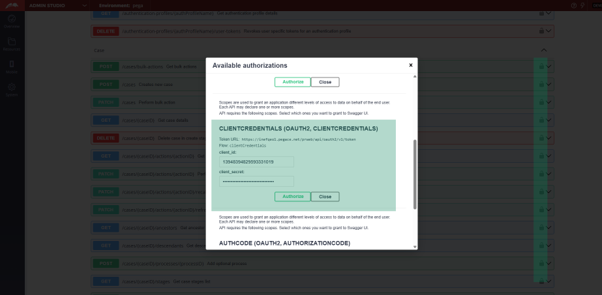
Try out APIs from Admin Studio Swagger Page
Scroll down and you will find a group of APIs under the Case category. Expand the second API listed, which uses the POST method for case creation.
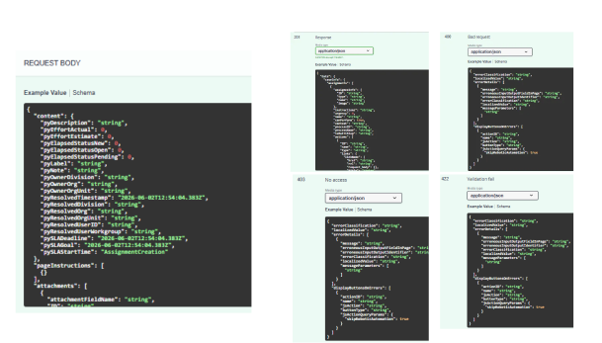
Inside Swagger, you can review the sample request and response message structures for different scenarios, including error conditions. This alone makes it a valuable reference during development.
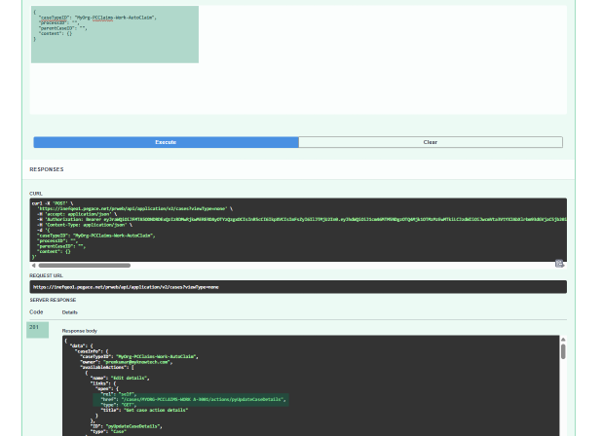
To test it live, click the Try it out button. Edit the parameters and provide your request body. For a simple AutoClaims case, I left all other data inside the content body empty. On clicking Execute, the case was successfully created as A-3001 with a 201 status code.
The same approach applies to any other API listed – explore and test at your own pace.
Before wrapping up, let’s quickly test a traditional API as well. Navigate to Traditional APIs from the dropdown and you will find a broader set of DevOps, system administration, and application-related APIs.
Try out one of them and you will notice something different – a username and password popup appears for authentication.
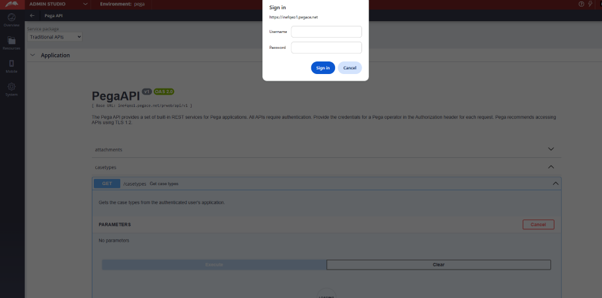
Can you work out why?
.
.
.
.
.
Because this is a different service package, and it uses basic authentication rather than OAuth 2.0. 😊
Each service package can have its own authentication configuration – and that is precisely the point. Once you understand that, the behaviour is completely expected.
If you had already figured that out, then you have a solid grasp of what this article set out to cover.
Feel free to explore all the APIs available from the Swagger landing page – there is quite a bit to discover.

