


OAuth 2.0 is everywhere. Every time you see “Continue with Google” or “Log in with Facebook” on a third-party app, that is OAuth in action.
Understanding how it works – and how Pega handles it – is essential for any integration work you will do on real projects.
What OAuth 2.0 Actually Is
Think of valet parking. You own the car. You grant the parking attendant permission to move it. You are still the owner. You have simply given someone temporary, limited authorization to use your resource.
OAuth 2.0 works the same way. You grant an application permission to access a resource on your behalf. No passwords are shared. A token is exchanged instead. The application uses that token to access what it needs, within the scope of what you approved.
The Grant Types You Need to Know
OAuth 2.0 supports several grant types. Two matter most in practice.
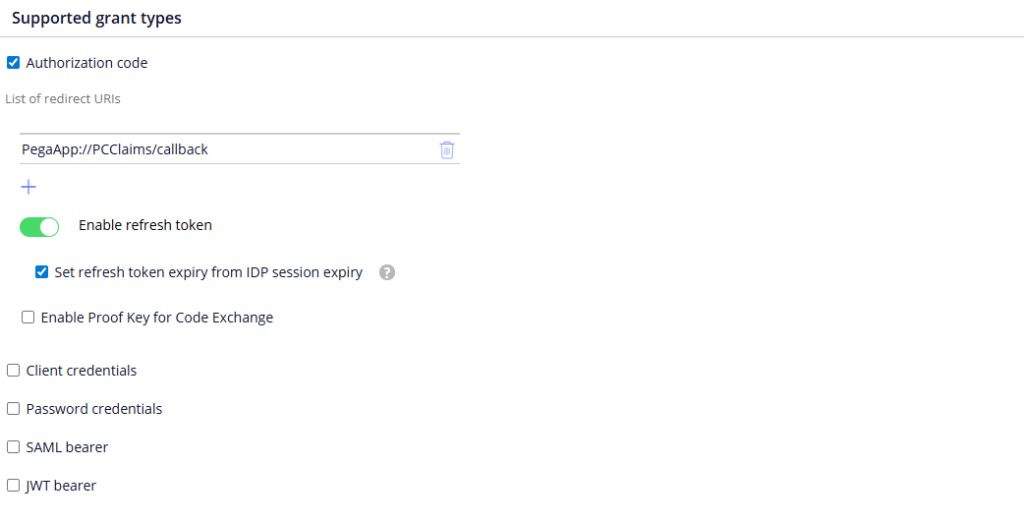
Authorization code is used when a user is involved. The user grants access, an authorization code is issued, that code is exchanged for an access token, and the application uses the token to access the resource. This is the flow behind “Log in with Facebook” style integrations.
Disclaimer – The supported grant types can definitely change in the Pega higher versions! Please verify from the official documentation on the same
Client credentials is used when two backend applications need to communicate with each other – no user involved. The client application sends its client ID and client secret directly to the authorization server, receives an access token, and uses it to access the resource. This is the grant type used in most Pega integration scenarios.
Resource owner password credentials involves sharing the actual user password with the client application. Only use this when there is extremely high trust between the systems – it carries significant security risk otherwise.
JWT Bearer uses a signed JWT token in place of client credentials to get an access token. Useful when you already have a JWT from an OpenID Connect flow.
Implicit grant type is mainly for JavaScript applications. Pega does not support it.
How Pega Handles OAuth 2.0
In Pega, you configure an authentication profile of type OAuth 2.0. This is where you store the client ID, client secret, scopes and endpoint configuration. Pega also ships with pre-built OAuth 2.0 provider instances for common providers like Facebook – so many of the endpoint details get pre-filled automatically.
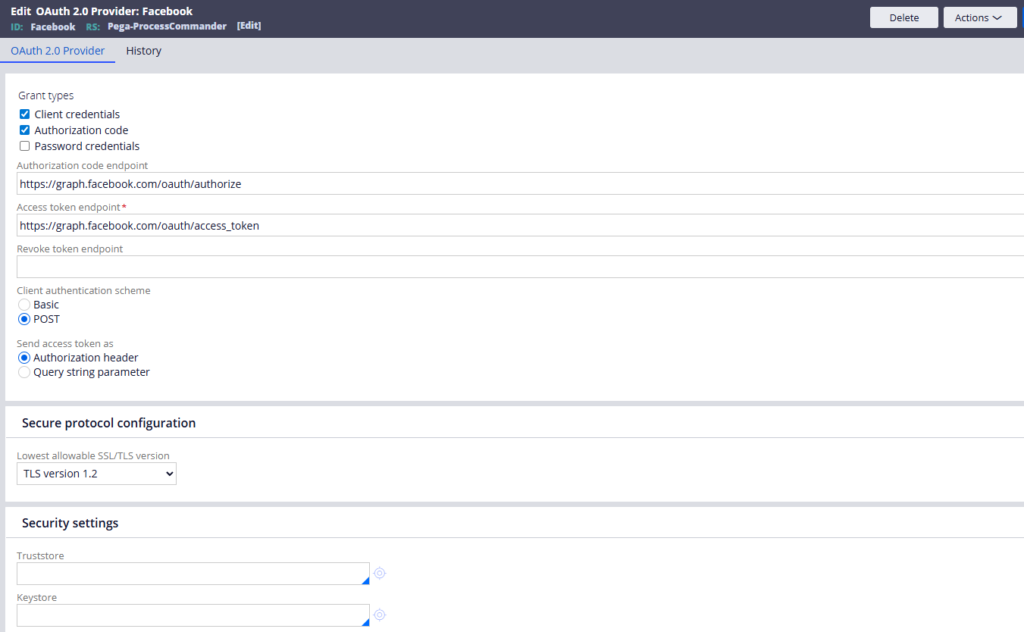
When you attach this authentication profile to a Connect REST rule, Pega handles the two-legged flow for you automatically. On the first leg it gets the access token using the client credentials. On the second leg it passes that token as a bearer token in the authentication header when making the API call.
You do not need to manually manage the token exchange. Do not try to pass the bearer token yourself – just configure the authentication profile and let Pega’s engine handle it.
Pega also stores access tokens in the database. Before making an API call, it checks whether a valid unexpired token already exists and reuses it if so. Clean and efficient.
Testing Before Building
Before building anything in Pega, it is always worth testing your OAuth flow in Postman first. Confirm you can get an access token with your client credentials, then confirm you can use that token to call the API and get the expected response. Once you know the flow works, replicating it in Pega becomes straightforward.
Watch the Full Walkthrough
In the video below I walk through the full implementation – setting up a Facebook app integration, testing the two-legged OAuth flow in Postman, creating the authentication profile in Pega, building a Connect REST connector and running a live test to retrieve Facebook profile data.
OAuth 2.0 is one of those topics that sounds complex until you see the token exchange in action. After that it clicks very quickly.

