


Pega supports encrypting sensitive data stored in your database. Whether it is personal information, financial data or any other regulated content, you can encrypt at the class level or the property level using a key management system like HashiCorp Vault.
Here is how the full setup works.
How Encryption Works in Pega
At a high level, you store encryption keys in an external key management system. When data needs to be saved, Pega uses the key to encrypt it before writing to the database. When data needs to be read, Pega decrypts it using the same key. The data stored in the database is unreadable without the key.
Pega supports two cipher options – platform cipher (built in, recommended for most cases) and custom cipher (requires importing custom JARs, not supported on Pega Cloud).
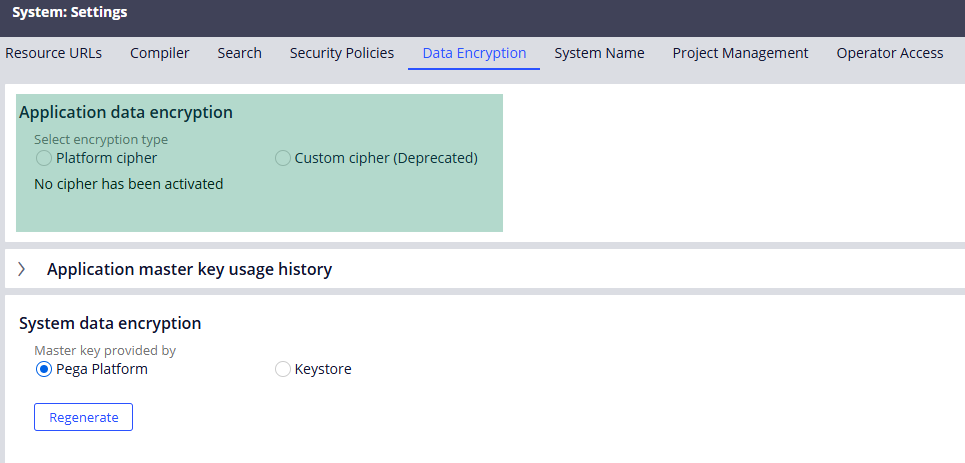
Update – Custom cipher has been deprecated in the Pega higher versions!
Setting Up HashiCorp Vault
Download the HashiCorp Vault binary from the official website. No installer needed – extract and run. Start it in dev mode for local testing using the vault server -dev command. This gives you an HTTP interface on localhost:8200 and a root token for initial login.
Once running, three things need to be configured in the Vault UI.
First, enable the Transit Secret Engine. This is the engine that provides cryptographic functions – encryption, decryption, signing. Create a key inside it – name it meaningfully, choose your algorithm (RSA-2048 is a solid choice).
Second, create a policy that grants access to the transit engine. Give it create, read, update and delete capabilities against the transit path.
Third, enable the AppRole authentication method. Create a role with your policy attached. From there, retrieve the role ID and secret ID – you will need both to configure the Pega key store connection.
Configuring the Key Store in Pega
Create a key store instance in Pega under the Key Management System for Application Data Encryption section. Select HashiCorp Vault as the type. Enter the role ID, secret ID and the service endpoints for login, encryption and decryption.
The encryption and decryption endpoints follow the format: your vault host, then /v1/transit/encrypt/ or /v1/transit/decrypt/, followed by your key name.
Do a test connectivity to confirm Pega can reach HashiCorp and read the keys. Once that passes, go to Configure – System – Settings – Data Encryption, select Platform Cipher, choose your key store and activate it.
Class Level vs Property Level Encryption
These two options serve different needs.
Class level encryption encrypts the entire blob column for a class instance. It is simpler – one encryption operation covers all the data in the class. But it only works on the blob. If you expose individual properties as dedicated database columns, those columns are not encrypted by the class-level setting. Also important – you cannot enable class level encryption after instances already exist in that class. This decision must be made before going live.
Property level encryption encrypts specific properties – including exposed columns. This is more granular and works even after instances exist. The trade-off is performance – every case open or save triggers individual encrypt and decrypt operations for each protected property. For a few properties this is fine. For many sensitive properties, it adds up.
To implement property level encryption, create an access control policy with the property encrypt option, select your class and add the properties you want to encrypt. Once saved, those properties are encrypted in the database while remaining visible in the UI after decryption.
Watch the Full Walkthrough
In the video below I walk through the complete setup – configuring HashiCorp Vault from scratch, creating the key store in Pega, activating platform cipher and testing property level encryption with a live database verification showing the encrypted values.
Data encryption is one of those capabilities that becomes mandatory on regulated enterprise projects. Getting familiar with the setup before you need it in a live project is time well spent.

