

In this blog article, we will see how Pega uses the Apache Log4j2 library logging features, and also we will create our own custom appender or a custom log file.
This tutorial is demonstrated using Pega 8.5.1 personal edition.
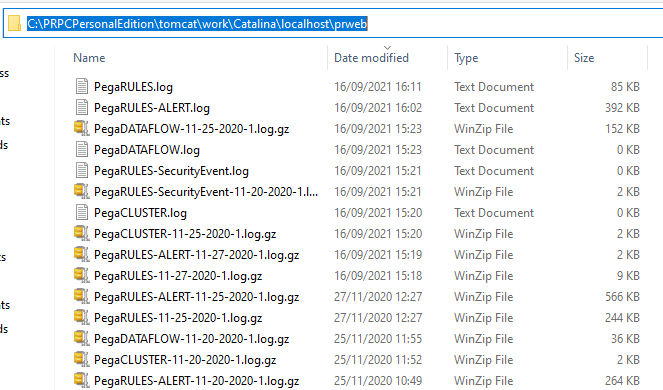
As a Pega developer / Architect, we always tend to look into the log files for debugging any type of issue. The log files (including the archived old log files) are stored in a specified log location in the server.
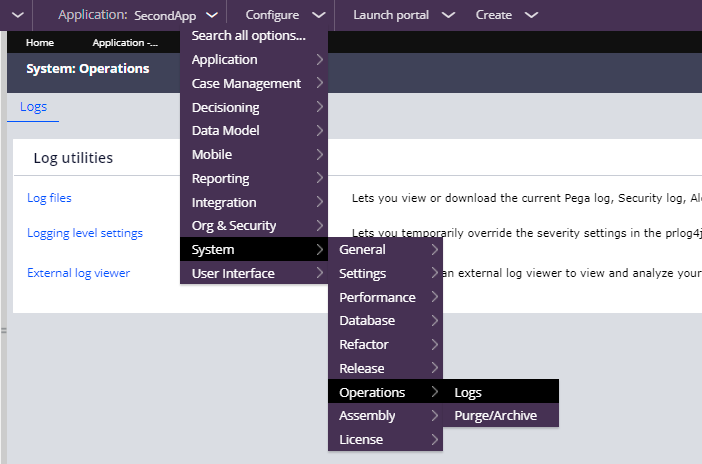
We can also access the log files from the designer studio navigation path
Configure -> System -> Operations -> Logs
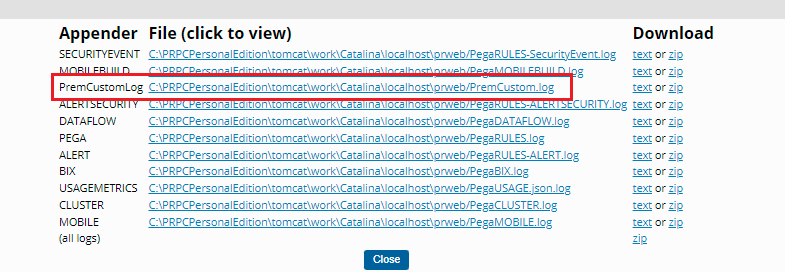
Click on the Log files link – you will get a pop-up window where you can find the list of log files persisted for the server.
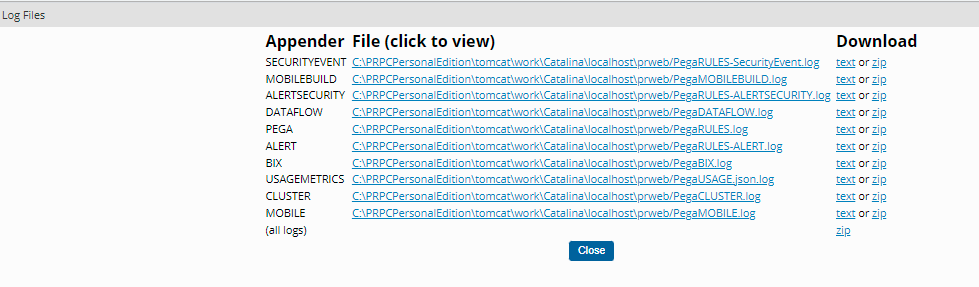
You see the log files are categorized on different usage/levels like – Pega, Alerts (into a separate file), security alerts ( into a separate file), bix, and other usages.
How do we write log messages from Pega?
There are two main ways
1. From an activity method – Log-Message
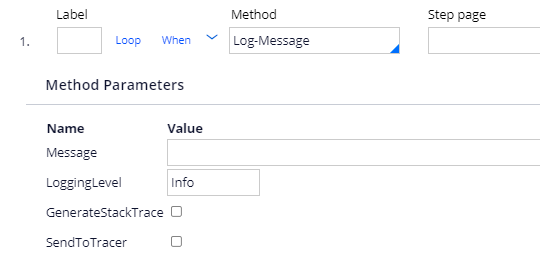
Here you can enter the message and the logging level for the message.
2. From a function rule – pxLogMessage.
You can use this function if you want to log from data transform.
Note: You can also log from any java step using oLog.<level>, but we know using java step is against the guardrail in Pega application 😉
What is the Logging level?
Log level is used to identify how important the log message is. The log message can be either an informational message or it can also be a critical error message. Log level will help in identifying it. I am not going to explain the different logging levels in-depth, I would suggest you go through the below article or you can browse on your own about log levels
https://www.section.io/engineering-education/how-to-choose-levels-of-logging/
Okay, now let’s just add a log entry from the activity rule.
Step 1: In the demo activity, add the log message step and enter a test message with level Info.
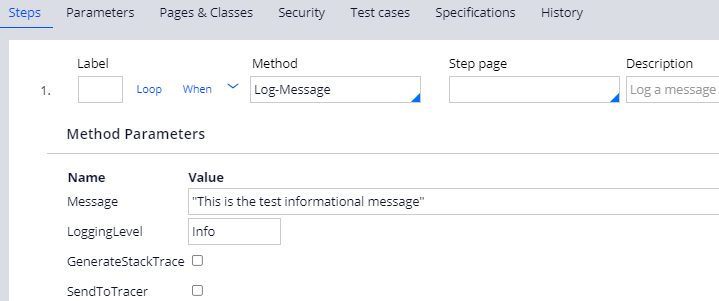
Run the activity.
Step 2: Check the pega logs from the designer studio
You won’t find the log message in the log files ?!!!!
Step 3: Update the LoggingLevel to InfoForced and run the activity.
Step 4: Check the pega logs again.
You will see the message is printed in some special format like
Data time – application – Logger – Level – Message

What you saw till now is
- Messages are getting inserted into more than one categorized log file.
- Messages can get filtered out.
- Messages are logged in special format.
- Older log files are archived in the log location.
Where do we specify all these configurations?
The answer is in Log4j2 file 🙂
In the personal edition, you can find the prlog4j2.xml under the prweb folder
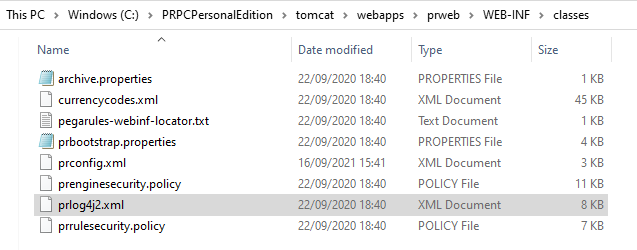
Open the file.
Tip: You can read on apache log4j2 in the following link – https://logging.apache.org/log4j/2.x/
The XML file contains two main blocks
- Appenders
- Loggers
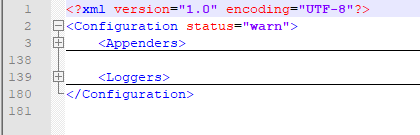
Appenders
Appenders are used to print the log messages into respective locations/files.
There are different types of appenders available – https://logging.apache.org/log4j/2.x/manual/appenders.html
In the file, expand the appenders block and you will find the list of appenders that matches the different types of log files generated.
You will see Pega, alert, alertsecurity, bix.. etc
Let’s focus on the Appender name – Pega
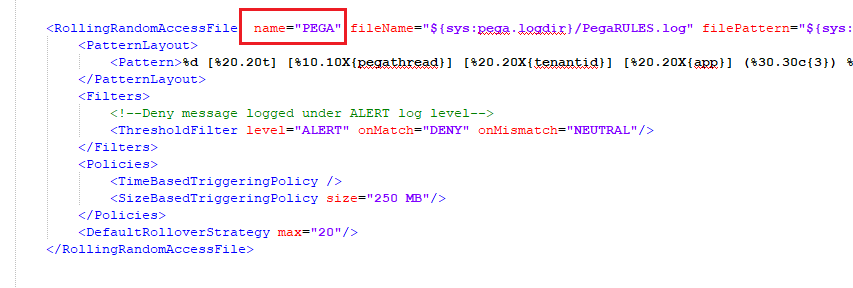
For all the different log files, pega uses the appender type – RollingRandomAccessFile.
Each appender type has different parameters that need to be specified.
Name – unique name of the appender
filename – name of the file to write to. Include the directory location as well. You see this appender writes into the PegaRULES.log.
filePattern – naming pattern for the archived file. filePattern=”${sys:pega.logdir}/PegaRULES-%d{MM-dd-yyyy}-%i.log.gz”
It is specified on mm-dd-yyyy format.
( we already saw the old log files in the server log directory ;))
Pattern layout – this formats the log event.
Pega rules log event is on a format like – timestamp – thread name – app name – logger – log level – message.
Note: If you leave it empty, then only message will be printed.
Under the following link, you will find the different conversions for the pattern layout
https://logging.apache.org/log4j/2.x/manual/layouts.html
Filters –
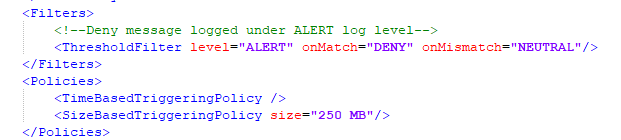
We use the Threshold filter and specify the log level as ALERT. On Match we deny the entry of log messages into the file.
So it means, log message with log level under ALERT i.e ALERT, Info will not be entering the PegaRULES.log.
Now you will understand why the Info message is not logged initially. We need to use InfoForced, which will take priority on the filters specified in the prLog4j file. For alerts, we know we already have two types of files – Alert & AlertSecurity. So it is obvious that we don’t need the same messages in multiple files and so rightly we filtered out.
Policies – The policy determines when a rollover should occur.
You can have two different rollover strategy
- Time-based – like per day you can create a log file
- Size-based – when it reaches a particular size, then you can roll over and archive the file.
Tip: Always try to include the size based rollover strategy, so that you will not have a heavy log file to debug 😉
These are simple appender configurations for the PegaRules.log file. You can also take a look at the Alert log file configuration.
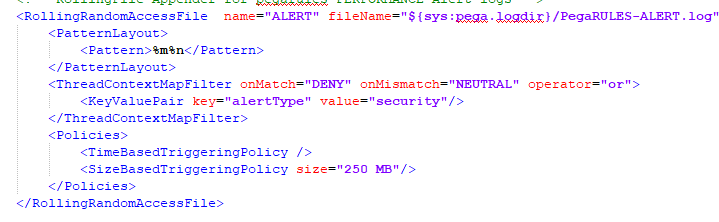
You will see, that the log file just saves the message alone without a special format and also it filters out the security alerts. You know why ????
Let’s look at the next block – Loggers
Loggers
Loggers are a little similar to filter, to specify what type of log message goes into what type of Log files or the appender refs.
We know that logs are usually generated from the loggers object in any Java application. Loggers block contains the asyncRoot node followed by some loggers specifications.
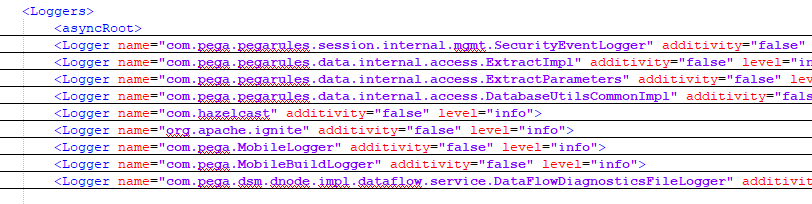
Expand the security event logger
If a log message is generated from the logger – com.pega.pegarules.session.internal.mgmt.SecurityEventLogger and at level equal to or under Info, then it always goes into the securityevent appender which logs into the alertsecuirty log file.

In this way, you can separate your custom logs to make an entry into custom log files.
I will show you how to add a custom appender shortly.
What happens to the log messages that are generated from the loggers that are not mentioned as a separate node in this configuration file?
Look at the root node.
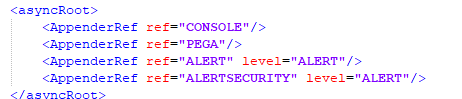
But don’t assume that everything goes into PegaRULES log file.
We already saw a filter applied to the PEGA appender which filters out levels under ALERT.
Do the logs generated from loggers (specified in the prlog4j2 file) also get inserted into root appenders? how to filter out those logs generated from the loggers– Definitely we don’t need the log entries to be there in multiple places right?
That is where the additivity configuration comes in.
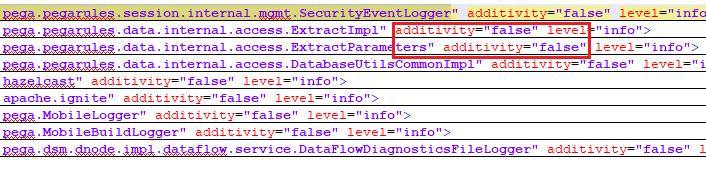
You need to specify it as false so that it never gets added to any root appenders.
Now we have enough knowledge of the prlog4j.xml, we will start implementing custom log files.
How to add a custom appender in prlog4j2.xml file?
Tip: before updating the prlog4j2 file, take a backup copy so in case some issue, we can revert easily.
Step 1: Add a new appender for the custom log file
I am copy-pasting the RollingRandomAccessFile XML tags from the out-of-the-box pega appender.
Update the specification to new names
Appender name – PremCustomLog
File name and pattern – PremCustom.log
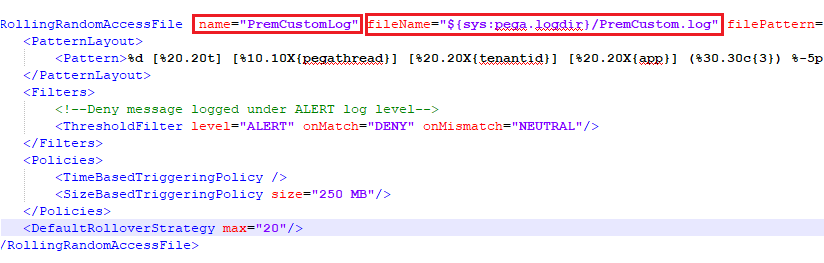
Filters and policies I kept as such.
Step 2: Add a new logger entry
First, you need to know the logger name that generates the log message.
Go to the designer studio and open the activity that has log message step.
In the Actions button, click View Java which opens a pop-up window.
There you will find the logger name in the java code – Rule_Obj_Activity.InsertLogs._baseclass.Action
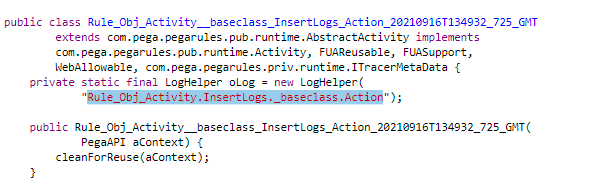
Tip: You can think about making a reusable activity whose sole job is to make entries for different types of logs for functionality. In this way, you can have a single logger which can be easily specified in the prlog4j2 file.
Enter the logger name in the file and specify the new appender we entered in step 1 Additivity = false

Also please update the activity logging level to Warn or Error for testing.
Step 3: Save the file and restart the server.
Step 4: Navigate to the Log file location designer studio/server, you should see the new file created at the server restart.
Step 5: Now run the activity to insert a log message.
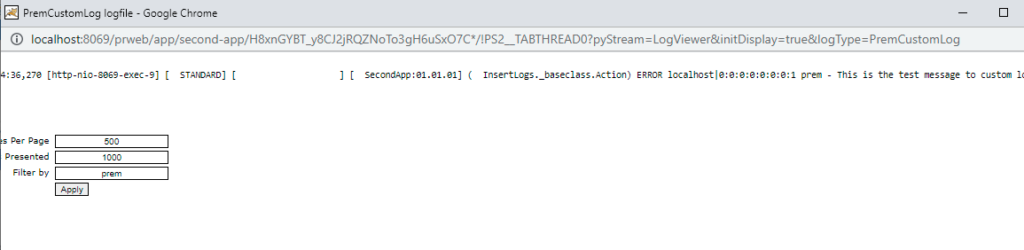
Step 6: Open the custom log file, you should see the log entry.
So, when to create a custom log file?
– When you want to group the log entries per-application basis
– When you want to group the log entries per functionality basis
– When a specific functionality needs a lot of information messages for debugging and you don’t want to flood the main PegaRULES log file, in such a case, you can create a custom log file.
Important tip: Always keep in mind, log the messages effectively. Frequent logging can have an impact on performance and also eats up system resources.
Hope a few learned something new today on adding a new appender/log file.

