


Declare trigger is the third in the declare rules series, alongside declare expressions and declare onchange. The key distinction from declare onchange is what it watches.
Declare onchange uses forward chaining to watch property values. Declare trigger watches transactions – specifically, what happens when a case instance is saved, deleted or committed.
The Five Trigger Conditions
A declare trigger fires based on one of five transaction events.
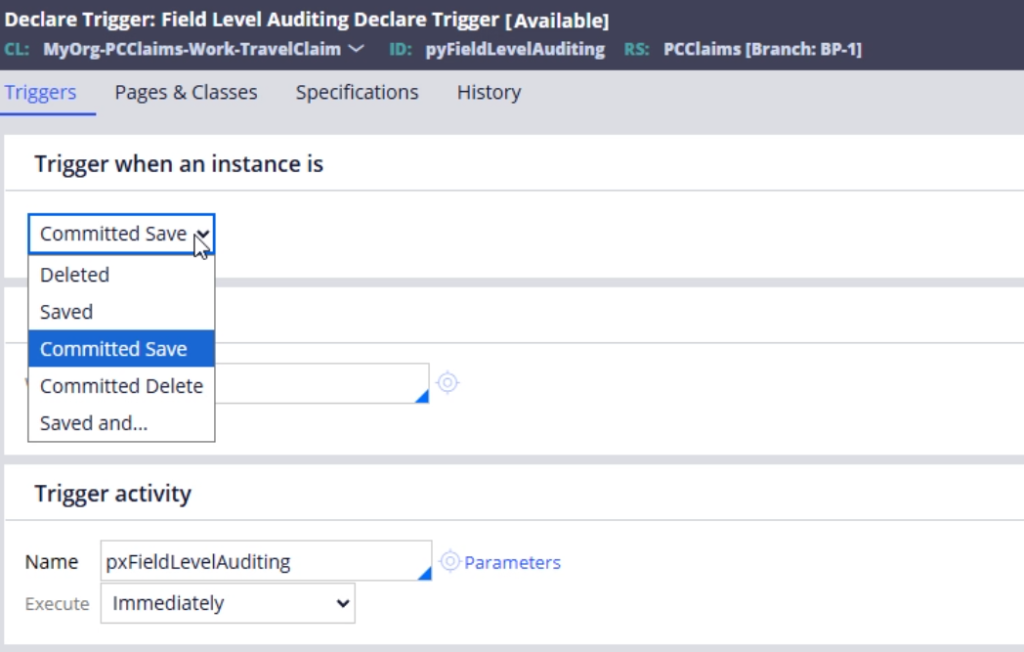
Saved – when an instance is saved using a deferred OBJ save (without write now). The change is in memory but not yet committed to the database.
Deleted – when an instance is deleted using a deferred OBJ delete.
Committed Saved – when a save has been committed to the database. This fires after the actual database write.
Committed Deleted – when a deletion has been committed.
Saved and One of the Properties Were Modified – this is where declare trigger overlaps with declare onchange. You specify which properties to watch, and the trigger only fires when one of those properties changes and the instance is saved.
For most use cases, committed save is the right choice – you want to react after the data is actually persisted, not before.
Watching Properties
When you use the fifth option, you specify the properties to monitor. If the customer type property changes and the instance is saved, the declare trigger fires. You can also copy the old property value to another property before the update overwrites it – useful when you want to compare old and new values in your trigger activity.
You can also add a when condition to control whether the activity executes. Not every property change needs to trigger the same action. The when condition lets you be specific.
The Trigger Activity
The activity you configure must be of type declare trigger. You can execute it immediately in the current request or run it in the background as a child request. Background execution is the right choice for anything that might take time or involve external calls.
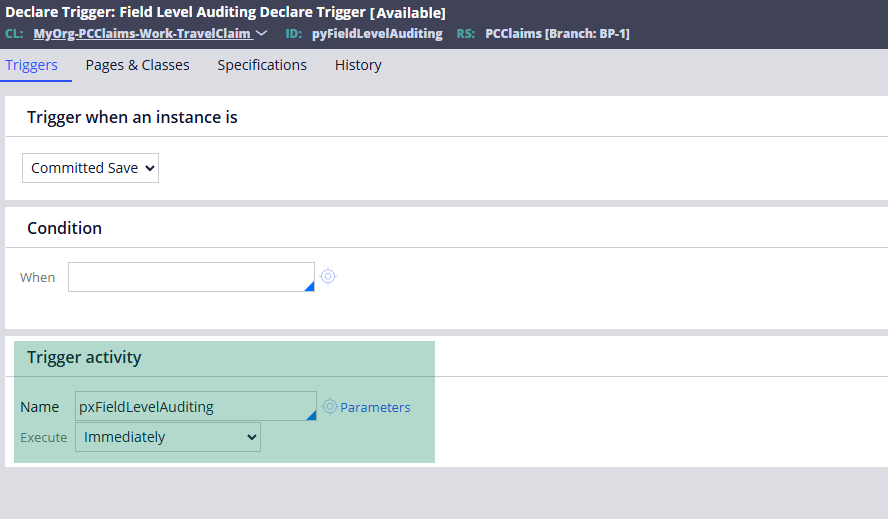
Field Level Auditing
The most common out-of-the-box use of declare triggers is field level auditing. You enable it from the case designer under Settings – Auditing – Field Level Auditing. Select the properties you want to track and save.
Pega automatically creates a declare trigger for you, wired to an out-of-the-box activity that captures property changes and writes them as history entries on the case. It also creates a data transform that lists all the watched properties – you will see it update automatically as you add more properties to track.
When users change a tracked property, the audit trail is visible in the Field Histories tab on the case. Each entry shows the old value, the new value and when the change happened.
Real Project Uses
Case dependency is a well-known use of declare triggers. When a child case reaches a certain status, a declare trigger fires an activity that checks whether the parent case can resume – this is what drives Pega’s wait shape resolution under the hood.
Field level auditing, case dependency management and any scenario where you need to react to committed database changes are all natural fits for declare trigger.
Watch the Full Walkthrough
In the video below I walk through the declare trigger configurations, enable field level auditing on a claims request case, track two properties, create a test case and verify the audit history shows the correct old and new values.
Declare trigger is one of those rules you will encounter on most enterprise Pega projects. Field level auditing alone is a common requirement. Understanding how the trigger conditions work means you can use it confidently beyond the out-of-the-box scenarios.

