


If you have a Pega cluster running multiple servers, node classification is how you make sure the right work runs on the right server.
The Problem It Solves
Imagine four servers in a cluster sharing the same database. A heavy background job starts running on server one. At the same time, the load balancer routes a new end user login to the same server. Both compete for the same CPU and memory. The user experience suffers.
Node classification solves this by separating servers by purpose. You label each server with one or more node types, and then configure your background jobs, file listeners, queue processors and data flows to run only on servers with the matching label. End users go to web nodes. Background jobs go to background processing nodes. Kafka processing goes to stream nodes.
Out-of-the-Box Node Types
The most commonly used node types are web user, background processing, stream and search. Beyond those, Pega provides CDH-specific types like ADM, DDS and real-time processing for decisioning projects, as well as custom node types (Custom 1 through Custom 5) that you can use without any additional configuration.
For Pega Cloud, Pega provisions the right node types based on your contract and the frameworks you use. For on-premise or client-managed deployments, you configure them yourself.
How Developers Use Node Types
As a developer, you encounter node types when configuring rules that run in the background. Job schedulers, queue processors, file listeners and data flows all have an associated node type field. Whatever you specify there determines which servers that job will run on.
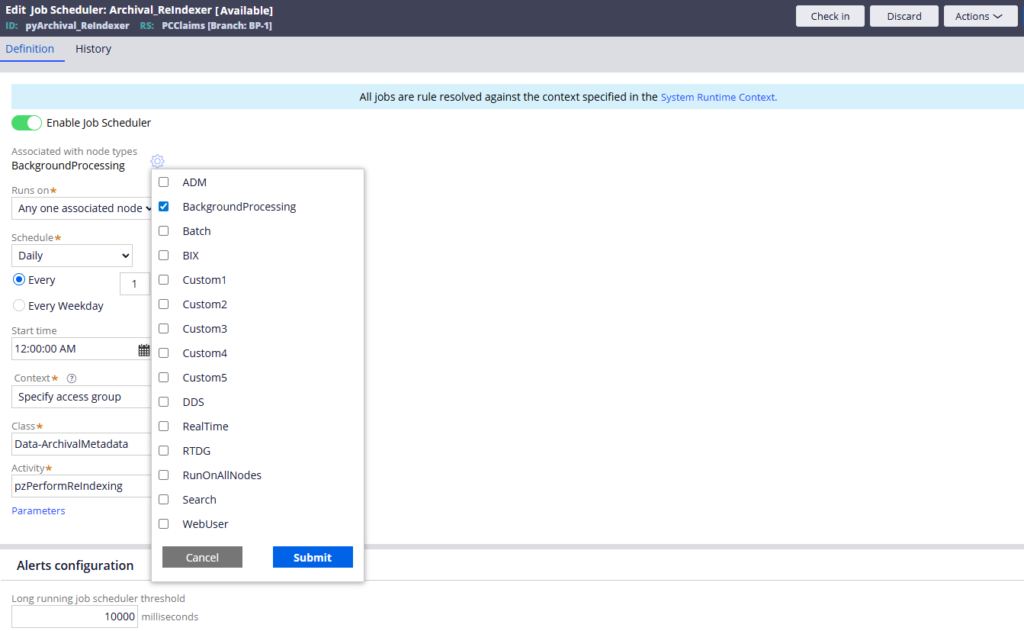
If you configure a job to run on Custom 1 but no server in your cluster has been labelled Custom 1, the job will never run. Make sure your node type configuration in the rules matches what is actually provisioned on your servers.
Configuring Node Types in setenv
Node types are set as JVM arguments in the setenv.bat file (Windows) or the equivalent shell script (Linux), found in your Tomcat bin directory.
More details in the below video!
Watch the Full Walkthrough
In the video below I walk through updating the setenv file to add Custom 1 as a node type, verifying it appears in Admin Studio after restart, creating a fully custom node type and seeing how the applicable node types list changes in the job scheduler dropdown.
Node classification is the kind of infrastructure knowledge that most Pega developers never engage with – but if you are an LSA or system administrator on a multi-server deployment, it is essential. Getting it right at the start of a project makes scaling and maintenance significantly simpler.

