


Of all the SSO authentication options available in Pega, OpenID Connect is the easiest to implement.
No XML handling. No metadata files to import manually. Standard endpoints that work the same way across different identity providers. If you have already worked through the SAML implementation, this will feel noticeably simpler.
OpenID Connect vs SAML – The Key Differences
Both are identity protocols that support single sign-on. Both are secure and follow similar authentication patterns. But there are a few important differences worth understanding before you start.
OpenID Connect uses JSON tokens rather than XML assertions. Instead of a SAML response with assertion tags, you get an ID token – a JWT token containing user claims encoded in Base64. Much cleaner to work with.
OpenID Connect is built on top of the OAuth 2.0 authorization framework and adds its own authentication layer on top. Standard scopes – profile, email, address, phone – and standard endpoints like /userinfo work the same way regardless of which identity provider you are using. That consistency is one of its main advantages.
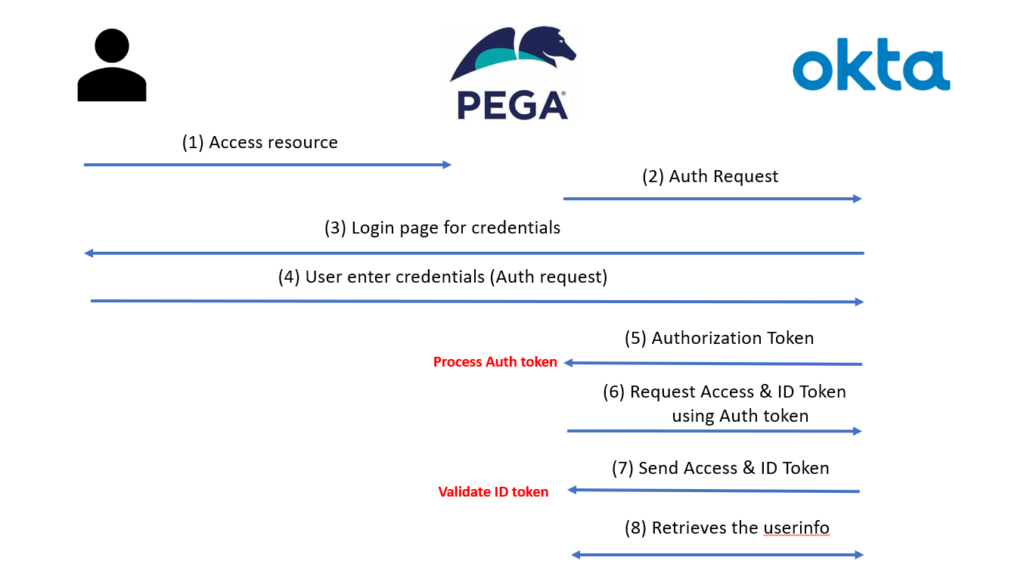
Okta Administrator Setup
In Okta, create a new app integration of type OpenID Connect with Web Application as the application type. Select the authorization code grant type and provide the redirect URI from the Pega authentication service. You can allow all users in the organisation to access the application, or restrict it to specific groups.
Once the application is created, Okta generates a client ID and client secret. You will need both for the Pega authentication service configuration.
Pega Authentication Service Setup
Create a new authentication service of type OpenID Connect.
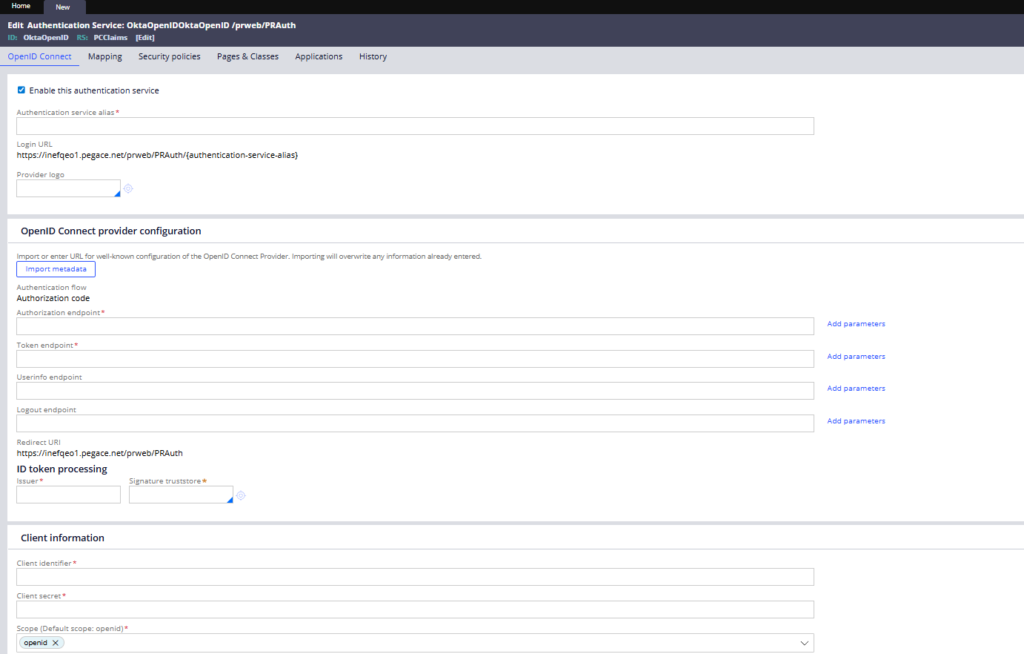
For the provider metadata, OpenID Connect makes this straightforward. Every provider exposes their configuration at a standard URL – the provider domain followed by /.well-known/openid-configuration. Paste that URL into Pega and import the metadata. The authorization endpoint, token endpoint, user info endpoint and key store URL all get populated automatically.
Then add the client ID and client secret from Okta. Update the redirect URI in Okta to match the PR Auth URL from the authentication service. Set the operator identification to use the email claim, enable operator provisioning with a model operator, and configure any attribute mapping you need – for example mapping given_name to the operator’s username or full name.
That is essentially it. Significantly less configuration than SAML.
Debugging OpenID Connect
When something does not work, two approaches help.
The first is creating a custom log category in Admin Studio. Search for OIDC in the logger list and add the oidcClientHandler logger. Set the log level to debug. The next SSO login will generate detailed log entries showing every step – authorization URL, auth code exchange, access token fetch, ID token validation and user info retrieval.
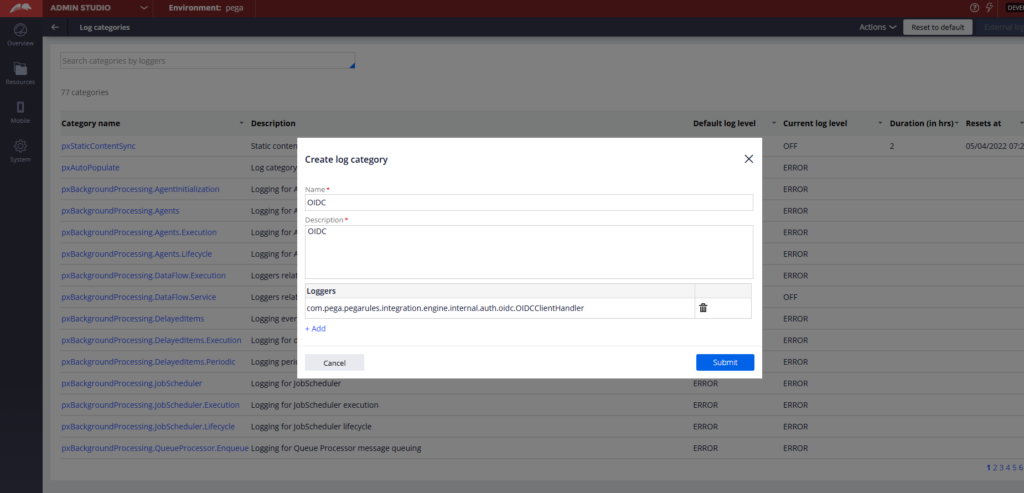
The second is decoding the JWT ID token. Copy the token from the logs – it starts with EY – and decode it at jwt.io. The payload will show you all the claims – name, email, subject, issuer – so you can confirm exactly what data is coming through. One note – avoid pasting production tokens into public websites. Use an internal tool if your organisation has one.
Watch the Full Walkthrough
In the video below I walk through the full OpenID Connect setup – Okta app integration, authentication service configuration, live SSO login, operator provisioning and debugging using log categories and JWT decoding.
OpenID Connect is genuinely the easiest SSO implementation in Pega. If you want extra practice, try implementing the same setup using Google as the identity provider. I have the steps in a separate blog article linked below.

