Report Scheduling in Pega

In this blog article, we will see how to schedule and subscribe any reports from Pega.
Business scenario: Say Amazon is using pega application for the sales department. The sales department has different line managers for different sales category. For example, Sales manager for electronics department, sales manager for household department etc. As a Sales manager, daily they need to generate a report on the total sales. The report should list all the sales cases that contain the sales details like product name, amount etc.
Let’s assume, that sales manager uses the Pega manager portal.
Solution 1: The Sales manager is provided with a sales report in the default Report tab. So, with this report, Sales manager can view the sales case any point of time in the day. He/she can also alter the filter criteria to look at the report for any data range. This is the power of pega in reporting. The reports in the report browser are provided with an interactive UI that can be easily handled by the business users for custom reports.
Automation is everywhere now. The above solution is a manual process, in which Sales manager has to perform the report generation daily for the daily report. Why can’t we automate the report and send the result to the sales manager?!
Here comes the solution 2.
Solution 2: Any report in Pega can be scheduled to any users. So, the above the sales report, created in the reports tab can be scheduled to run daily by 11.59 AM and the report PDF can be send to the sales manager.
Pega can do this very easily with little configurations 😊
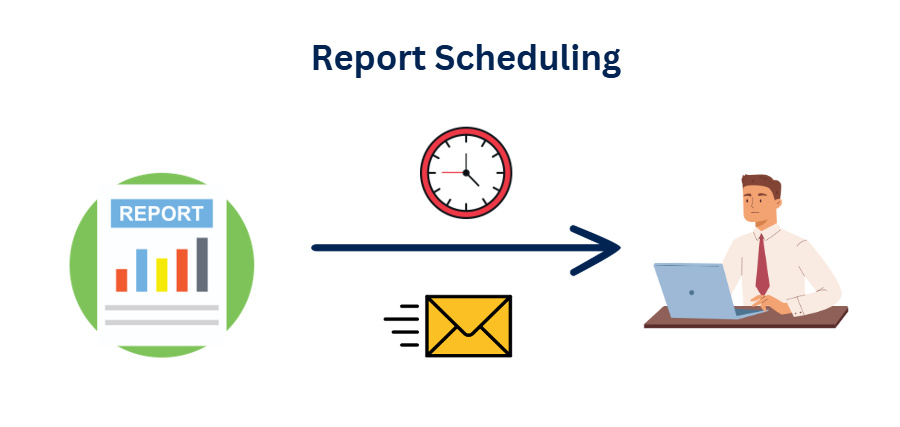
Let’s start with scheduling the reports 😊
What are the pre-requisites for report scheduling?
1. A working email account
Make sure you have a working email account.
I have already configured an email account by following one another blog article 😛 You can also do the same.
Just updated the default email account with a valid email address.

Make sure the email account works by clicking test connectivity.

2. Agent ScheduledTaskProcessor is enabled
Make sure the agent that comes under Pega-RulesEngine is enabled and running.
Always check the agent schedule instance, since it is a data instance and can be different (updated manually) from the agent rule instance.

Note: If node classification is enabled, then check the agent schedule created for backgroundProcessing node.
These are the two main pre-requisites for scheduling reports.
Let’s see the other steps one by one.
How to enable scheduling in a report?
1. Create a new Sales report
As we saw before, reports can be easily created by the business people. Now we will see how to create report from manager portal.
Again, there is a dedicated blog article on report creation from manager portal. You can go through it.
Step 1: Launch the case manager portal
Step 2: Move to the reports tab on the left navigation panel.

Note: Look and feel of the reports may vary based on your UI Kit version.
Step 3: Click on New report and select the right case type in the pop-up.

Remembering the requirement, I need to list all the sales that happened in one day.
The solution is to run the report at 11.59 to list all the cases that were created today.
Step 4: Include the filter criteria – Create date/time is equal to today.
Drag and drop the create date time field.

After that, click done editing.
Step 5: Enter a meaningful report name and for now place it under your private category.

Step 6: Finally, you see your report under reports tab.

2. Enable scheduling on the sales report
Step 1: Click on the configure icon and and select schedule.

Step 2: Click on the schedule option, it pops up a window.
Make a note on the header – it opens the perform harness of an instance.

There are three main blocks
a) Task definition
b) Task scheduling
c) Task output processing
Task definition
Task name & Task description – Both are prefilled by default. If you need you can always change the values.
Task scheduling

You can specify the Time at which the report to be scheduled. We have a limitation here that it runs at round-off hours like 1 AM, 2 AM etc.
In our requirement, we planned to schedule by 11.59 PM, but now with this limitation we need to run it on 12 AM and update the create date filter to yesterday. So that at 12 AM, the start of the new day, it generates the report for the previous day.
Task can be scheduled in two ways.
- One-Time only. Here you can specify the exact date on which it should run.
- Recurring task. For this you get some additional fields to fill in.

Frequency
Specify whether it is for daily, weekly, monthly or yearly.

So, for every frequency, you get different options to choose.
For example – for daily, you can specify either to run on weekdays or on all days; Please switch and check the possible options.
Start date – you can specify a date from which the scheduling should occur
For End date – you can 3 options
1. No end date – keeps on scheduling without an end
2. End after (1 or more ) occurrences
3. End after a specified date.
In our scenario – I am going to run it by 12 Am, recurring and no end date.

Note: for testing, please update to the next hour to see the email, which we will obviously do at the end.😉
One error, retry – On selecting this option, you can do some error handling if the report fails.

Task output processing
There you have 5 main fields to configure
Output file format – You can specify either PDF or Excel report.

Enable authorized users to subscribe to task notifications – Primarily the operator, who created the scheduling who be default selected to be notified. You see this in the next field. If other users should also need to subscribe the report, then you can enable this option
Send notification to the following users – As I mentioned before, you can see my name is auto subscribed. You can also add other users for subscription. They will be auto subscribed.
The email ID configured in the operator rule form will used as the To address for report. So make sure the email address is properly updated in the operator ID.

Attachment – We can either attach the report file with the email or send a link for them to download.
Configure notification message – Click on the button and you can configure the email message.

Click on submit.
You have successfully scheduled the report.
Step 3: verifies that you are auto subscribed.

Now the real fun part 😊
Let’s see the Pega architecture for the report scheduling.
First thing that comes to your mind is – scheduling part should be handled by agents in Pega, right?! We will see it.
1. Pega creates a new case instance of class Pega-ScheduledTask-Reporting
Step 1: Go to app explorer and search for the class – Pega-ScheduledTask.
Step 2: You will see there are three child classes for the scheduled task.
Click on the reporting class to see its instances.

Step 3: You see the instance we created just now! Click and open the instance to verify the details.

You can click update button to update the scheduling details.
We will see the update part while testing.
Step 4: If you are interested more, then you can look at the flow and case type corresponding to the scheduledtask case.

Note: most of the rules are in available mode and hence can be customized. But make sure you customize only the extension points so that you don’t make the new features in the later releases 😊.
If you delete the report, then corresponding scheduled task instance will be cleared. Please test this on your own.
2. Pega creates a new queue instance for the agent
ScheduledTaskProcessor
Go to App explorer and check the class System-Queue-ScheduledTask. You will see a new instance created for our scheduled job.

You can also, click and open the instance to check the minimumdatetimeforprocessing value.
You will see it is 11 PM GMT which is 12 AM my time.

3. You can see the agent rule under Pega-RulesEngine
This comes out of the box.

Note: As a pre-requisite we already verified that the agent is enabled in the agent schedule instance as well.
It’s time to test the report scheduling.
How to test report scheduling?
Step 1: Update the scheduled task instance to the next one hour.

As soon as you update the time, the scheduled queue instance gets updated with the right process time.
Tip: The OOTB activity pzPostProcess in Pega-ScheduledTask class is responsible to delete the old queue instance and recreate a new queue instance.

Step 2: You can click and open the instances of System-Queue-ScheduledTask instances.
You will see the process on date to be Dec11 9 PM.

Step 3: Let the agent pick and process the queue item. You will see once the agent picks up and process it successfully, attempts made will be 1 and the process on data will be the next day 9 PM.

Step 4: Check on the Inbox.

Now this report scheduling is successfully tested. Now the next step,
how to promote the report scheduling to higher environments?
Usually the reports will be created in the lower environment and promoted to the higher environments. Simlarly two more instances has to be manually promoted to the higher environment for supporting report schedule
a) The Scheduled task case instance – PX-ST-3
Note: To promote any instance manually, you need to include the pzInsKey in the product rule.
Now you may get a question, if more than one people subscribed to this report, will it be same in all environments. The answer is yes. All those details stay within the case data.
Open the case PX-ST-3 and check the clipboard.
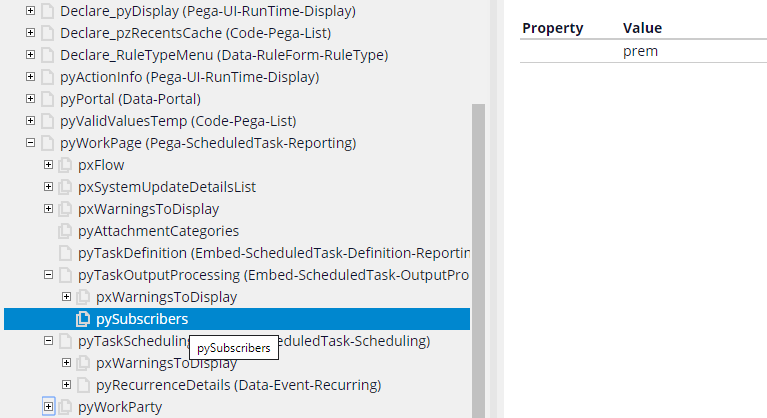
You will the pySubscribers list the operator ID.
Important note: Make sure before promoting the instance to higher environment the subscribers are properly determined.
b) Promote the scheduled task queue instance
You need to do this. Because you need a starting point to start the agent processing right. Once the agent picks up for the first time, then it will requeue based on condition and manage on its own.
We are at the end of this post. Let’s see a summary of report scheduling
– Any report in pega can be scheduled to any pega user.
– You need to enable the agent and have a working email account as a pre-requisite
– Pega creates a scheduled task case instance for every report scheduling.
– Pega maintains a standard queue scheduled queue instance that will be attended by a OOTB agent to process and send out the email.
– Email address configured in the operator form will be used as To address.
– You need to promote both the scheduled task case and queue instance to higher environments.
Hope you enjoyed this article on report scheduling. Look out for a business use case in your project and try to implement the same

