Single Sign On – Part 3 – Configure SP

This is the continuation of the previous blog article. In the last article, we saw how we can configure an IdP entity using OpenAM.
For better understanding, please go through the below articles, before proceeding further.
In this post we will see how we can configure a Service provider entity details in Pega authentication service as well in OpenAM application.
We know that Pega plays the role of service provider entity.

Let’s start with configuring the service provider in Pega
How to configure the service provider entity in Pega?
Step 1: Create a new authentication service for SSO
Configure-> Org&Security -> Authentication -> Create Authentication Service

Enjoying this content?
Access the author’s full video courses here at MyKnowAcademy.
Explore Courses →
On the create form, you can select SAML2.0 as the authentication type.
I gave the name as sso1.

Just to mention that pega already has few servlets name by default for SSO configured in the web.xml file (tomcat->webapps->prweb->WEB-INF). I am gonna use one of the servlet sso1

Provided the alias name as sso1. Hence my url will be
http://localhost:8080/prweb/PRAuth/sso1

Okay, next step.
Step 2: Import the IdP metadata
In the previous post at the end, we saved the IdP metadata in an XML file. Upload the same file for importing the data.

On submitting, you will see all the details are prefilled from the metadata.

Entity Identification – The IdP host name.
Login protocol binding – Determines the protocol/ method by which the response message is transmitted.
The most recommended binding method is HTTP POST, where the SAML message is a normal POST body
The other methods
HTTP Artifact – this is a secured way, where the SAML message will not be exposed and compressed in a single entity artifact
HTTP Redirect – Here the SAML message is enclosed in URL.
Login location – identifies where the logic service is located in IdP
The similar fields are applicable for Logout as well
Verification certificate –
Click on the edit icon, to view the available keystore instances.

You see already a keystore instance available for sso1 !! Don’t think it as the OOTB keystore 😊
When you imported the IdP metadata along with the signing certificate, pega created a new keystore instance and saved the .jks file
In the certificate alias, you will see the details we provided while creating a new certificate!

You can click and open the keystore instance – sso1IDPCertStore

Do not touch any of the IdP information, unless needed. Just accept the default 😊

Step 3: Update the operator identification details.

Map Operator Id from – we have two options
a) Name ID in the subject – We already specified uid in the NameID format. So I am going with this option selected.
b) Attribute – You can also map other attributes to identify the operator ID (eg.given name, email etc)
Enable operator provisioning using model operator –
We already seen this option in LDAP tutorial. Here you can create operators on the fly, if the operator record is not available in the pega database.
You can set the operator context in 3 ways
a) Model operator
b) By organization structure
c) Data transform.
I specify by using the option of Model operator – Prem

Important note: My another hurdle, put it inside double quotes.
Step 4: Verify and update the Service provider details.

Same like before, all are default updated.
One interesting thing to note is the ACS and logout URLs are Pega rest api under the service package WebSSO.
Certificates –
Here the service provider can sign the request with certificates.

So, we will create new certificates for SP, same as we did in previous post using keytool.
Switch to the bin folder of JDK using command line tool and execute the below command
keytool -genkeypair -alias pegaspkey -keyalg RSA -keysize 1024 -validity 730 -storetype JKS -keystore keystore.jks

After successful creation, you will see a new jks file.

Now create a new keystore instance in Pega and import the keystore.jks file
Records->Security -> Keystore

Provide the newly created keystore instance in both the Signing certificate and decryption certificate.
Make sure you provide the right password.

Advanced configuration settings

Use access group timeout – This is a security restriction where you can specify the allowed time a session can be in idle/inactive state. Use it only when needed.
Pre-authentication activity – Use the activity to excute the preactivity to be performed before the actual authentication kicks in.
For eg – You can restrict accessing your website from mobile using pre-authentication activity.
Check my previous post on LDAP, where I explained with a tutorial. Also note down an OOTB activity – pySSOPreAuthenticationActivity for reference.
Post-authentication activity – Use the post activity to perform some operations like conditional data mapping from the attributes and also you can restrict access to the operator even though after successful SSO authentication.
Note down the OOTB activity – pySSOPostAuthenticationActivity for reference.
Force authentication – If you need to reauthenticate the expired sessions, then use this checkbox.
For this tutorial, I am leaving all empty!
Mapping tab
You can map the SAML attributes or the properties used in the pre, post authentication activities can be mapped to the Operator rule form.
For mapping SAML attributes, specify the attribute name inside curly braces as shown below.

Save the rule form.
Step 5: Generate the Service provider metadata.
Move to SAML 2.0 tab and scroll to the service providers block.

Click on Download SP metadata.
You will see the Rest service response as XML output.

Save the XML into meaningful name.
We are done with configuring the service provider details in pega.
How to configure the service provider entity in OpenAM?
Step 1: Launch the OpenAM admin studio
Step 2: Click on the Realm (MyKnowPega) ->Create SAML2 Providers -> Register Remote Service Provider

Step 3: In the configuration page, upload the generated SP metadata XML.

Step 4: Update the CoT and Attributes as we did for IdP configurations.

Once done, click on the federation tab, to verify the IdP and SP details.

Configuring SP entity is pretty simple right 😊
Now, one last step here. Add the users to this realm.
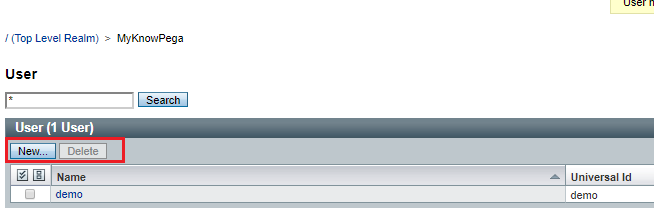
How to add users in OpenAM?
Step 1: Go to OpenAM homepage and click on Realm (myknowpega)
Step 2: On the left panel, click on the Subjects.

Step 3: Click ‘New’ to add a new user.
Step 4: Fill in the details of the new user.
ID=UID;
Note: This operator Loki is not available in my pega system and remember I configured user provisioning option! (creating pega operators on the fly)

Step 5: You can go back to the users overview, click and add more details to the operator.

Once done, save your changes!
Time to test! But before that do a restart to your OpenAM application.
Hint: Use tomcat manager page, to stop start the server.
How to test your SSO authentication?
Step 1: Hit the SSO authentication URL, you configured in the authentication service rule
http://localhost:8080/prweb/PRAuth/sso1
Step 2: Watch the URL header field.
It lands in the OpenAM landing page and prompting for credentials. Expected result because I haven’t logged in yet!

Step 3: Provide the credentials of the newly created user and watch the header!
First you will get Access right validated message.

Followed by your assertion URL.

Step 4: You should be successfully logged in to pega application.
Yes 😀

Step 5: Let’s verify the newly created operator record.

You see it is automatically created. Full name is Premkumar, because that is the model operator attributes
Step 6: And finally verify the telephone number attribute mapping.

Finally,Loki is back 😊. SSO is over.
Hope you liked these posts and learned something new about SSO.