Database Class Mapping Wizard

In the previous article, we saw how to use data type to create a data layer and map it to the local database table.
In this article, we will see how to make a connection to the external database table using the database class mapping wizard.
This article was created using Pega '24 version.
Note: With the database class mapping wizard, you can actually make a connection with also internal Pega database tables (in the data schema). It is not restricted to only external database. But most of the time, we will be using for the external tables.
In the previous article, we saw different rules that got auto-created when creating a data type.
a) A database table got created in the database
b) A concrete class got created.
c) Property names corresponding to the column name in the database table got created.
d) Database table instance that maps the concrete class with the database table.
The database class mapping wizard can also do the same like creating all the rules except that the database table (the real DB table) should be already available in the connecting Database server.
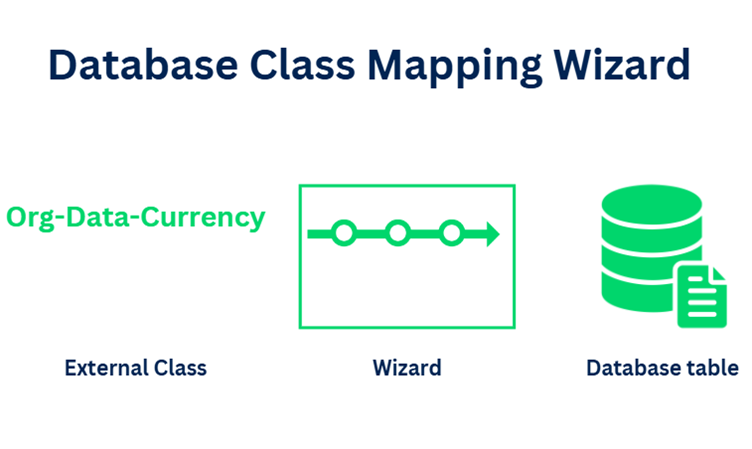
The main role of the database class mapping wizard is from the name itself you can say that the database class and the class will be mapped.
If you are a beginner, it is suggested to go through the below block to understand why do we need to map a class to the database table.
Why do we need to map the class to the database table?
We know Pega stores the user session data in memory using clipboard pages, but we may need to persist the data for future reference.
Pega supports mapping class to the table, so that when we save a page of defined class, the particular instance gets saved to the mapped database table.
Remember only concrete classes can be mapped to the dedicated database table.
Database commits are handled by Pega platform.
Okay now without the database class mapping wizard, how to do this manually? In the end, Wizard just automates some of the rules creation right?
So you have to do all the database class mapping manually.
Database class mapping – manual steps
There are 3 main steps involved.
- Create a new table in the Database.
- Create a new concrete class.
- Map the class with the Database table.
Before jumping into manual steps, let’s look at the places where Pega automatically execute all the 3 main steps and does the automatic database class mapping.
What are the ways Pega does the OOTB database class mapping?
1. Work table creation on new case type.
When you create a new case type, Pega OOTB creates a new work table, it also creates a new work class rule and maps the class with the database table.
In our Mortgage application for the Mortgage request case type, pega created a new class MyOrg-Mortgage-Work-Mortgage and also created a database table with the necessary columns.
From the below picture, you can already see the class is mapped to the database table on test connection results window.
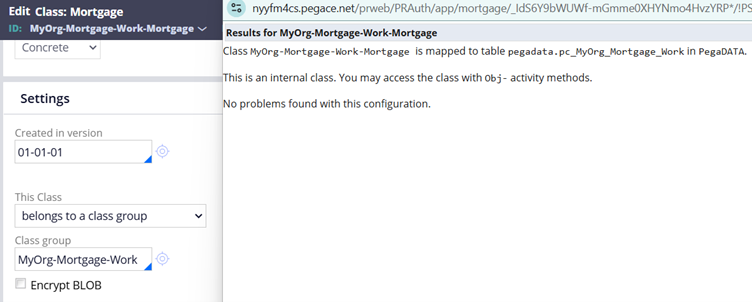
Note: For every concrete class rule instance, pega provides a test connection button through which you can test to which database table the class instance is pointed to.
This class and database table mapping is configured via a data instance called database table instance.
What is a database table instance?
Pega as a platform maintains the connection of class with the database table via the database table instance.
Under Records -> SysAdmin -> Database Table, you can find the list of database table instances.
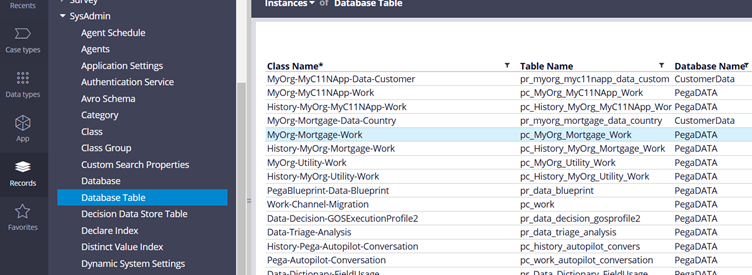
Database table instance is a data instance and so it cannot be locked with any rulesets.
Let’s open the auto-created database table instance for the Mortgage work class.
Note: By Default, Pega treats all the work class belongs to a common class group which will be mapped to single table.
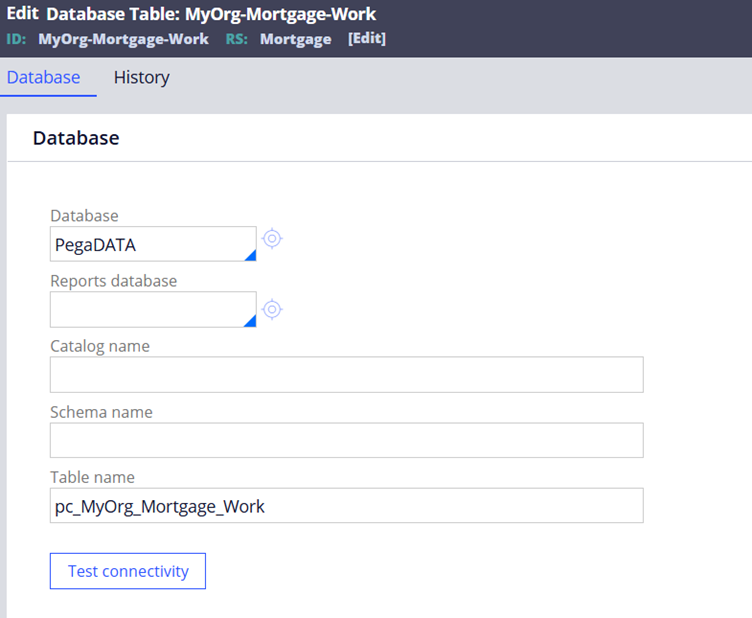
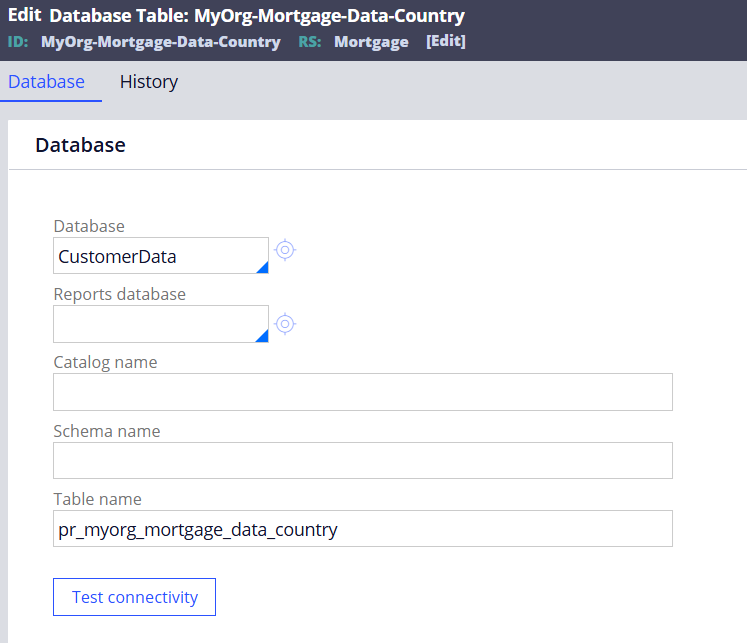
The ID is the class name and in the configuration form, you specify the database and the table name. Very simple configuration 😊 and this is how the link is specified for the work table.
2. Local storage data table creation on creating and define source for new data type.
In one of the blog articles, we talked about creating data table and local data storage pega database table.
In the example, we created a new data type called Country with class MyOrg-Mortgage-Data-Country with the source defined as ‘Local data storage’ and pointing to table name – pr_myorg_mortgage_data_country.
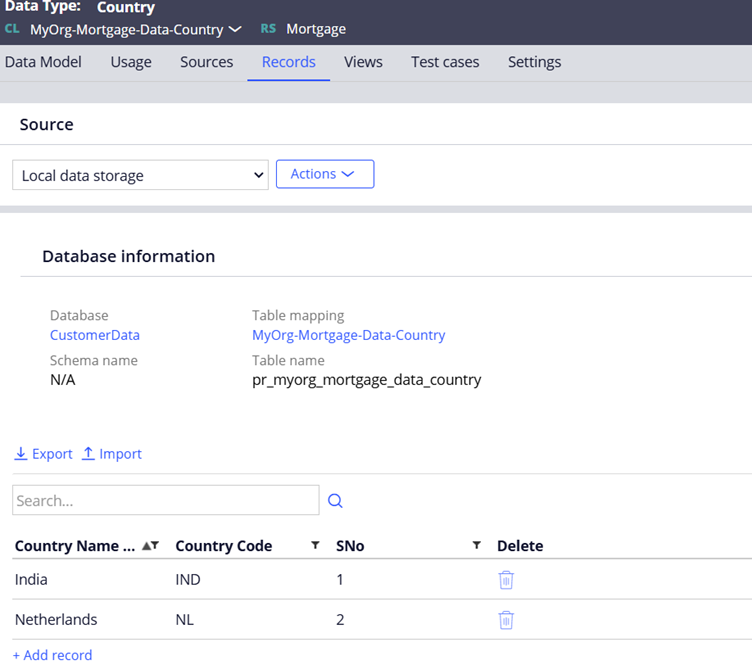
In the above picture, you also see a Table mapping (class name) with the link. Click and open it, that will land you the database table instance configuration
3. Optimizing an aggregate property using optimization tool.
Note: Embedded properties types like page and pagelist are referred as aggregate properties.
When you optimize embedded properties, a new index table gets created along with the Index class, database table index and also Declare Index rule. We will see more about the Declare Index in a separate blog article.
https://myknowtech.com/tag/declare-index
But you can just trust me without any screenshot that Pega automatically creates the Index table, Index class and also Index database table instance to define the class mapping 😊
Okay, these are the different ways how in-built Pega handles the database class mapping.
Now let’s see how to do the same database class mapping manually
As a very first step, I need to create a new table in the Pega data schema.
For this blog article, I cannot continue with my community edition as we don’t get the admin privilege to manually login and create the table via Postgres console.
Note: The query runner which you see below (can be enabled when you add the database administrator access role) is only for read transactions. You cannot execute an create query.
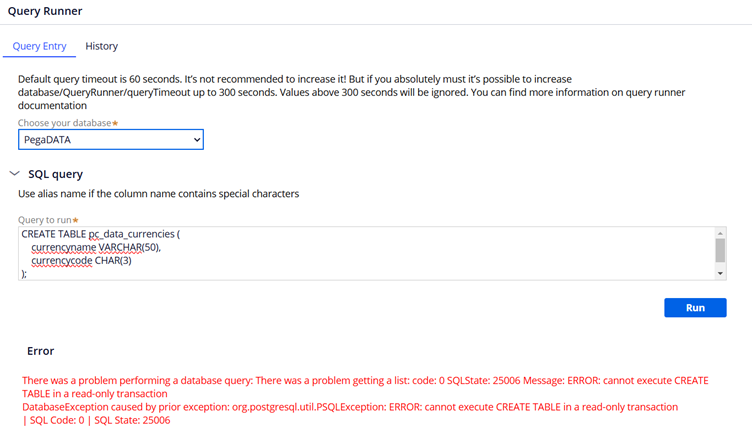
So we will start with using my Personal edition 8.7 version.
I already started my server with the Mortgage application inside.
I am launching my pgadmin console to create the pc_data_currencies table manually by executing the CREATE query

You already see the table is created.
Now we can consider this as an external table.
To connect to this table and perform any obj-operations like Obj-Open, Obj-Save, we definitely need a class mapping.
What we can do from here is, manually create a Concrete class instance, Create two properties and then create a database table instance.
But instead of doing all these manual actions, you can simply use the database class mapping wizard to perform all those above actions.
Note: When you do these manually creation, always do a resave of class and database table instance, so that the metadata will be updated with the right mapping.
What is Database class mapping wizard?
It is a mapping wizard, which can help with mapping an already available database datable with a concrete class.
The wizard can auto-create the concrete class, properties based on the table columns, and database table instance to complete the mapping.
In simple words, you already have an external database table. Think, “How can we use that external table in Pega?” – using the class mapping.
Prerequisites:
– We need a separate DB table created in the Database (We just created it)
– Required columns are available in the database table (We just created those)
– If you are connecting to external database, then the connection is already established with database instance in Pega. (here in this demo, we will just try to connect to table in data schema)
How do we use Database class mapping wizard?
Step 1: Move to Configure -> Data Model -> Classes & Properties -> database class mappings.
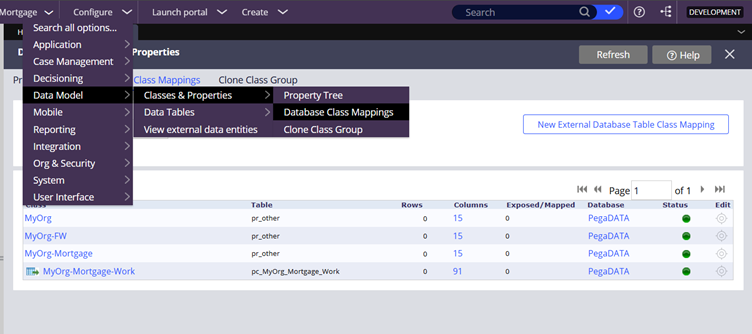
Step 2: Click on the ‘New External Database class mapping’.
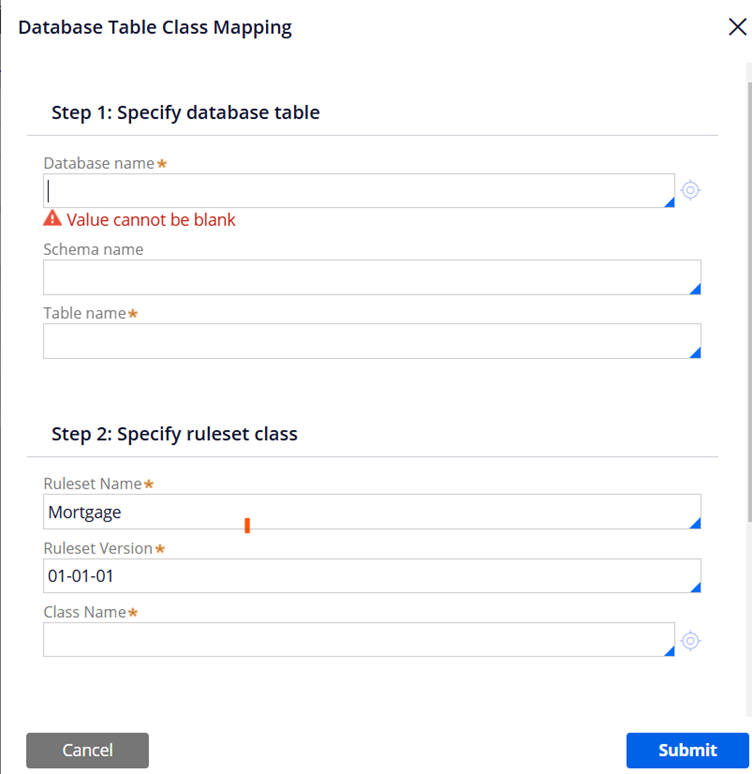
You get a popup form which needs to be filled out to complete the database mapping.
Step 3: Specify the configurations.
Step 3.1: Specify database table
Provide the DB name, schema, DB table name.
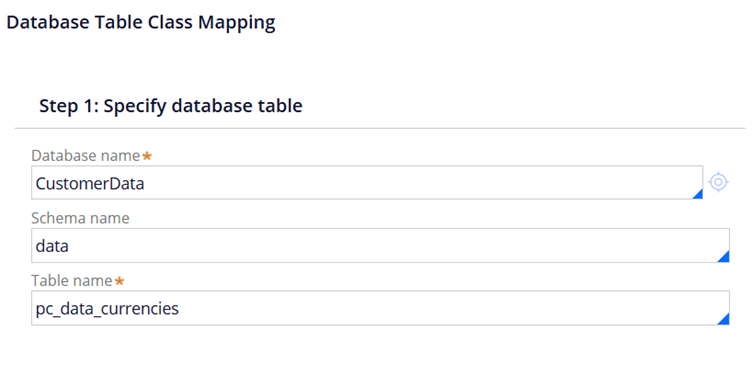
Note: Make sure, your table name is already listed in the dropdown. If there is some issue, it can be related to database privilege which you can easily fix it or your DBA can help with it
Step 3.2: Specify ruleset class
Specify the ruleset details and a new Class name. Pega by default selected the values.
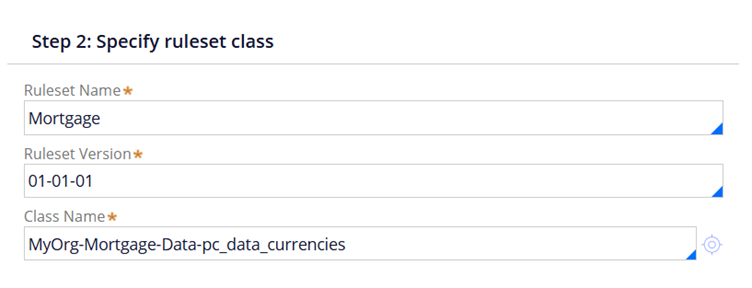
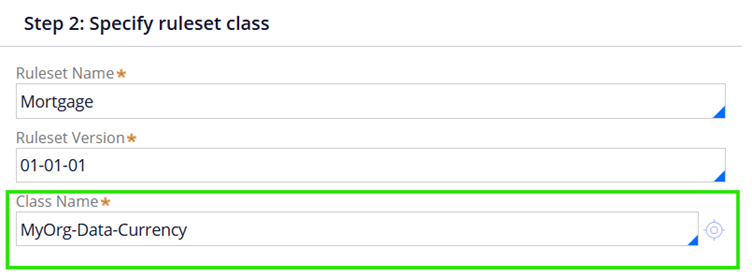
Here important thing is, that you need to finalize the concrete class that will be created. Pega used the table name and appended to the Application data layer.
I am going to create this directly under Org data layer with proper name as below
Step 3.3: Map database columns to properties
This is the final step to map the columns with the new pega properties that will be auto-created. You can use the camel case here.
Key – You can check the column to make it as key to the table.
Property Name – You can select the properties in Key column and provide a Property Name in property column.
Map All/None – Creates new properties, if checked. Pega creates new properties in XYZ-PREM–Data-Countries class.
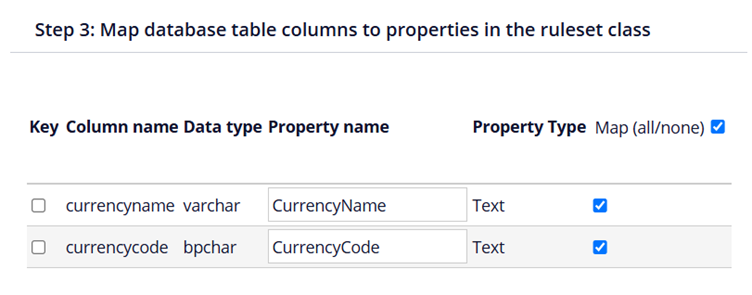
Note: I could have created a column that can act as key. For a concrete class it is wise to set a key to effectively manage the basic CRUD operations.
Now click submit.
It may take few seconds to create the necessary rules supporting the database class maping.
You can see that the class gets mapped to a new table.

Now let’s look at the rules that got auto-created by the wizard.
What are the rules that are created by the wizard?
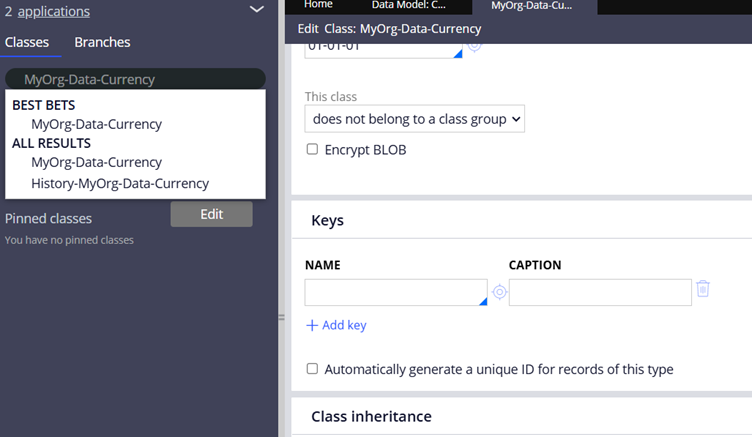
1. Concrete class rule and history class.
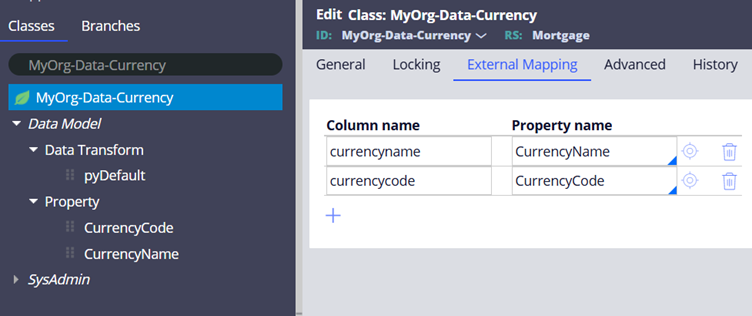
2. New properties – You can check the external mappings tab.
New properties are created for CurrencyName and CurrencyCode
3. Database table instance
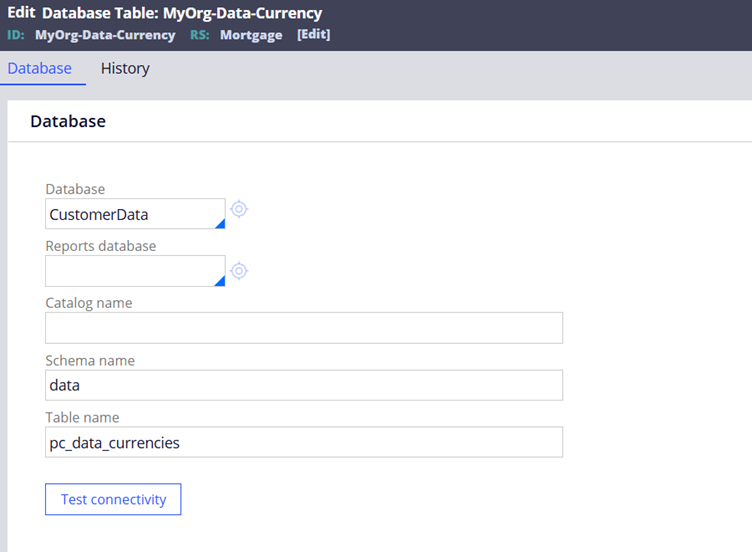
Now the connection is successfully made.
You can use all the Obj operations to successfully connect to the database table via the class and do the basic CRUD operations.

