Case Management – Case Stages, Processes and Steps
This is more like a continuation of my other blog article on Case Management Introduction where we saw the basic configurations in Case Designer and case type rule.
I would request you to visit the article, before proceeding into this one for a better understanding. I also used the same business requirement.
Here we will concentrate on defining the life cycle of Claims Request using the Case designer workflow management.
We already drew a blueprint of the Claims request lifecycle and we concluded to have 4 stages as shown below.

How to define stages?
First, you should know that from Pega 8.4 version, Pega automatically create a default create stage whenever you create a new case type.
Even for the Claims Request we have a create stage.
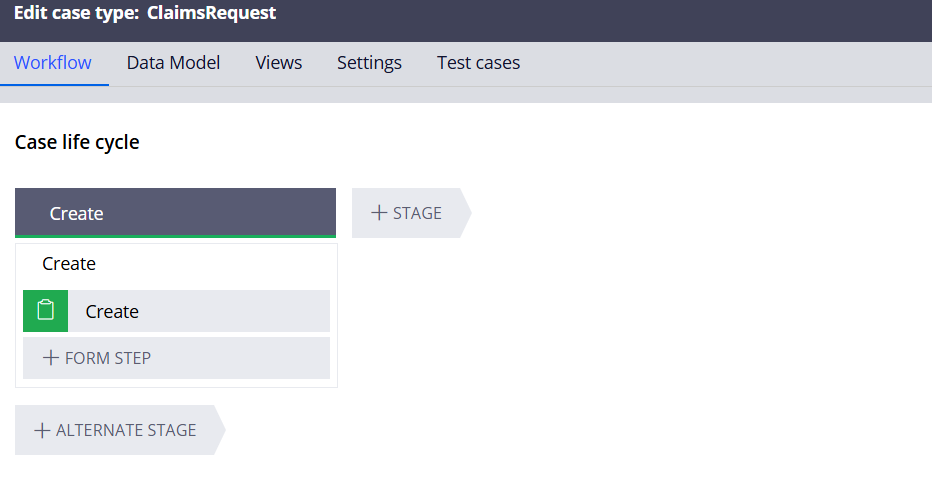
Why a Create stage?
If you look carefully at the create stage, you will find that, we can just add only form step. The form step roughly translates to forms to collect information.
Enjoying this content?
Access the author’s full video courses here at MyKnowAcademy.
Explore Courses →
If you are a hardcore developer you must have come across the screen flows with different screens that help to collect information.
In the Creae stage process, Pega uses a flow rule which is of screen flow.
Pega expects every case to start with Collecting the information about the case.
You cannot delete the create stage. You can either make it empty by removing all the form steps and you can just rename the stage and use it in your case lifecycle. We will do that.
Stages
A case can be decomposed into stages. Take any case life cycle, you will see the case moves through different stages.
Normally group of related tasks can be grouped to form a stage. For example, take the first stage – Request. Here the CSR can collect the claim request details and can also request some documents.
Rename the Create Stage name to Request.
Let’s add the other stage. You can use +Stage to add new stages.
Note: As a best practice, try to use Nouns or gerunds for stage names.

What are the types of stages?
Primary stage – It defines the expected behaviour of the case. Happy path
Alternate stage – It defines the exceptions in a case.
For example, if the claim process is rejected then we can jump to an alternate stage and end the case (Resolve cancel). We will see more in detail at the end of this post.
Next, we can define the process for stages.
Processes
Stages can be broken into processes. Based on your business requirement, you can define one or more processes in a single stage
In every stage, you get a menu icon, from where you can add new processes.
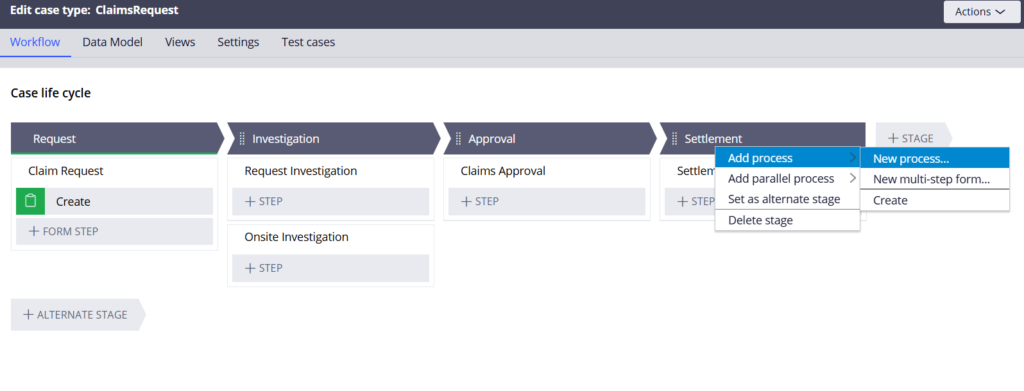
In the stage menu, you see different options
Add process – You can either create a new process or use the already available process ‘Create’.
When creating a new process, you get two options – New process flow, which is like a standard flow or New multi-step form process, which is a screen flow.
You can also Add parallel process, which can be started parallelly to other processes. It means when the case enters the stage then both process starts parallel. In the parallel which gets exactly the same options like creating process flow or multi-step screen flow.
Now processes are ready, let’s define the steps in each process. We already see a form-step added to the Create stage/process.
Steps:
Steps represent an action that can be performed in a process( manual action or automated action)
Click on the +Step to add new steps.
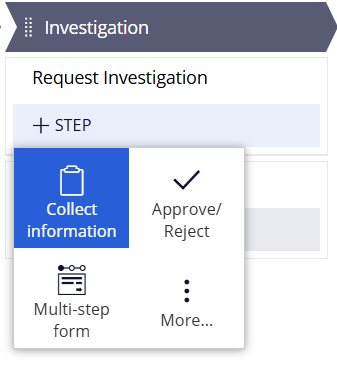
Pega provides you with some predefined configurations for steps
1. Collect Information – provides you with an assignment shape.
2. Approve / Reject – Uses OOTB approval process
3. Multi-step form – Since there are no steps added to the processes, we can still treat the processes as screen flows by start adding multi-step forms.
4. More –
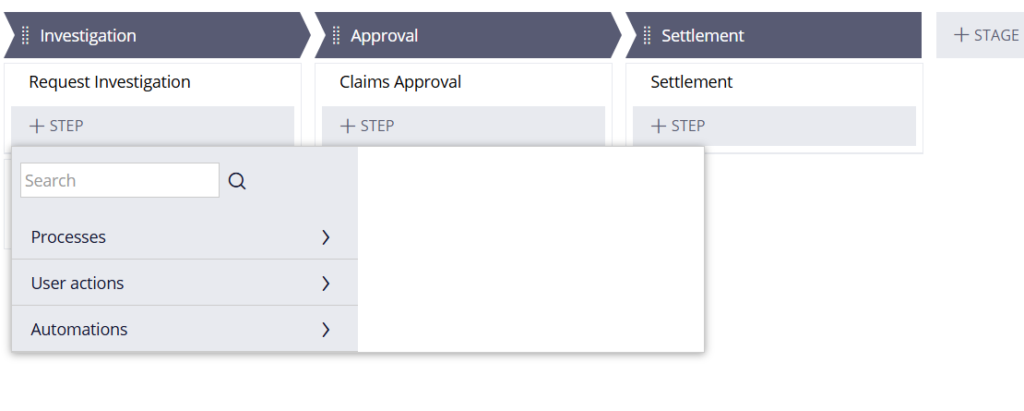
Processes – Expand the icon and you can use any existing processes. We have only one already created processes called Create.
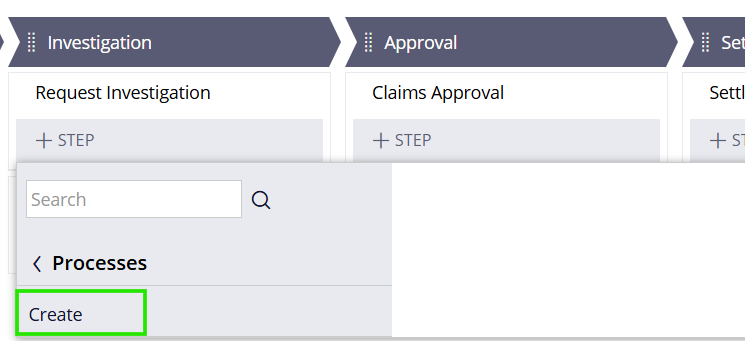
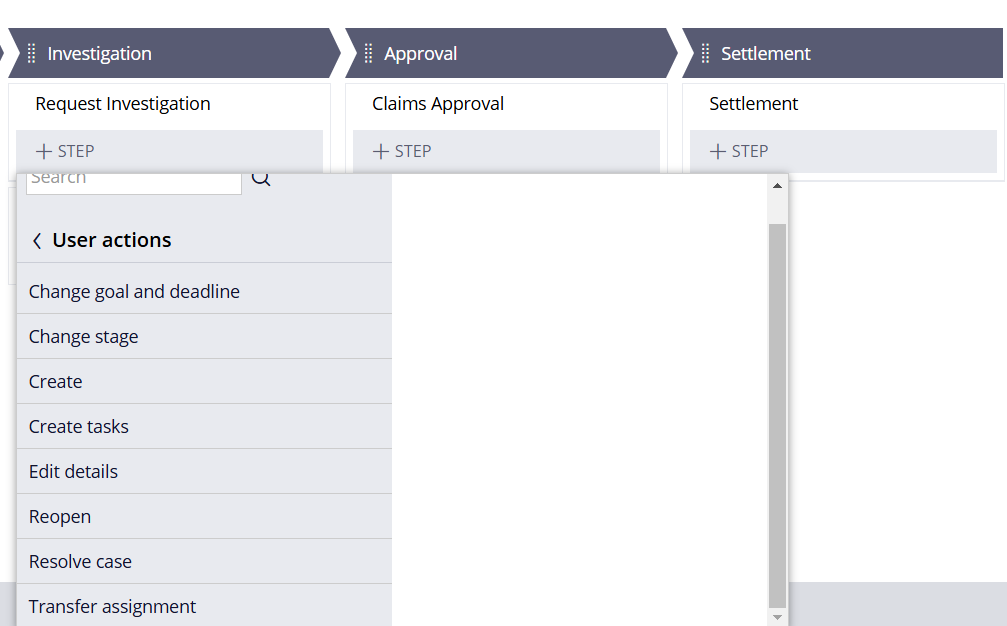
User actions – With these, some assignment will be added to the flows that require an user action.
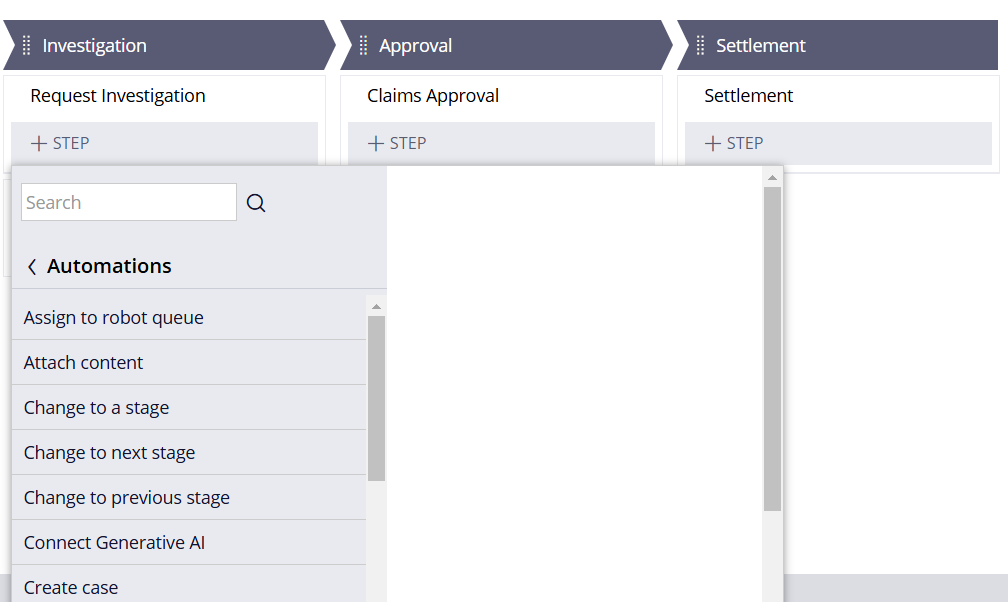
Utilities – Automated actions
Let’s define the steps for all processes.
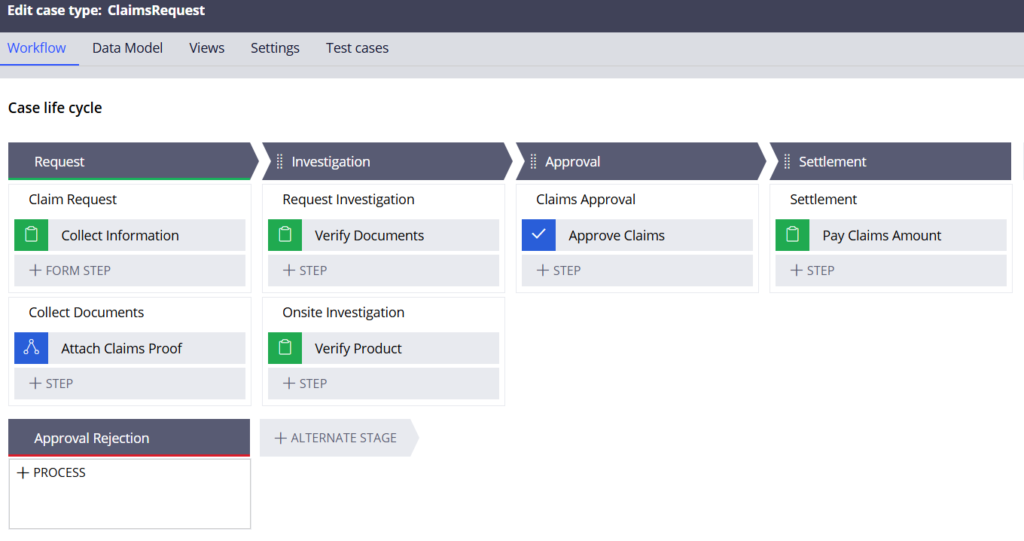
Note: In the third stage, as soon as you add an Approval step, Approval Rejection alternate stage is added by system.
You also see the Attach Claims Proof step in the Collect Documents process. How did I add that step?! I will share with you shortly how I did.
Let’s see, how the rules were created at the back end
1. Flow rules –
For every process you define in the stages, Pega creates a flow rule at the backend.
Select any of the processes and on the right-hand side you see a Open process button. Click the link.
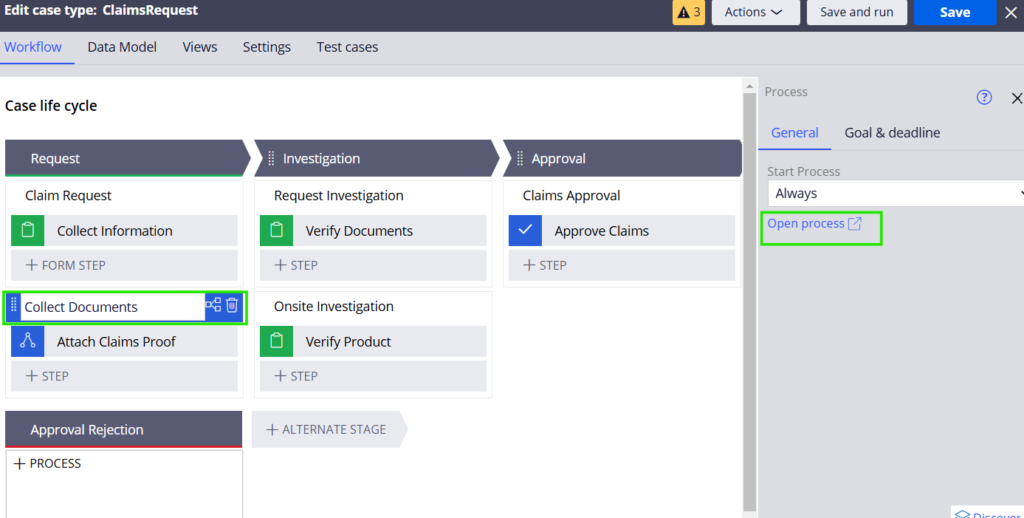
You can see a new flow that got created. You can always modify the flow rule.
I manually updated the flow rule to include the attachment step 😉
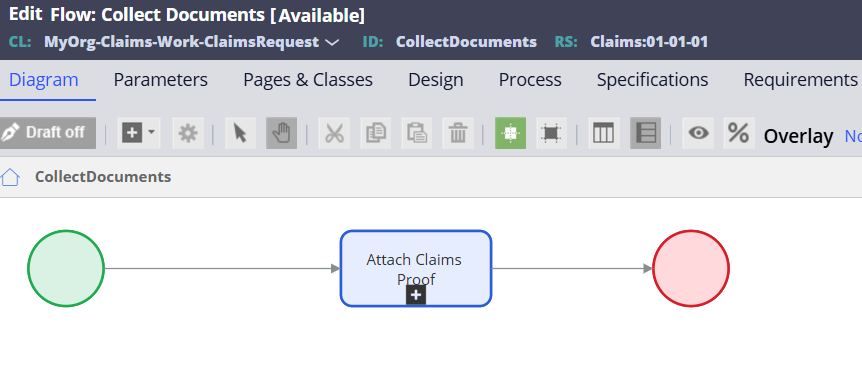
Click on the sub-process. I added ‘pzAttachmentStep’ OOTB flow rule as a sub process.
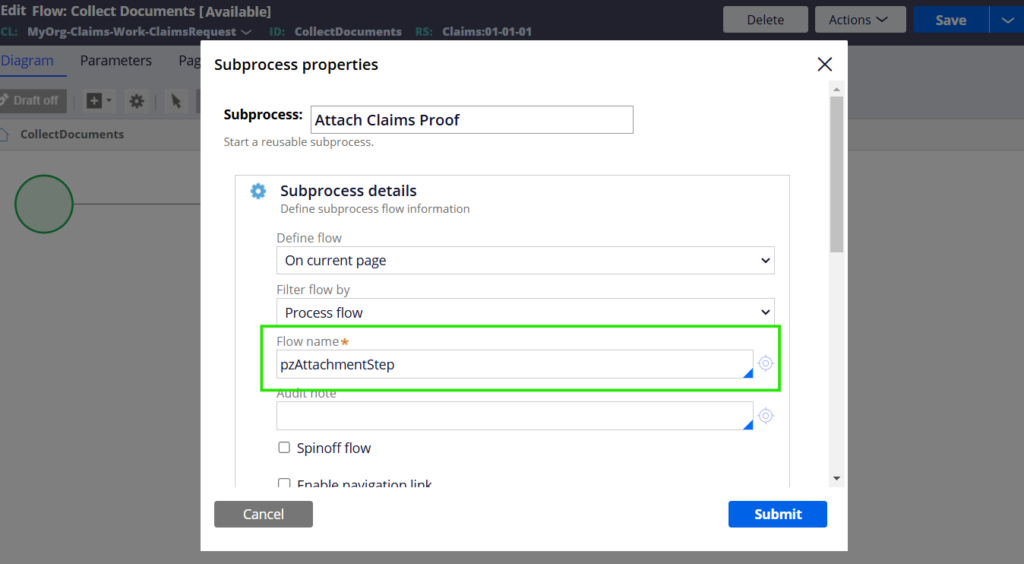
Note: Updating the flow here, automatically reflects in the process steps and like the same if you update the steps in the case designer the corresponding flow will be updated! It’s just vice versa
You also note that the ‘applies to’ class of the newly created flow will be same as the Claim work class.
Some of the flows created will be in Draft on mode. (This is because the flow is not completed fully). You have to create the flow actions to complete the flow.
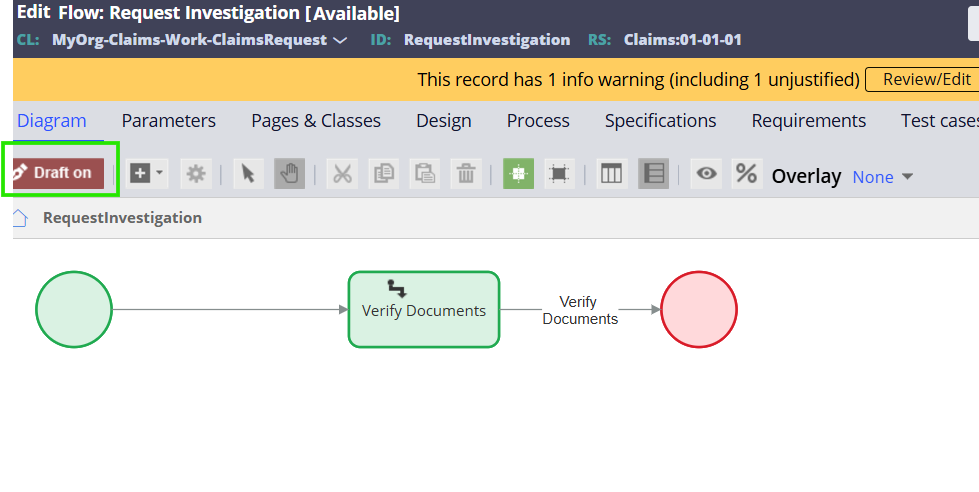
Note: Remember to switch off draft mode, It may lead to issues in production.
2. Flow actions and Sections
In every collect information step, you can use ‘Configure view’ to design the data model. On using Configure view, Pega creates a new flow action and section for the defined data model.
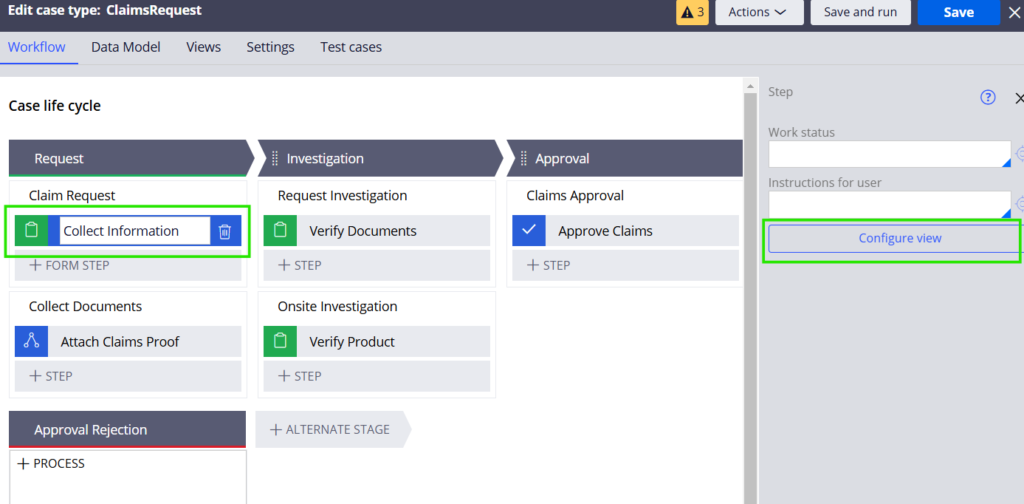
Quickly add the Customer details in the view.

As soon as you submit the Configure view pop-up, the flow actions and section will be created or updated.
You can see a new flow action ‘Create’ got created as shown below.

Also a new section rule got created.
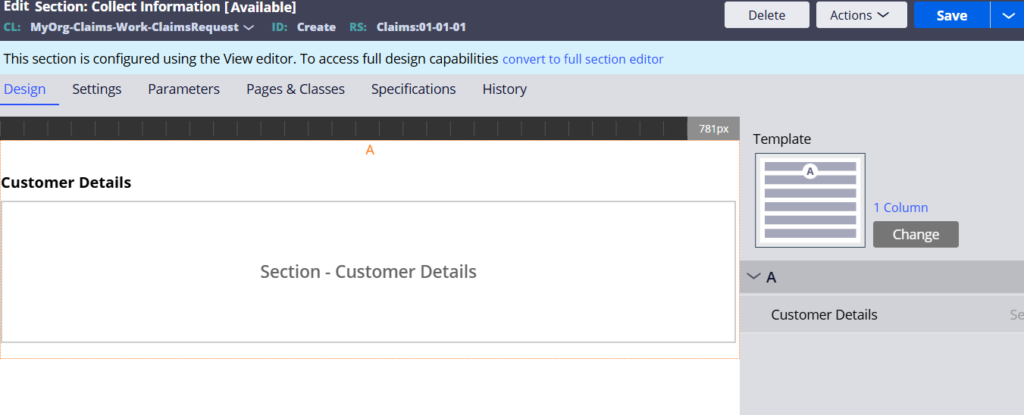
Primarily flows, flow actions and sections (or views in constellation) got created automatically when you define the processes and steps for your stages.
How to add alternate stage?
As mentioned before, alternate stages are designed for all exception actions.
Alternate stages appear at the bottom row of the Primary stages. You already see Pega added a new alternate stage – Approval Rejection as soon as we added OOTB Approval step in the 3rd stage.
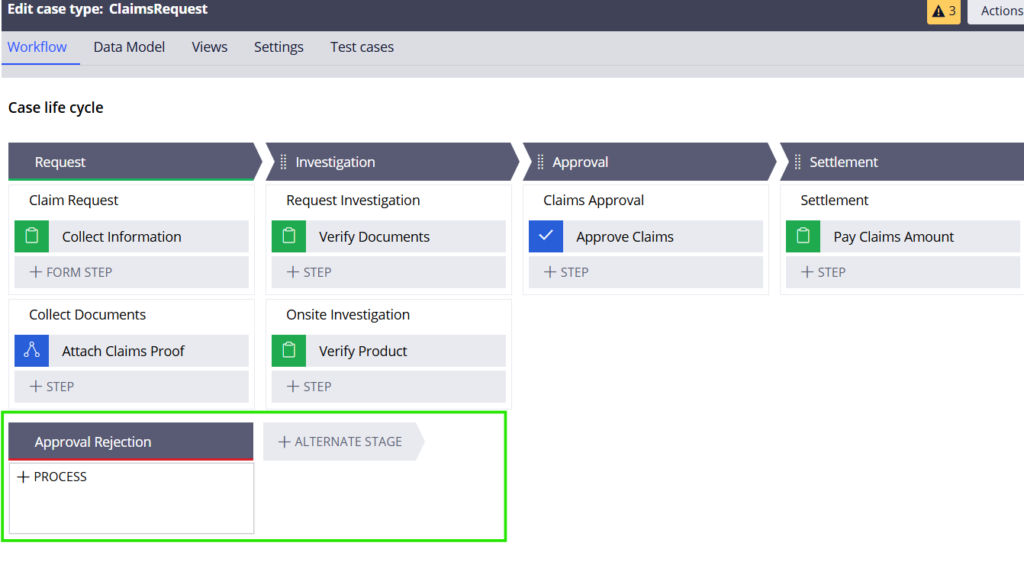
Click on the ‘+ Alternate Stage’ to add a new alternate stage.
Similar to primary stages, alternate stages can include processes and steps.
Alternate stages do not support automatic transitions, so how do you jump to an alternate stage or come out of an alternate stage?!
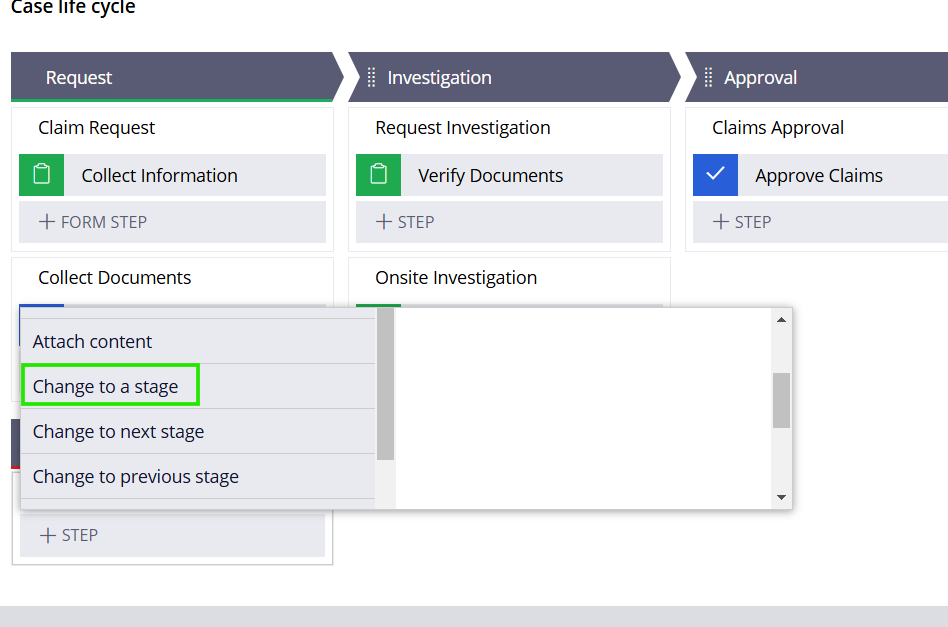
Use Change stage. You can use this action, to jump to any stage.
Change stage is available as a Utility in flows or case steps as well as available as a local action.
Before ending this article, let’s look into the different configuration settings at different places.
What are the configuration settings in each stage?
Click on the stage label. On the right side, you see the configuration settings for the stage.
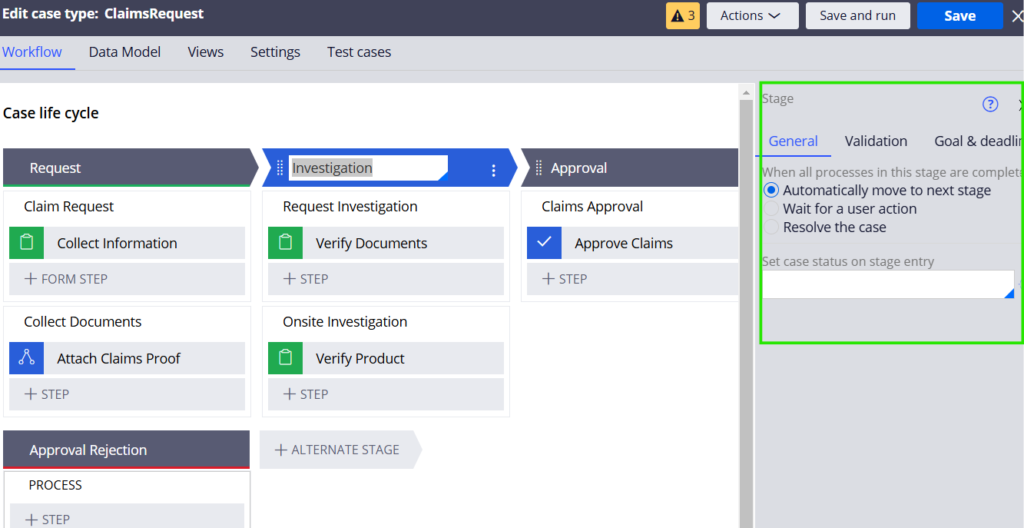
General tab
When all processes in this stage are complete
a) Automatically move to next stage – Maximum we use this option and it is default selected.
Assume you are in the first stage “Request”. After you complete the ‘Attach Claim Proof’ step and submit, the case automatically moves to ‘Investigation stage.
b) Wait for user action –
Even after all the processes and steps are completed, the case remains in the same stage.
It needs some manual user action to complete the stage. You can quickly test this by configuring one of the stages as ‘wait for user action’
The case will never move to next stage and you get an option to advance the case manually from the user portal!
c) Resolve the case

You can also resolve (complete) the case at any particular stage.
As per my design, once the claim amount is settled, I can resolve the case. So, I Updated this configuration in the last stage. Once the processes are completed, then the case will be resolved. You can set the resolution status to Resolved-Completed.
Delete open assignments upon resolution –
When you spin off or do any type of parallel processing, then more than one assignment is always possible. So it’s always good to delete those open assignments if any, upon resolution. If you don’t delete it, then the assignments may be orphaned!!
Resolve open child cases – We can always have one or more child cases and there are chances that the child cases may be opened.
For example, let’s say you spin up some parallel child case for Investigation and meanwhile if the case is rejected then you can need to close off everything including open assignments and open child cases.
Goal & deadline tab
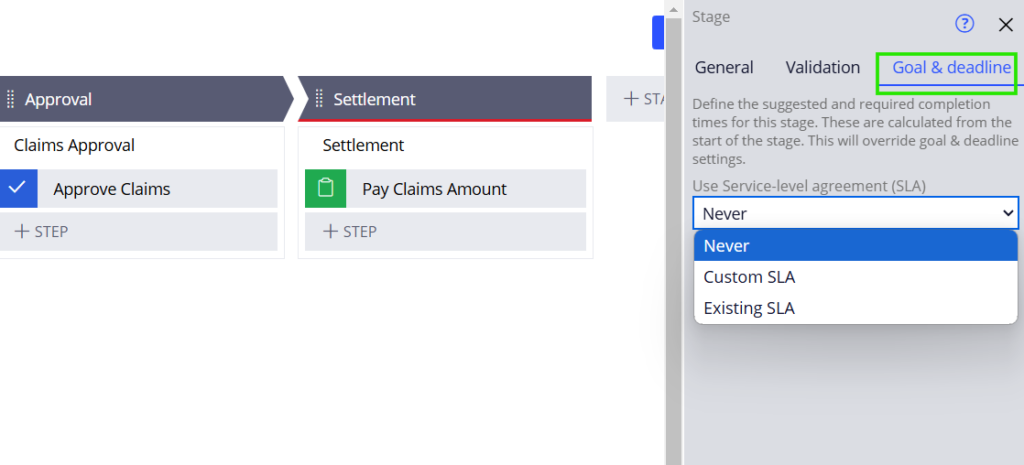
Earlier in my SLA blog artcile, I explained in detail about stage level SLA.
Validation tab
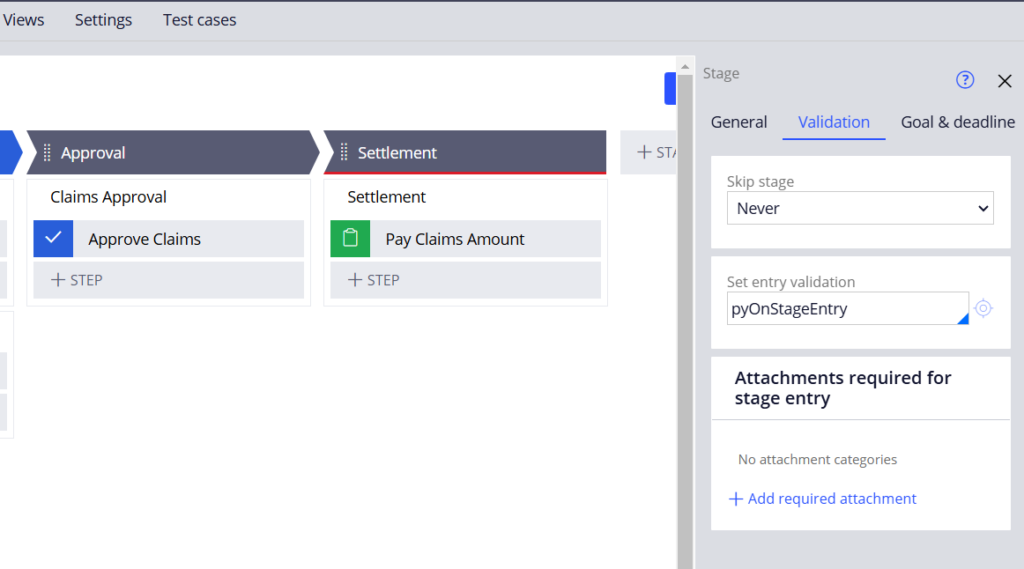
You can implement the stage validation in 3 ways.
a) Skip Stage when – You can specify a when rule here. If the when rule evaluates to true, then the stage will always be skipped.
Say for example, you have a business requirement like If the Claim amount is less than $100, then no Approval is required. In such case, you can define a when rule and specify it in the 3rd stage.
So, when stage 2 is completed, then the when rule is evaluated for stage 3 (Approval) and if it is true ( Claim amount < $100), the case skips the approval stage and enters stage 4.
b) Set entry validation – You can specify a validation rule. Validate rule can be used to verify certain pre-requisite criteria.
For example, you have a requirement that before entering the investigation stage, all the claim details must be collected. In such case, you can specify a validate rule to evaluate the criteria. In such an exception case, the corresponding error message is shown in the user portal.
In the later version, pega provides an extension validation rule called pyOnStageEntry, which is automatically applied to all stages.
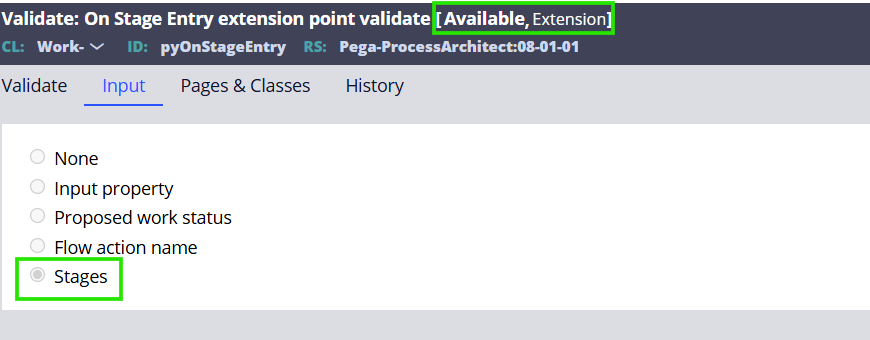
You can use a single Validate rule for the case type and define different validation condition for different stages.
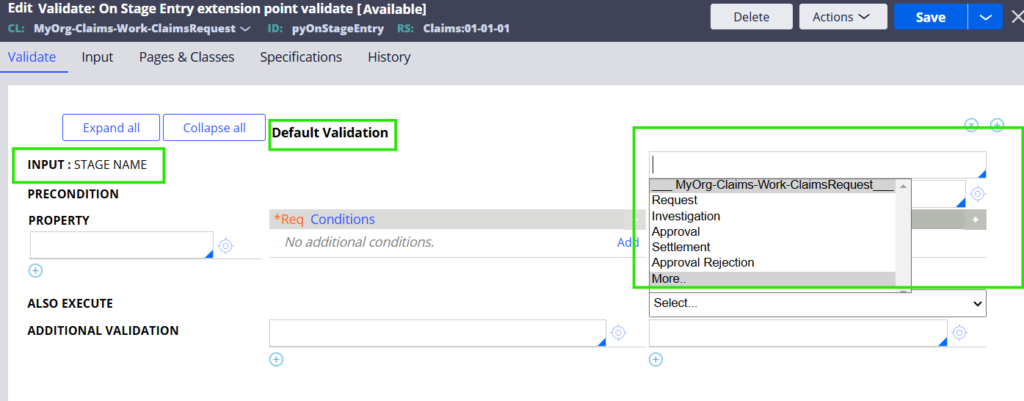
You can use different input stage names and apply different column block of validation.
I explained about this in detail in the Validation blog article.
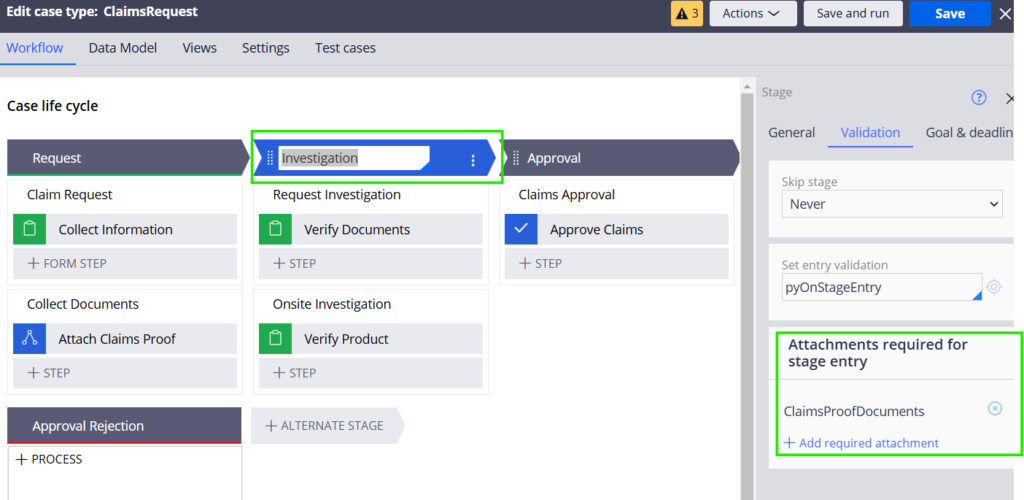
c) Attachments required for stage entry – You can specify certain attachment categories (documents) are required for this stage.
For example, the investigation stage requires, a claim proof document. Let’s define and test it.
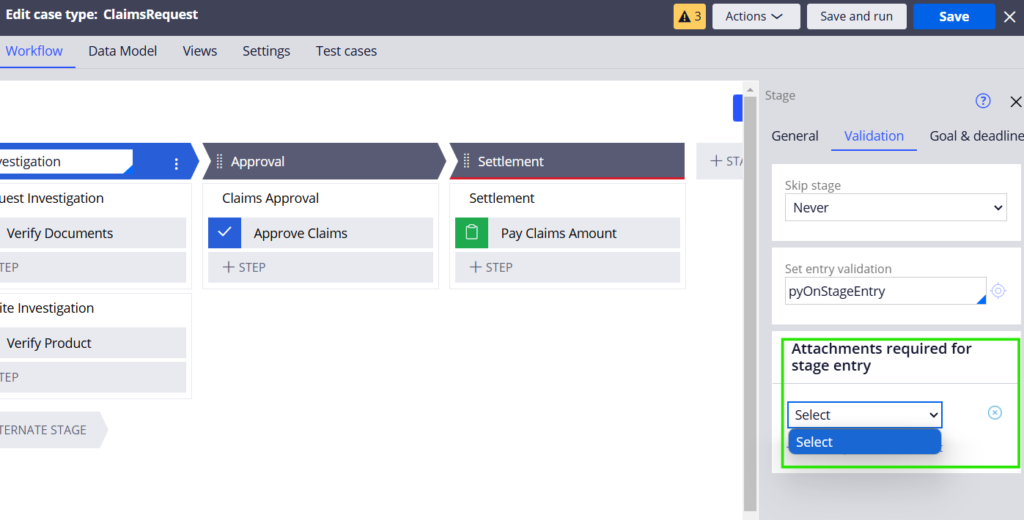
Select dropdown is empty!!!
You need to do some pre-requisites to add an attachment category.
Step 1: Create a new attachment category rule.
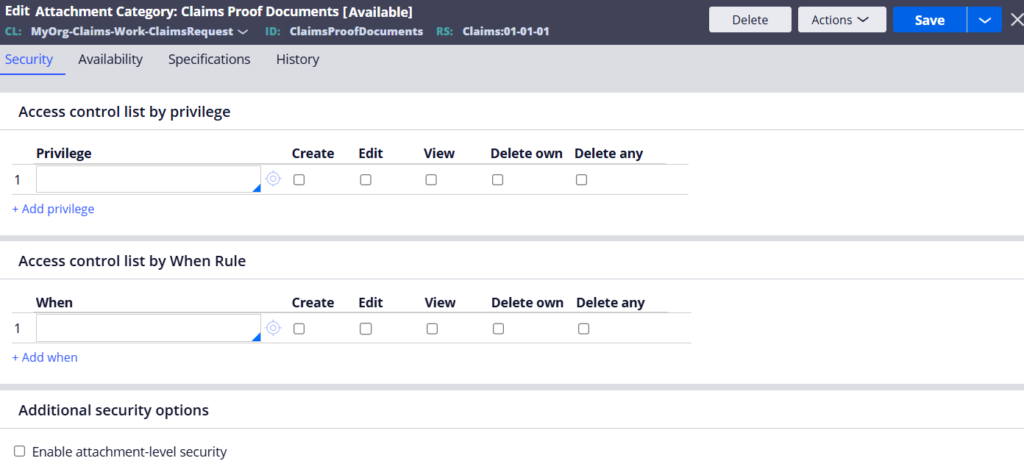
Leave the default configuration. We will see about the attachment category in a separate blog article.
Step 2: In the case designer, go to the Settings tab.
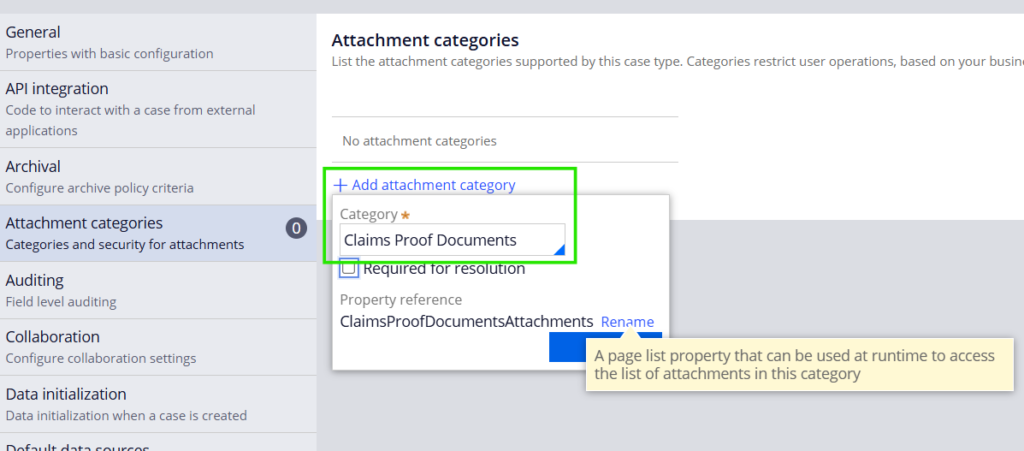
Click on Attachment categories – Add attachment category
Category – Specify the attachment category you created before
Required for resolution – This is a validation constraint.
If true, then the attachment category is mandatory to resolve the case.
Property reference – Pega by default specified a ClaimsPrrofDocumentsAttachments pagelist. System creates a pagelist property and use at runtime to access the attached documents in the Claim proof attachment category.
Click Ok and save the case.
Step 3: Return to workflow tab. Select the Investigation tab and provide the attachment category as required attachment.
Save the case.
Step 4: Run the Case. In the Attach claim proof step, attach the document of type ‘File’ ( Not Claim Proof) and proceed.
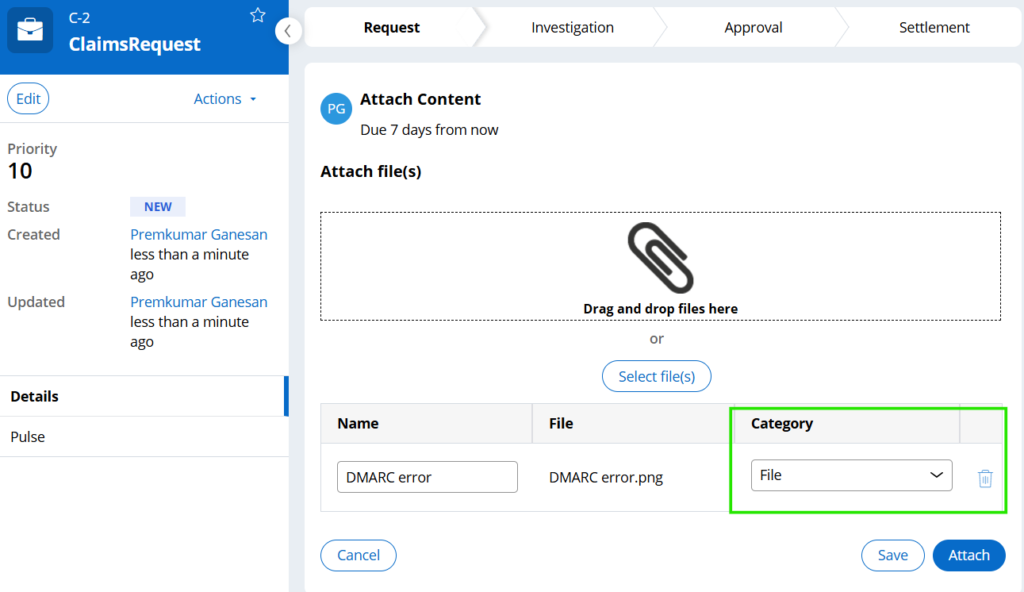
Click Attach. You get the expected error 🙂
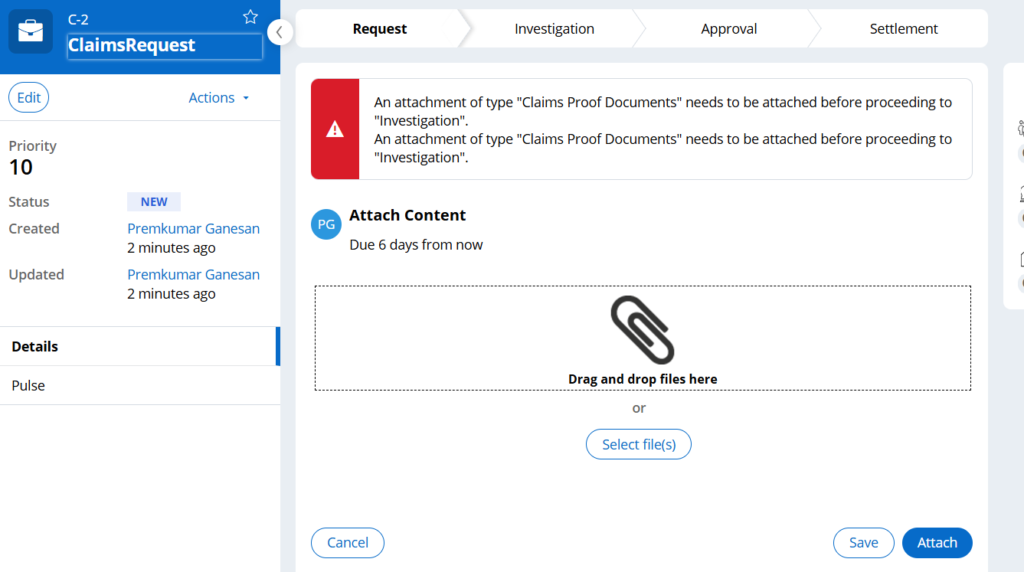
Step 5: Now upload the file of the attachment category ‘Claim Proof’ and proceed.
You should be able to proceed to the Investigation stage.
What are the configuration settings in each process?
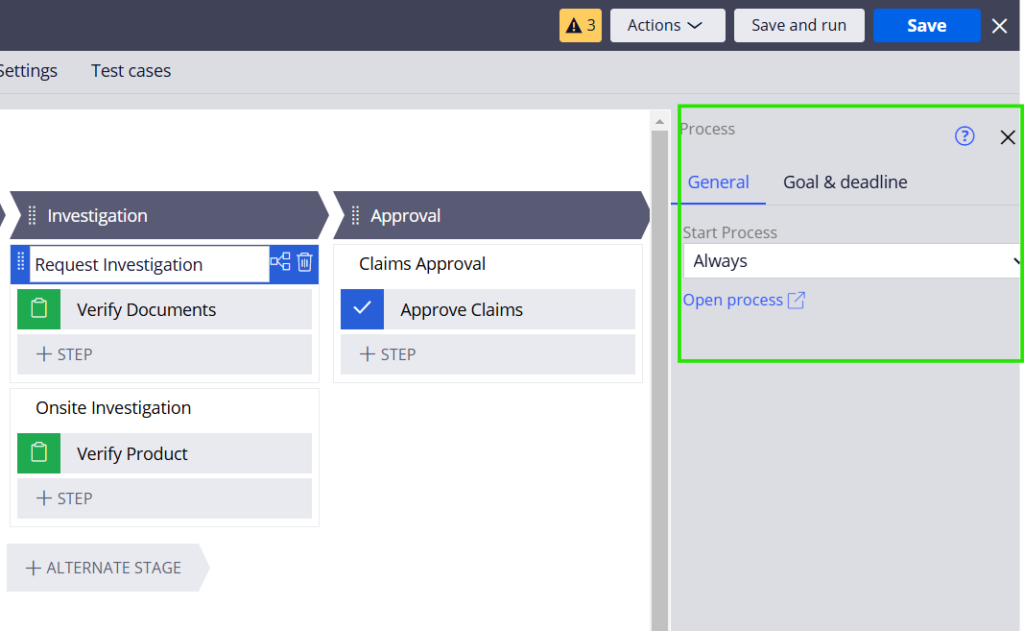
Click on the process. On the right side, you see the configuration settings for the selected process.

Start when – You can conditionally start the process. By default, ‘Always’ when rule is used in every stages. You can use different when rule based on your requirement.
Goal & Dealine
Again same thing we discussed in the SLA blog article 😊 Process level SLA configurations.
What are the configuration settings in each step?
Note: The configuration of each step varies based on the step we choose
Click on the assignment step. On the right side, you see the configuration settings for the selected step.
General tab
Route to –
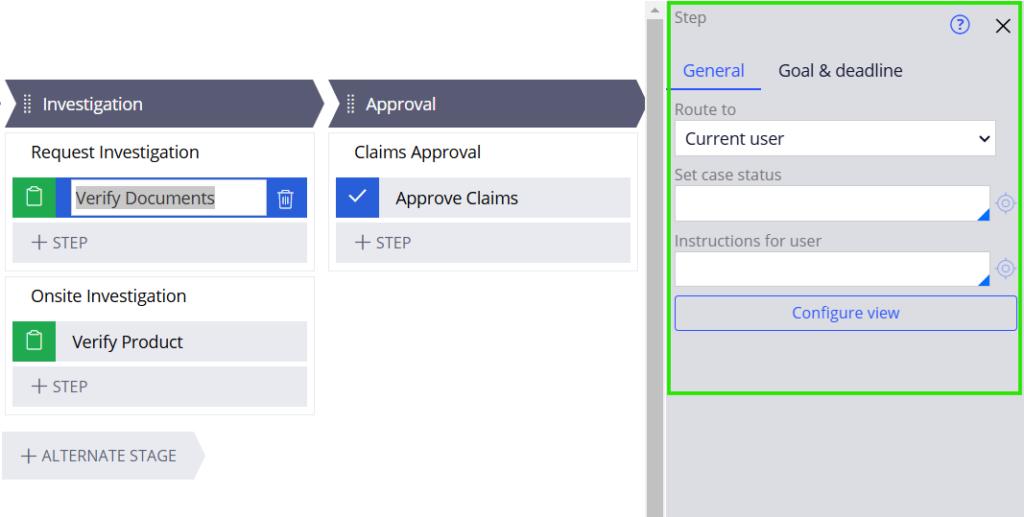
You can specify to which operator/workbasket you need to route.
Set Case status – set the status
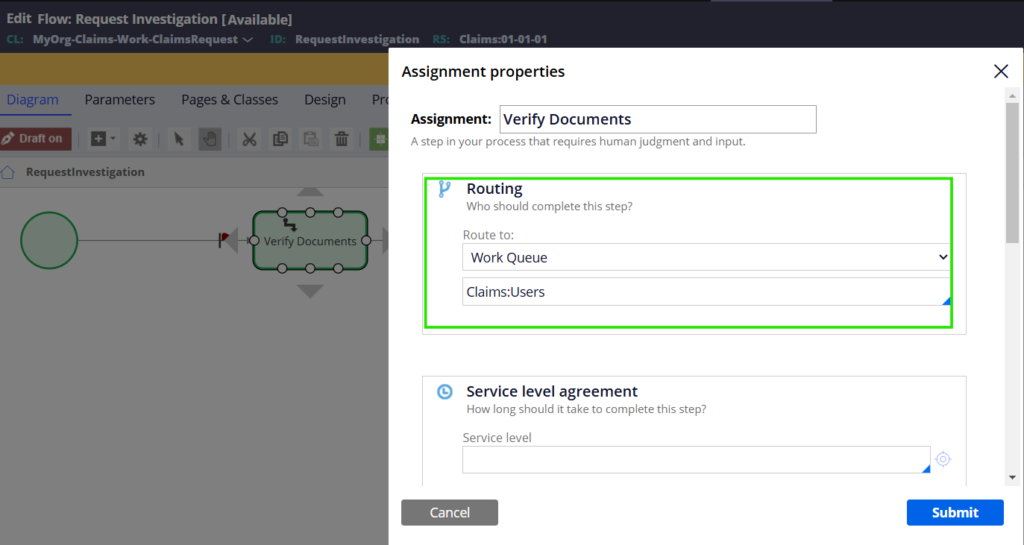
The main thing to note here is that whatever you update here will reflect in the flow assignments.
Step 1: Update the fields.
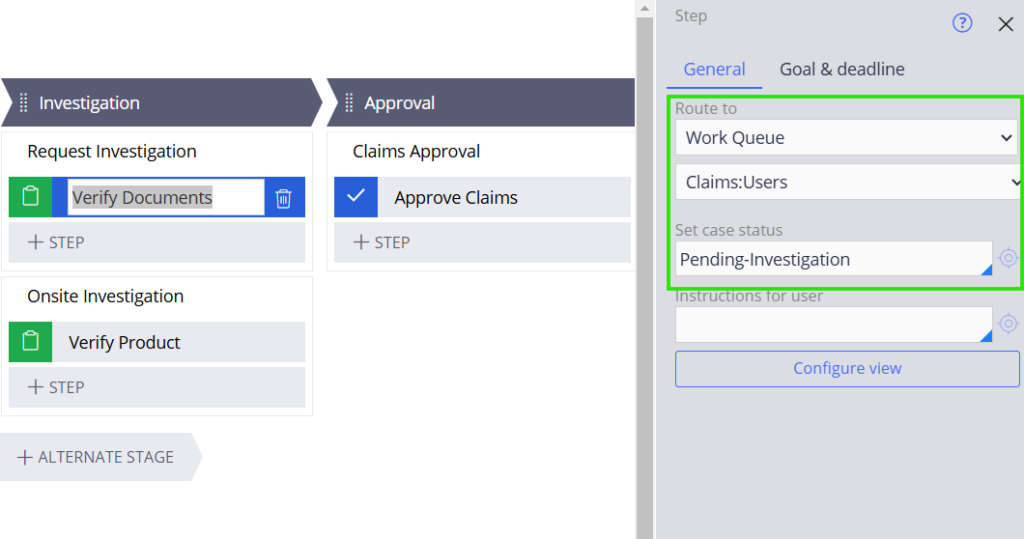
Step 2: Open the RequestInvestigation process – Verify Documents assignment. Values are automatically updated.
Configure view – For assignments, you can configure the view ( properties to be displayed in the assignment flow action).
Remember in the create stage assignemnt, we already embedded the Customer Details
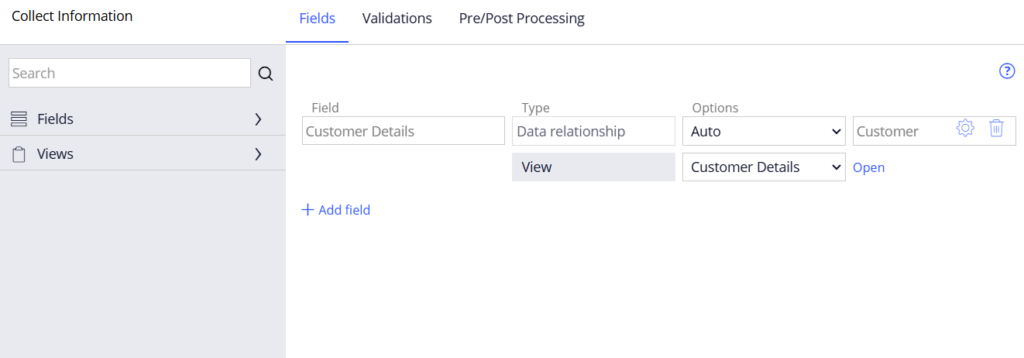
You can also use the Validations tab, to define validations (pega creates a validation rule to the assignment and add it in the flow action) and pre/post processing tab to invoke Pre or post data data transforms.
This will automatically update the flow action rule validation and pre/post data transforms.
Goal & deadline tab
Again, this is the same as saw as assignment level SLA in the SLA blog article.
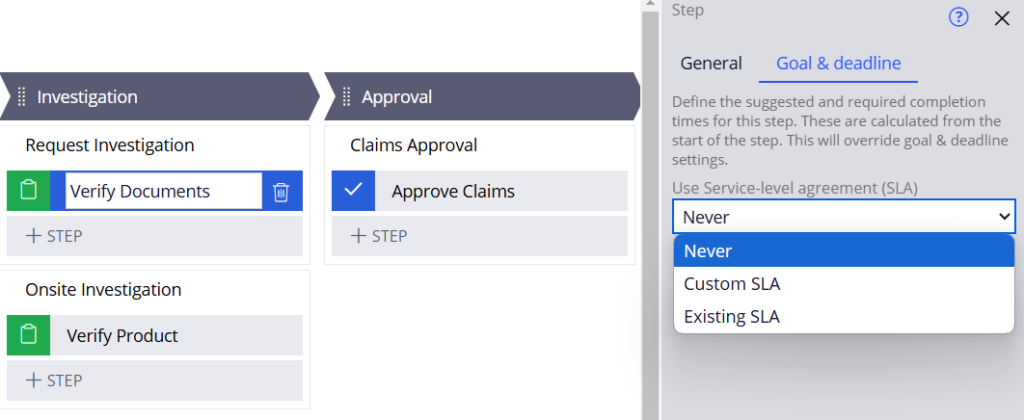
Similarly, you can also easily explore the different step configurations when you include different types of steps in the processes.
We are at the end of this article!!

