


This is the continuation of the previous blog article. It is highly recommended to visit the previous blog article before proceeding here!
In this article, we will build and test three types of approvals.
1. Single approval flow by reporting manager
Here the claims request should be approved or rejected by the reporting manager irrespective of claims amount
2. Cascading approval using the hierarchical structure
When the claims amount is less than $1000 only the claims manager should approve. If it is greater than $1000, then both the claims manager and claims director should approve at cascading level.
3. Cascading approval using a decision matrix
Exact similar requirement to above – When the claims amount is less than $1000 only the claims manager should approve. If it is greater than $1000, then both the claims manager and claims director should approve at the cascading level.
We will achieve it using a decision matrix.
Single approval by the reporting manager.
Step 1: Update the approval step as
Single level – specific user and Reporting manager.
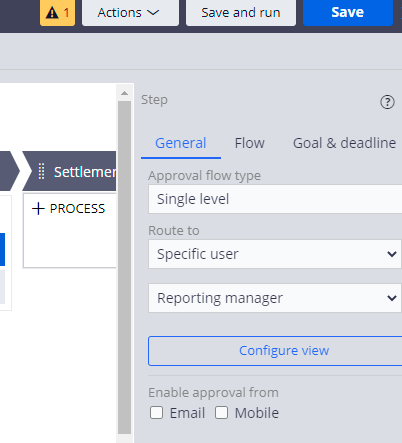
Save the case type.
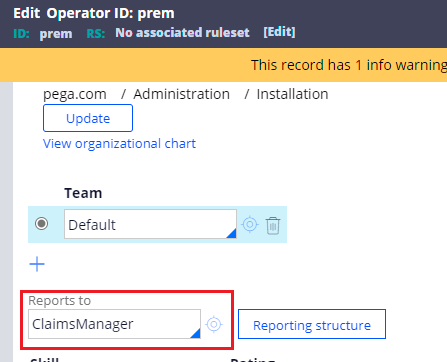
Step 2: In the current operator form update the routing manager to Claims Manager.
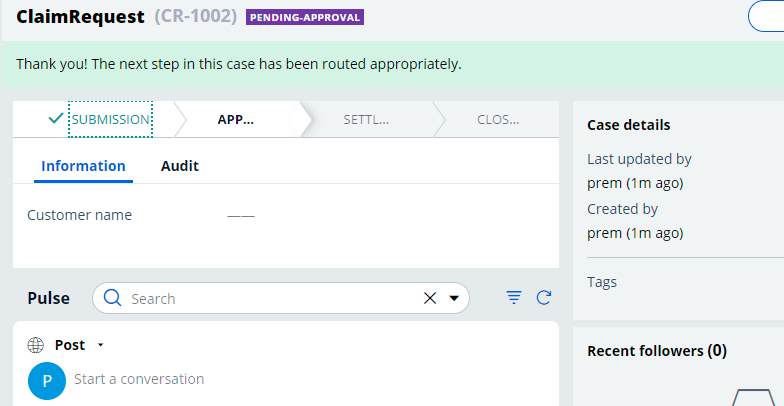
Step 3: Run the Claims Request case type till the approval stage.
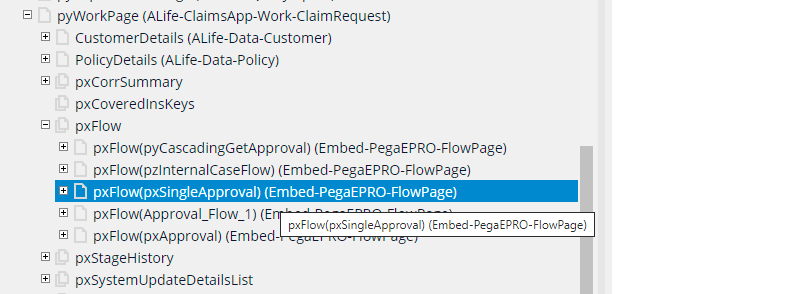
Step 4: You can check the pxFlow in the clipboard.
You can find all the open flows
Approval_Flow_1 -> pxApproval – > pxSingleApproval -> pyCascadingGetApproval
Step 5: Login with Claims manager and find the case CR-1002 in the worklist.
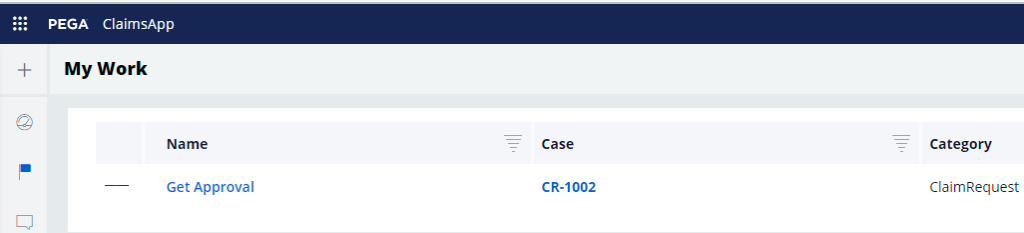
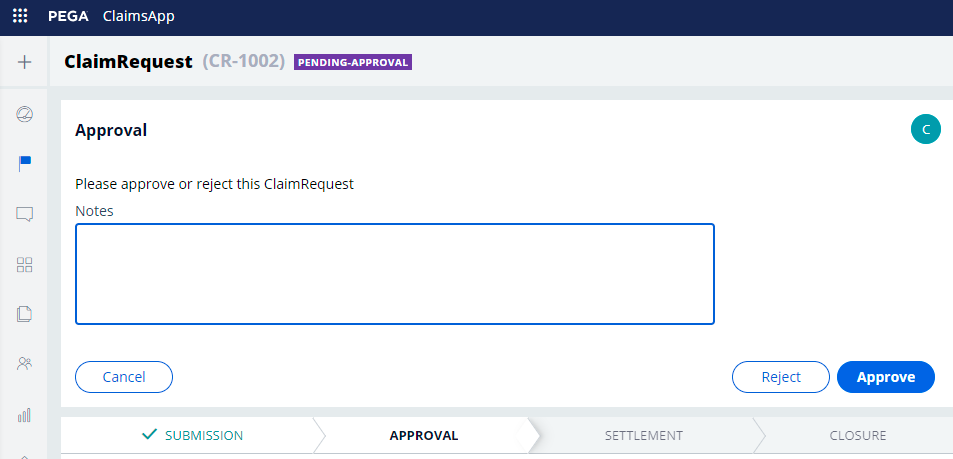
Step 6:you can open the assignment and reject the case.
You see the Case got rejected.
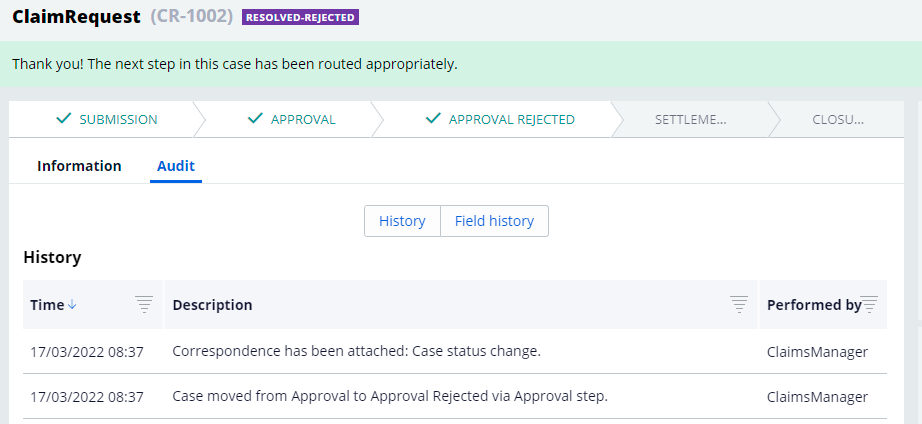
This is a single-level approval.
2. Cascading approval using the hierarchical structure
When the claims amount is less than $1000 then only the claims manager should approve. If it is greater than $1000, then both the claims manager and claims director should approve at the cascading level.
Step 1: Update the approval step as cascading type
Approval is based on reporting structure.
Report to be completed by reporting manager.
Step 2: Create two when rules.
ClaimsAmount lesser than 1000 and claims greater than 1000
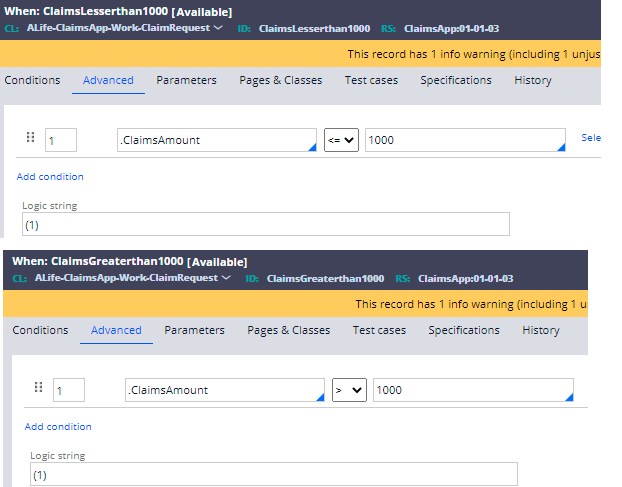
Step 3: Update custom approval level.
When claims amount lesser than 1000, then approval level should be 1 with claims manager alone.
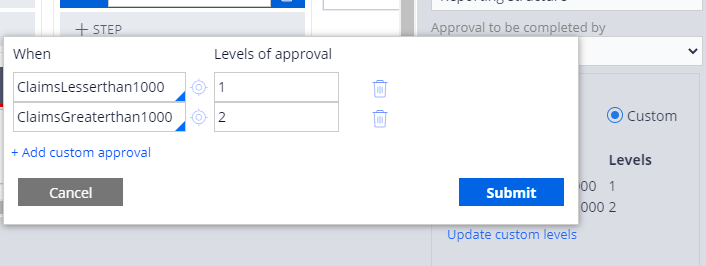
When claims amount greater than 1000, then level will be 2 with claims manager and claims director approval.
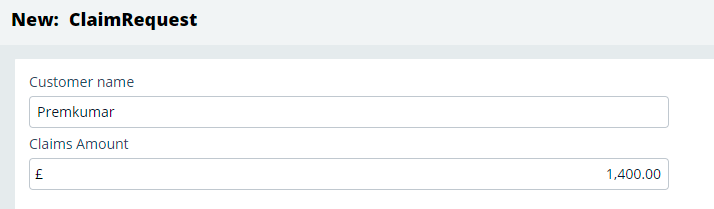
Step 4: Run claims request case and input the claims amount to 1400 and reach till the approval stage.
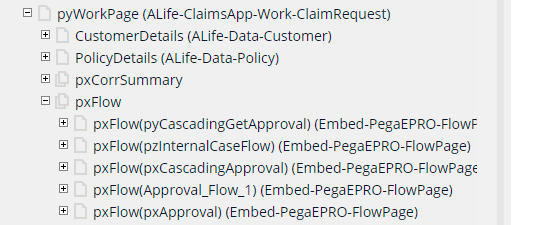
Step 5: You can check the pxFlow in the clipboard.
You can find all the open flows
Approval_Flow_1 -> pxApproval – > pxCascadingApproval -> pyCascadingGetApproval
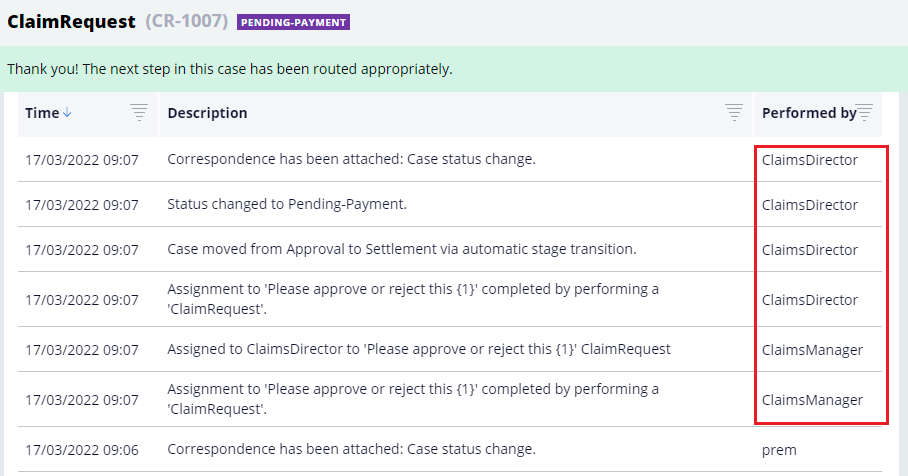
Step 6: You can login with Claims Manager and approve the request.
Repeat for ClaimsDirector and approve the request.
You see the claims proceeded to next stage and from Audit, it assigned two levels for approval.
3. Cascading approval using decision matrix
Exact similar requirement like above – When the claims amount is less than $1000 then only claims manager should approve. If it is greater than $1000, then both claims manager and claims director should approve in cascading level.
Step 1: Update the approval step as cascading type.
Approval based on Authority matrix.
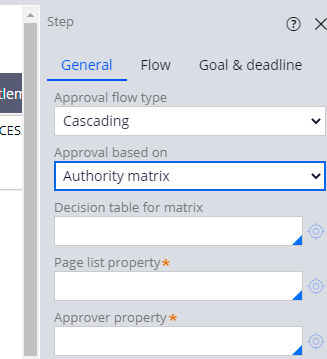
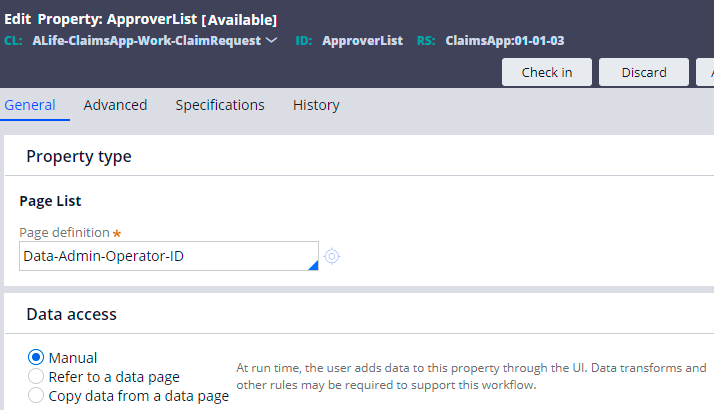
Step 2: Create a new pagelist – ApproversList that points to data-admin-Operator-ID class
Tip: Since the approvers are claimmanager and claimsdirector who are already part of pega operators, it will wise to reuse the operator ID class.
Step 3: Create a decision table to determine the approver list
Step 3.1 – Create a new decision table – DetermineApproversList
Step 3.2 – In the results tab – check evaluate all rows.
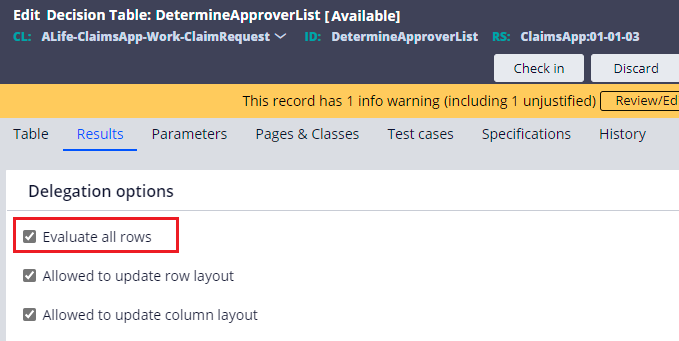
This will help to evaluate all rows and append to the approver list from the actions column
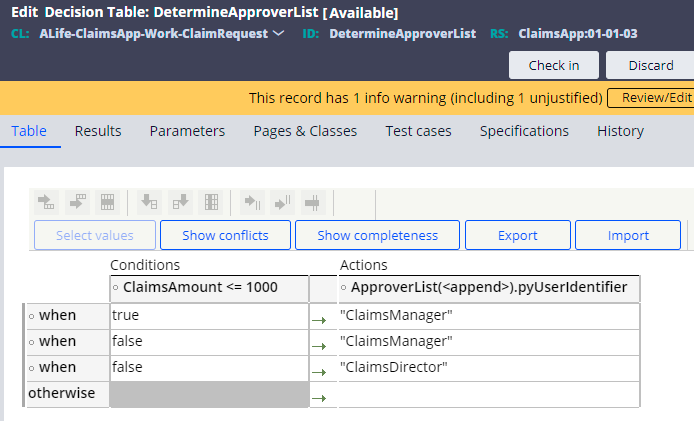
Step 3.3 – Update the decision table
In the condition check if ClaimsAmount<=1000 and in the actions column, append the approverlist.pyUserIdentifier with the approver name.
Step 3.4: Test the decision table
Run and test with different values.
When claimsamount <= 1000
Only ApproverList(1) is appended with Claims Manager.
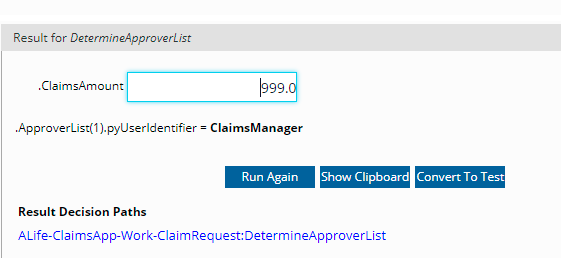
When ClaimsAmount > 1000,
Then you will see approverlist of 1 and 2 got appended.

Our decision table looks good.
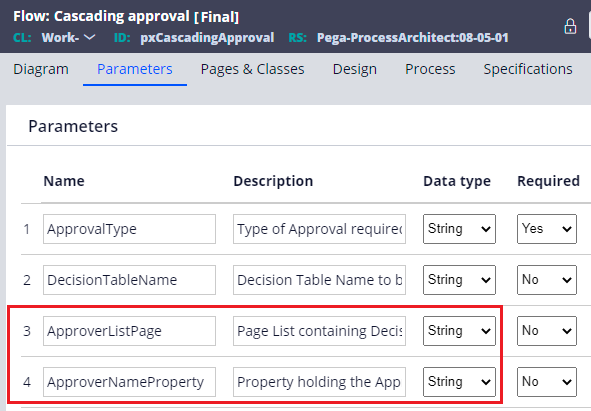
Step 4: Update the approval step configuration
Add the decision table, page list and property.

Step 5: Save and create a new case.
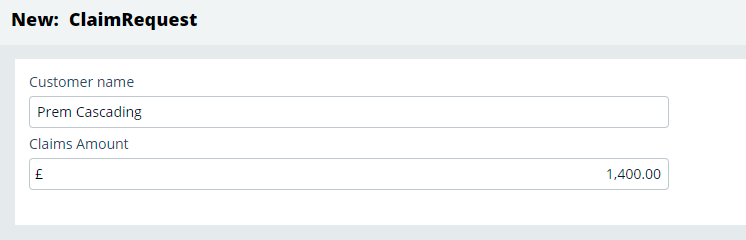
Step 6: Check the clipboard
You don’t find the ApproverList in the pyworkpage?????
Pega considers it as temporary and pass the pagelist to pxCascadingApproval flow as parameter.
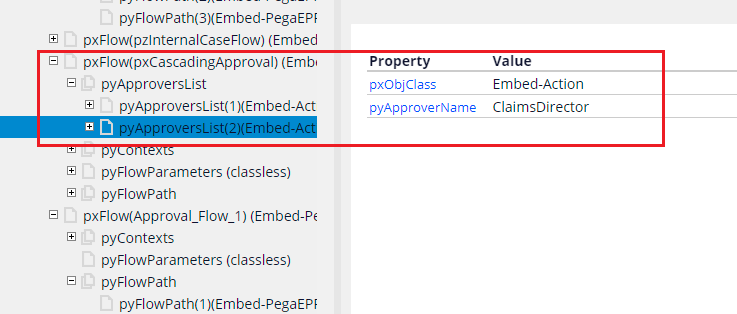
You can also see it from pxCascadingApproval flow.
In the pxFlow page, you can see the ApproverList got appended to pxCascadingApproval page.
Step 7: You can test the cascading approval flow on your own now.
Things to remember
1. For single approval type, you can either route the case to worklist and workqueue. You can also use business logic to determine the routing.
2. For cascading approval, you can either use reporting structure or authority matrix
3. In cascading reporting structure, you can use when rules to determine the approval level.
4. In cascading authority matrix, you can use decision table and populate the approvers list. The order of approverlist is key here.
5. If there are 3 approvers in a page and if first one rejects, then cascading flow ends and case goes to rejection.

