SSL – Understanding and Terminologies
This blog article is the first of the SSL series. In this blog article, we will see more in detail about the basics of SSL and end by hosting the pega personal edition using https.
Let’s get started.
If we see from the networking angle, systems can communicate with each other through host name and a port. HTTP (Hyper Text Transfer Protocol) can be the application layer protocol used.
Communication means, data can get transferred between systems, right?! The data can be normal data as well the sensitive data like credit card, transactions etc.
As Information Technology grew, the security risk grew at the same phase. Lots of hackers were born and all the sensitive data became high risk. As a result, the researchers introduced the Transport Layer Protocol Secured Socket Layer (SSL) in 1993.
This gave way to the new application layer protocol – Secure Hyper Text Transfer Protocol (HTTPS) which works in conjunction with SSL.
What is SSL?
Secure Sockets Layer, as the name suggests is a security protocol used at the transport layer that secures the connection between systems
It helps in two ways
- Encrypt the data transferred during the connection between systems.
- It can also used to establish authentication between systems.

Since the data is encrypted, hackers cannot eavesdrop on the data!
Now let’s zoom into the HTTPS protocol.
Note: The below explanation is at very high level. We will go slowly deep in!
What happens, when you hit a url with https protocol?
Step 1: User from his/her desktop hit the url to access the necessary website, let’s say facebook.com
Step 2: The router checks the DNS host name using the ip address. This will help to find the website host.
Facebook has its own data center now. Earlier it was in Hardvard university server (Courtesy, social network movie 😉).
Step 3: Now a search is executed in the website host and once the DNS record is found, then it redirects to host web server.
Step 4: It requests the website host using https protocol.
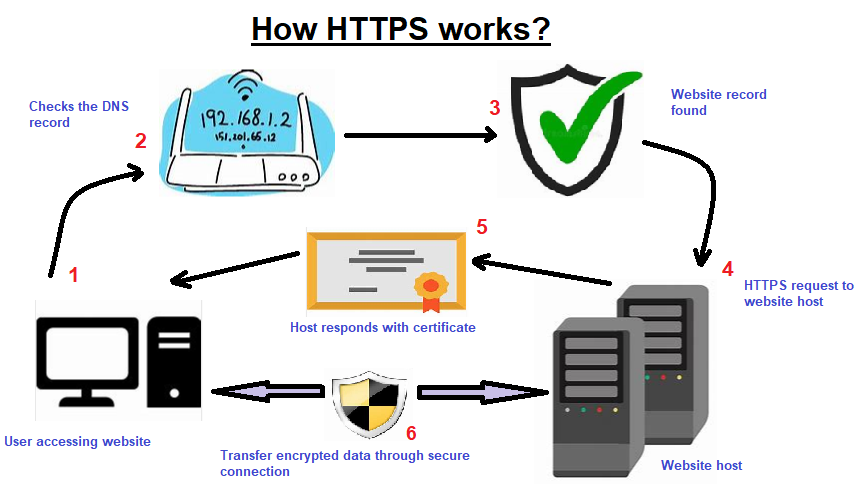
Step 5: Host responds with the certificate.
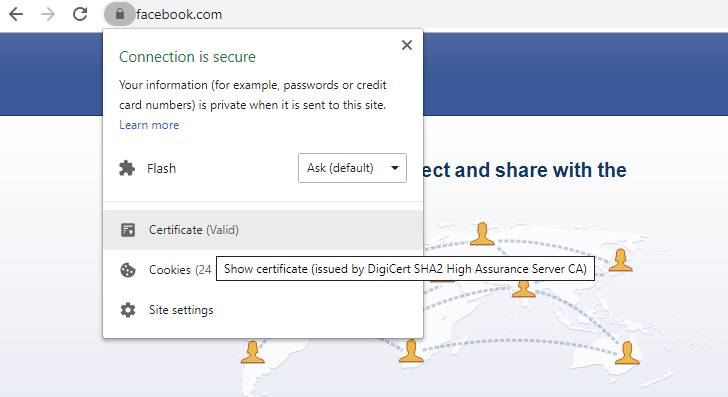
You can view the certificate in the web browser. It says the connections is secure?! Who said the connection is secure?
What if someone creates a duplicate certificate and claims the connections is secure!!
To answer this, let me put this question! How do we validate the country currencies?
If it is legally approved by the concerned authorities, otherwise, it is of no value. Similarly, the digital certificates can be approved/controlled by the centralized group called the Certificate Authorities (CA). If the certificates are controlled/approved by the CA, the web browsers believe the connection is secure.
Each web browser comes with the list of trusted Certificate Authorities (CA), which in turn inherits from the operating system certificates.
Let’s check it in chrome browser settings

Click on manage certificates.
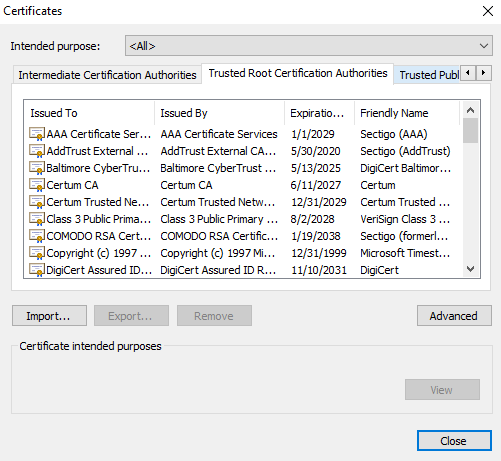
You will see all the trusted certificate authorities, issued by and the expiration date. So, chrome says the connection is secure, when it finds any website that has certificates issued by one of the authorities!
To check the trusted CA certificates that comes with the windows OS, perform the below steps.
Step 1: Run, search and open the program MMC
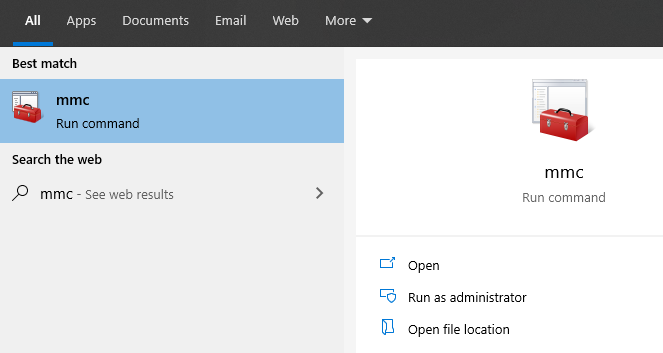
Step 2: On the pop-up window, click File -> Add or Remove snap ins.
You will get a pop up, where you can select certificates and Add.
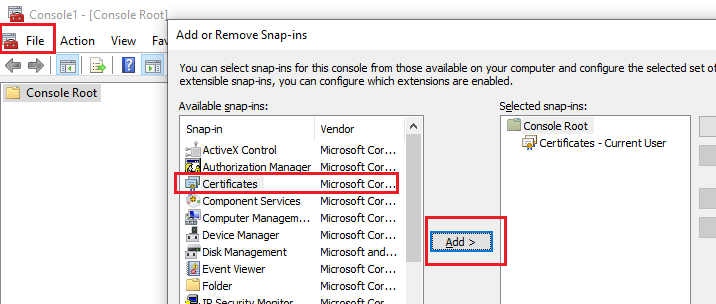
Save and close.
Step 3: You can view all the CA certificates that come by default.
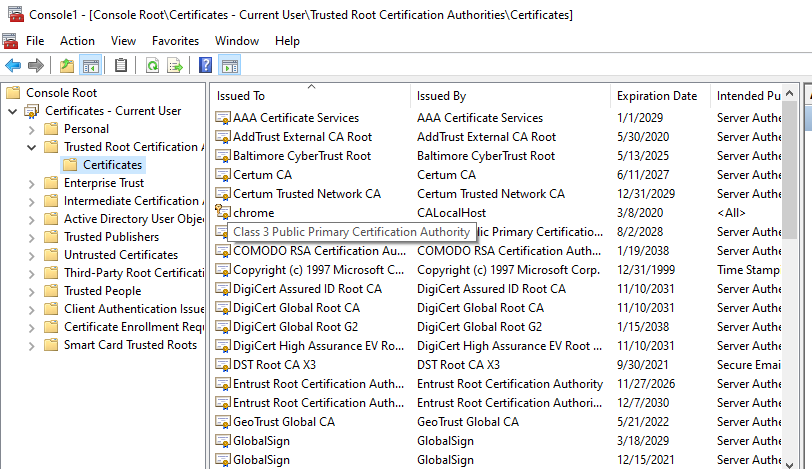
Browser loads the certificate from this location.
Note: You can add your certificates either here or via browser manage certificates.
What is a certificate?
SSL certificate is simply a file that binds the domain, server or hostname to the organization name and location.
Types of SSL certificates
Based on Signing/issuer
There can be three types based on the signing/issuer of the certificate.
1. External CA signed
Sometimes before, we saw that the certificates should be approved by Central Authorities (CA). There are many popular organizations like Digicert, Symantec, GeoTrust who are the certificate providers.
Let’s see the certificate issuer for facebook.com
Click on certificate icon to view the certificate.
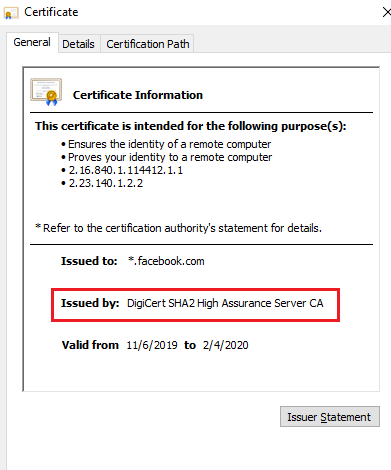
Seems facebook preferred DigiCert.
Mostly you need to buy a subscription for these certificates, Money, Money, Money.
2. Internal CA signed
Most of the organizations have their own Central Authorities to sign the certificate.
Say like a bank ABC is using lot of intranet applications (applications not exposed to the outside world, only the bank employees use it for internal purpose) for purposes like loan process, sales and services at the backend. In these situations, they don’t need the External CA approved certificates for all the applications. They can have their own, Internal CA, that can approve the certificates and those are internal.
If you have any https url in your project, go to the certificate and check who issued the certificate. Mostly it can be your organization CA.
Note: When your application is exposed to internet, then mostly the certificates will be from external CA.
3. Self-signing
We can all create our own certificates.
Say like, you are starting with a very small organization, which doesn’t hold any sensitive data ( like my blog 😉), then you don’t need (may be) some CA approved certificates!! In such scenario, you can create your own self signed certificate and use https protocol to host your domain.
How to do you create a self-signed certificate?
I already explained few steps of how to create your own keys in my previous post on SSO using keytool.
In these post, I am going to use openSSL together with keytool.
How to setup openSSL in your location machine?
Step 1: Download the OpenSSL executable file from the below link
https://www.filehorse.com/download-openssl-32/

Step 2: Run the .exe file form the downloads and accept the default setup in the wizard.
Step 3: Open the openssl application.
This is the application which we will be using throughout the SSL posts.
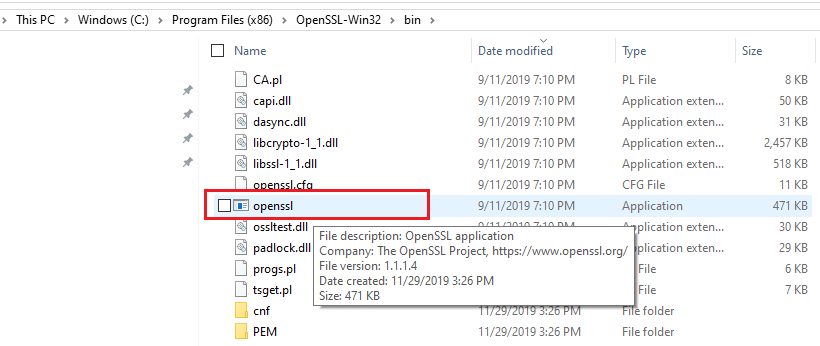
A command line prompt should be opened. Ready to go!
a) Create your own CA certificate
First let’s start with creating our own Certificate Authority. You will get to know why I created own CA.
As a hint, you need this for two-way SSL so that you can load your own CA in the browser trusted CAs.
How to create your own Certificate Authority (CA)?
As a preparation, create a new folder, say Key that can hold the server, client and CA certificates.

Step 1: Create a private key for CA.
Launch the openssl application and input the below command
genrsa -des3 -out C:UserspremgKeysca.key 1024
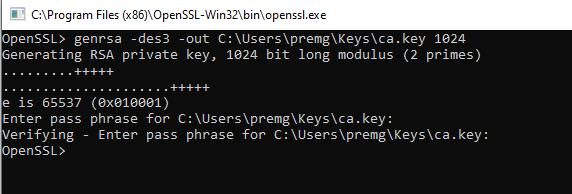
Enter a valid pass phrase. I am using changeit.
We will be using lot of pass phrases! For now, try to use one password so that you don’t miss it out 😉
You will see the ca.key file in the right location.

Step 2: Create a self-signed CA certificate
After creating the key, you can self-sign the CA certificate. You will end up creating a certificate that holds the public key, corresponding to the private key we created before
req -new -x509 -key C:UserspremgKeysca.key -out C:UserspremgKeysca.crt -days 3600
You will be prompted with a pass phrase and certain input about the organization.
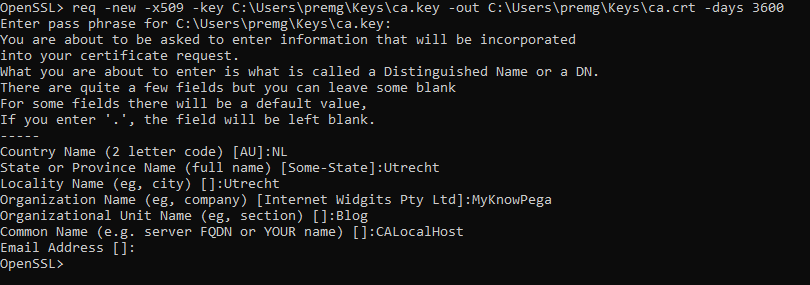
You will see a new certificate ca.crt is created.

Now we have successfully created our own CA certificate. We will use this to sign other certificates.
b) Create and sign your server certificate
We know the first step in HTTPS authentication. Server should present its certificate.
Step 1: create a private key for your server.
Execute the below command.
genrsa -des3 -out C:UserspremgKeysserver.key 1024

Same as CA private key.
Step 2: You need to create a certificate signing request. We need to do this to get signed by our own CA certificate.
Note: You perform this step as well to send the request to external CA approval. I am not going to explain those steps in these posts.
req -new -key C:UserspremgKeysserver.key -out C:UserspremgKeysserver.csr

I often end up in error like above. As a workaround, I just reinstall again. Bad that google didn’t provide much details.
Okay, here also you need to provide all the details for the certification generation.
Important note: When you create server certificate, you provide your host name as the common name (CN). For ca and client it doesn’t matter. Because with CN name, only the host is identified by the browsers.
In my situation, localhost is the CN.
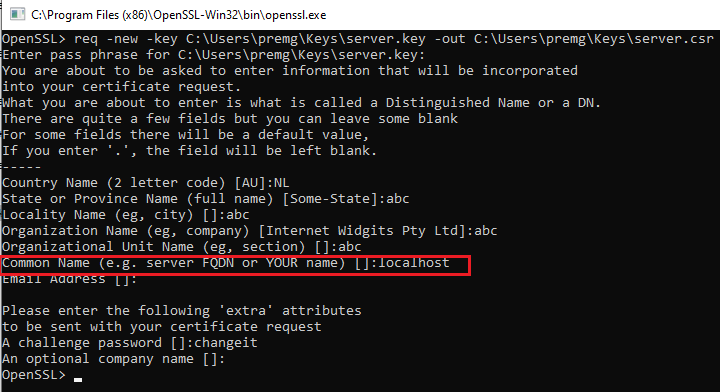
You can see the server key and the CSR file in the location.
Step 3: Sign your server certificate with your own CA.
Now we will start signing all the certificates with our own CA we generated before.
x509 -req -days 360 -in C:UserspremgKeysserver.csr -CA C:UserspremgKeysca.crt -CAkey C:UserspremgKeysca.key -CAcreateserial -out C:UserspremgKeysserver.crt

You will see the newly created server certificate.

Step 4: Create a JKS file – keystore for tomcat server.
For this, first we will create a new file in PKCS12 format.
Tip: Please read in google about terms which I don’t explain in this post like PKCS12, pem etc.
So PKCS12 also called as .p12 format will hold the public certificate + private key together.
Execute the below command.
pkcs12 -export -in C:UserspremgKeysserver.crt -inkey C:UserspremgKeysserver.key -out C:UserspremgKeysserver.p12

Now let’s put the .p12 file into the JKS keystore.
For this, you can use the keytool command, that comes with the JDK/bin folder.
keytool -importkeystore -srckeystore C:UserspremgKeysserver.p12 -srcstoretype PKCS12 -destkeystore C:PRPCPersonalEditiontomcatconfkeystore.jks -deststoretype JKS
I gave the destination keystore location as tomcatconf folder.

You will see the file created in the right path.

Execute the below command to verify the content of the keystore.
keytool -v -list -keystore C:PRPCPersonalEditiontomcatconfkeystore.jks
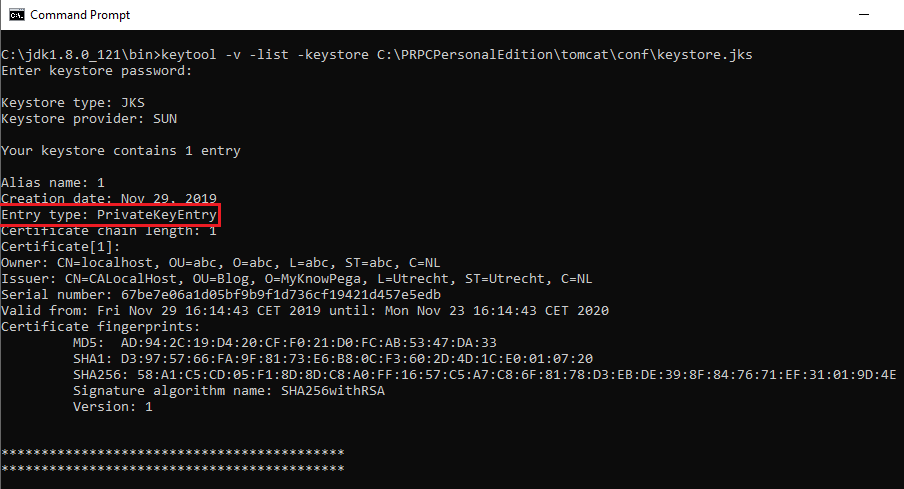
We have successfully created a keystore in tomcat server with the public private keys corresponding to server certificate.
c) Update the server.xml file and enable the https port
Server.xml file is also found on the same tomcat-conf directory.
Edit with notepad++ and scroll to the center. You will see https block is commented by default.
Enable it as shown below.
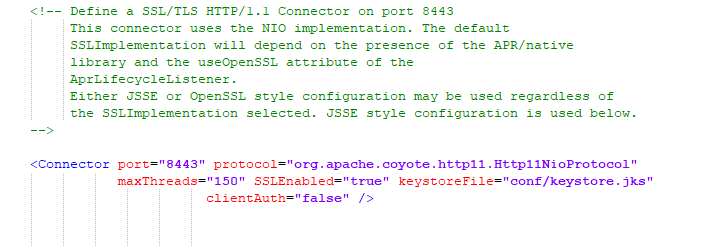
Note: By default these steps are commented.
Specify the keystoreFile path to your conf/keystore.jks file
We are done with configuring HTTPS in server side.
Restart the server now.
You should see both http and https are opened at the start logs.

Get ready for the magic.
Hit the url (https) – https://localhost:8443/prweb/PRServlet
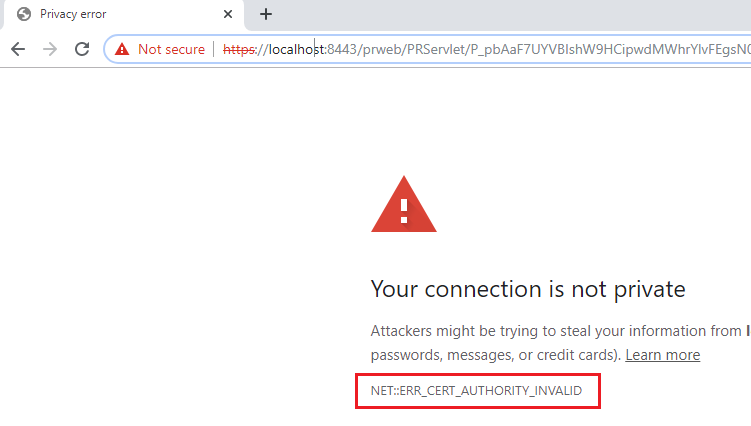
You see, chrome still consider this https as not private, because of invalid Certificate Authority. You know why, because it is a self-signed certificate.
Click proceed to unsafe.
Click on the certificate icon, to view the certificate we installed.
The certificate is issued by CALocalHost (CN for the CA certificate). Server sends the certificate to the browser.
Here browser is the client and our pega tomcat is the server.
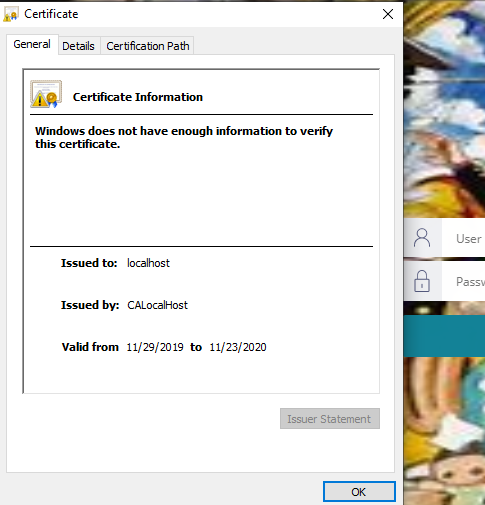
It is valid till 2020.
So do a final touch. This is not a mandatory one, but just a warmup for the two-way ssl post 😉. Install the server certificate in the client browser.
How to install the server certificate in chrome browser?
Step 1: View certificate from the icon and save the file in .der format
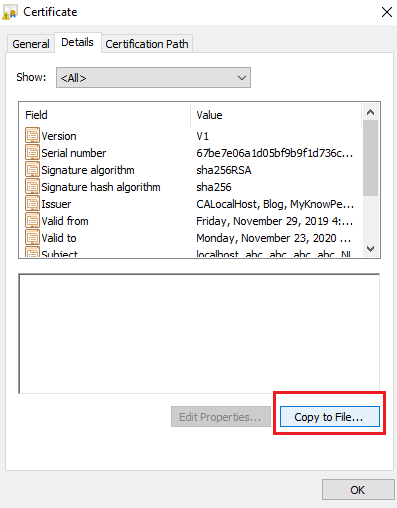
Step 2: Go to chrome -> Settings -> Search SSL
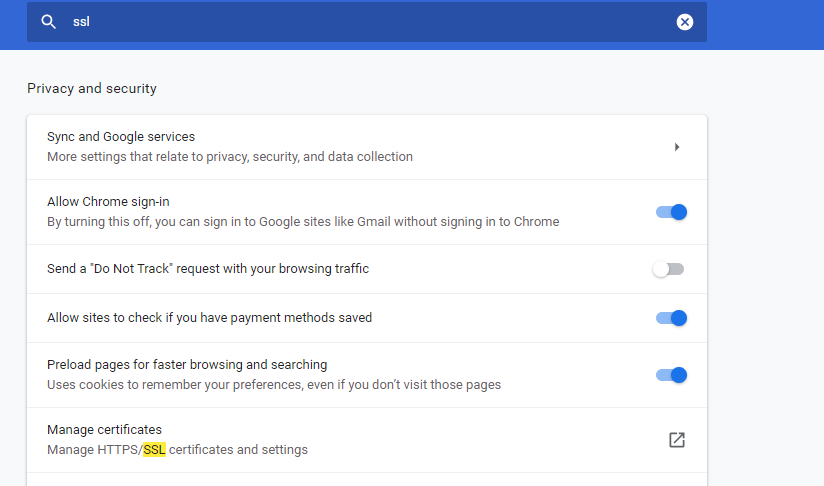
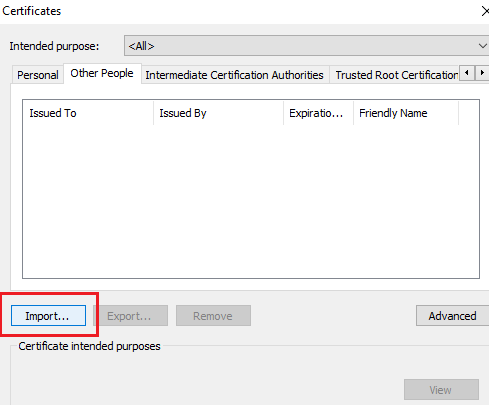
Step 3: click on import the certificate using import wizard.
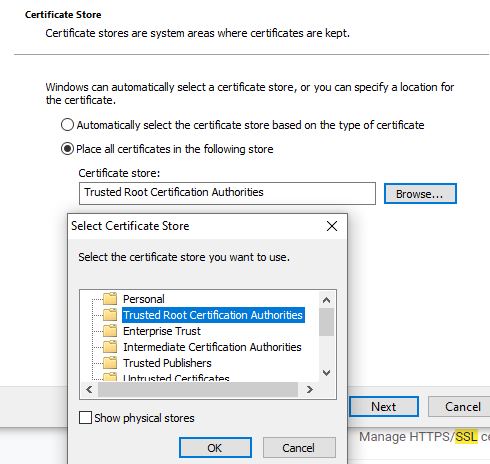
Make sure, you save the certificate in the trusted root CA.
At the end, you will prompted with a security warning, because this is signed by our own CA.
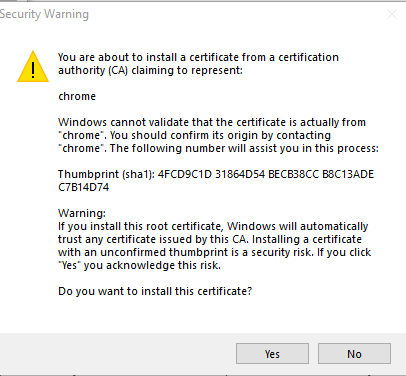
Click yes.
Okay, we have successfully hosted our personal edition into https URL. 😊.
Let’s get back to the different certificate types based on different category!
b) On the verification or validation level
All these types come under getting certificates from external CA.
1. Domain validated certificates
You can get certificates for your domain without disclosing your organization information. Here the CA does a very little validation and provides you the certificate.
For example – I can get a domain validated certificate for myknowpega.com
2. Organization validated certificates
Here the CA checks the domain name and also validates the organization details. This adds a little bit security to the domain validated certificates.
3. Extended validated certificates
Here CA checks the domain name, organization and thorough investigation on all the organization details
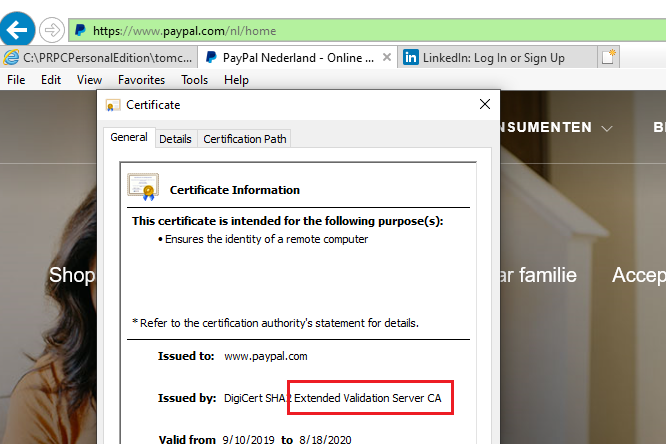
For example – click on https://www.paypal.com/nl/home in IE.
You will see it is fully secured with a green block on the URL field. You can also verify the certificate.
Extended validation certificate.
Click on the certification path.
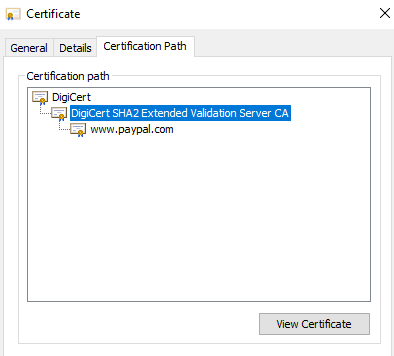
You will see a hierarchy path in the certificates.
It starts with root certificate – DigiCert and then Intermediary certificate.
Please browse about intermediary root certificates on your own 😊
Hope you got some basics about SSL certificates. Lot of cool stuffs are available in google and youtube. Learn it!!
In the coming article, we will see how to implement one-way and two-way SSL and some pega 😉


