Add JNDI Datasource for External Database Connection
In this blog article, we will see how we can add a JNDI datasource and also create a new Pega database instance using the JNDI datasource to connect to the external database.
This tutorial is demonstrated using Pega 8.5.1 personal edition.
Okay, first let’s look into the out-of-the-box pega database instances.
Records -> SysAdmin -> Database
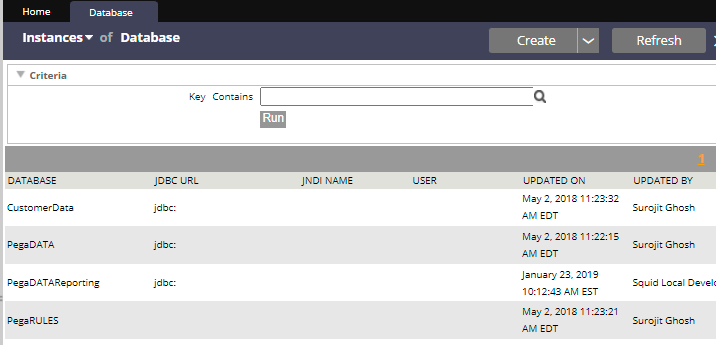
You see there are 4 database instances specified
1. PegaRULES – rule schema
2. PegaDATA – data schema
3. CustomerData – usually the created data types goes into this schema to store the customer data. Also by default CustomerData schema uses the connection details of PegaDATA schema.
Enjoying this content?
Access the author’s full video courses here at MyKnowAcademy.
Explore Courses →
4. PegaDATAReporting – In the recent versions, pega provides this connection to be used specially for reporting.
Click on the PegaRULES instance
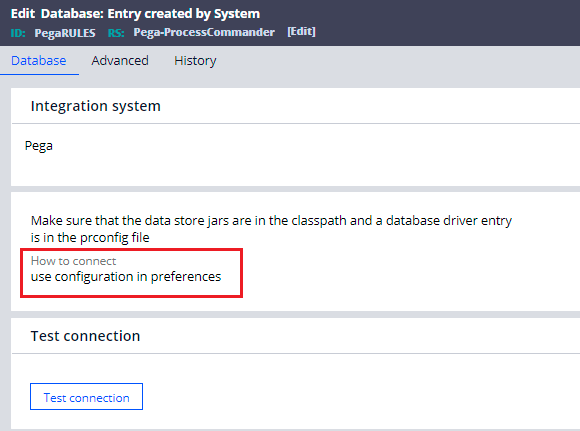
You see it uses the configuration in preferences to make the connection.
Configuration in preferences means to look into the prconfig.xml 😉
You will find the prconfig.xml file under tomcat – webapps –prweb – WEB-INF – Classes directory.
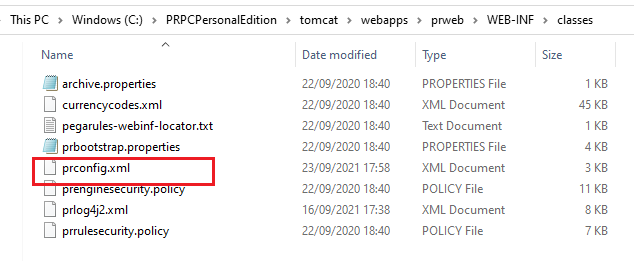
Open the prconfig file and you will see the database environment names under the pegarules tag.

You see the value corresponds to JNDI reference. How did I find out?
Java:comp/env is the node in the JNDI tree.
What is JNDI?
– Java Naming and Directory Interface.
– Allows the applications to look up the resources.
You see the value as – java:comp/env/jdbc/PegaRULES
java – connection string which acts as a protocol
comp – root for the JNDI context
env – subcontext for all the resources.
jdbc – subcontext for the jdbc resources
PegaRULES – name of the jdbc resource.
As a summary, prconfig specifes the PegaRULES datasource as the JNDI resource.
How do we specify the JNDI resource?
There are two ways, you can specify the JNDI resource in tomcat server.
a) In the tomcat server.xml file
Tomcat – conf – server.xml file
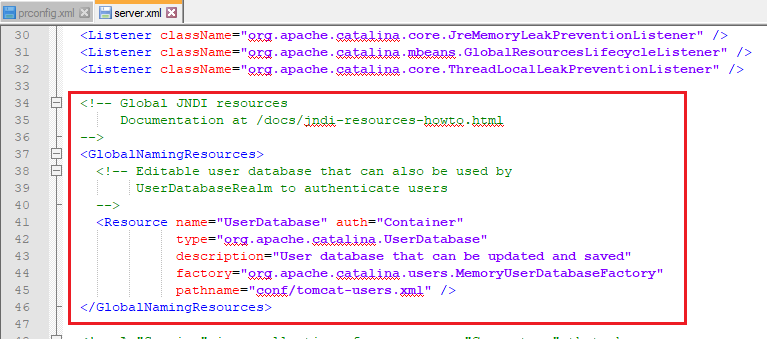
The global JNDI resources can be specified in this file.
The web apps that are running in this tomcat server can use the resource linking tag in their web.xml file to use the global JNDI resources.
b) In the context.xml file
Usually, you will find context.xml in 2 locations.
1. Tomcat/conf/context.xml – The resources specified in this context.xml can be used by all the applications that are running on the Tomcat server.
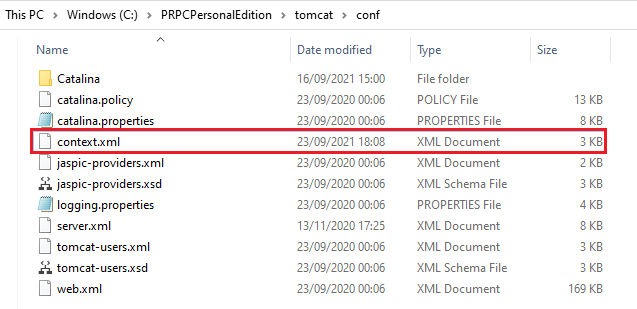
2. Tomcat/webapps/<appname>/META-INF folder
The context.xml file in this location can be used to specify the application specific resources.
Currently in the Pega personal edition, only generic context.xml at the Tomcat server level is used.
Open the context.xml file.
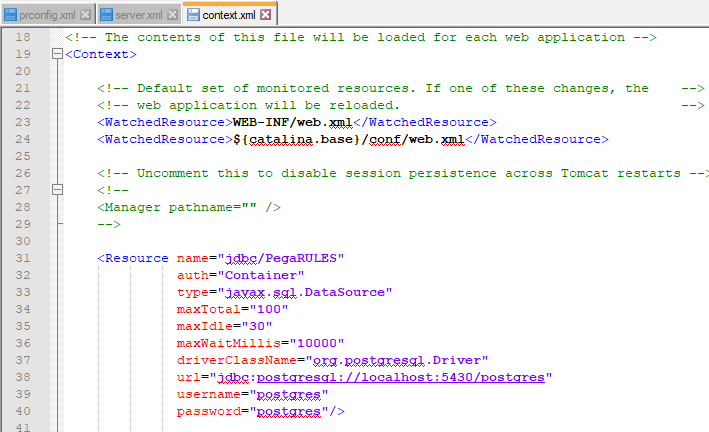
You will find the JDBC resource specified for the PegaRULES.
You also see the JDBC connection pool details like maximum connections, min/max idle connections etc.
Driverclassname
What is JDBC driver?
– Is a software component or a library that is used to enable a Java application to interact with the database.
– JDBC drivers vary based on the database we use and so the driver class name.
Here in the personal edition, we know Postgres database is used and its corresponding JDBC jar should be in the tomcat home – lib directory
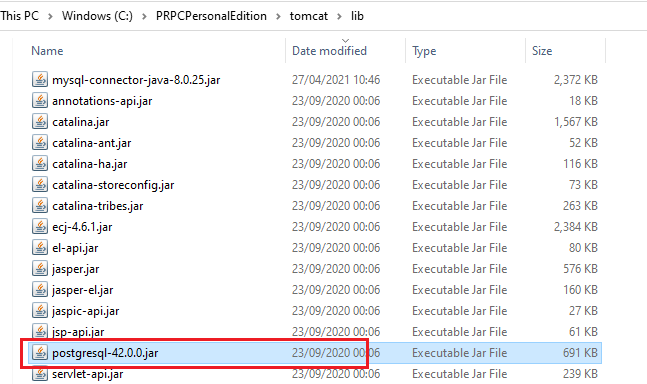
So when the Tomcat server starts, all the Java classes packaged under these jars will be loaded and can be used by the Pega application.
Back to the context.xml file, you can also specify the URL, username and password to connect.
Note: you see in the personal edition the password is hardcoded, but in real time usually the secrets will be injected dynamically.
Till now we have seen how a pega database instance can make use of prconfig JNDI configuration to make the database connection, but it is not the only way to make the connection.
We can also use the JDBC connection pool or to specify the JDBC URL directly in the database instance.
Tip: try to use either prconfig or JDBC connection pool method instead of specifying JDBC URL directly.
Disadvantages of specifying the JDBC URL directly in pega database instance
– The configuration stays within pega like a hardcoded value. In terms of data migration, extra care should always be given to have the right JDBC URL for right environment.
– When you specify the JDBC URL directly you miss the privilege to specify the connection pool settings for the database connection.
Before closing the theory part, let’s look into the JNDI tree.
Remember long before we used to have an application SMA which is built on JMX – Java Management Extensions.
The inbuilt Java usually comes with jconsole which can be used to launch the monitoring console.
Just type jconsole.
Here you can connect to any Java process either locally or remotely.
It is very easy to make a local process connection.
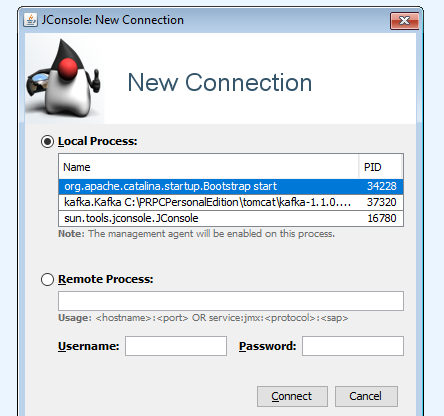
Click connect.
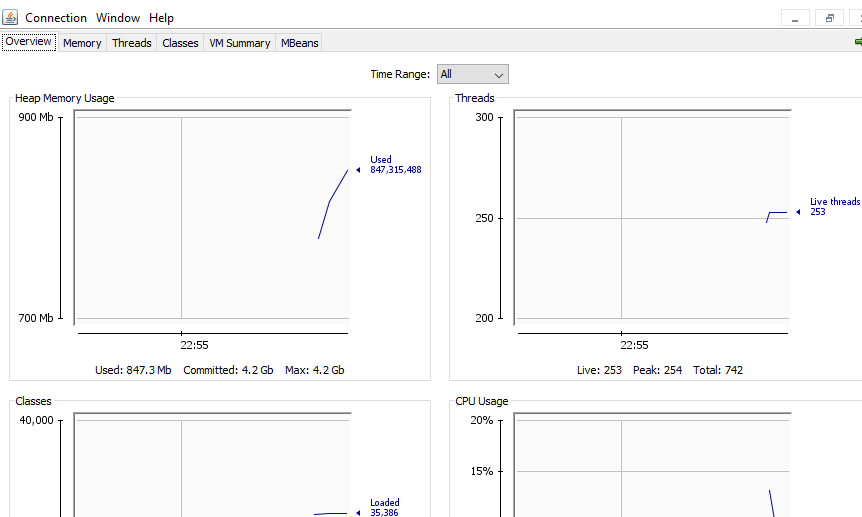
Navigate to MBeans tab.
Expand catalina -> Resource -> Context
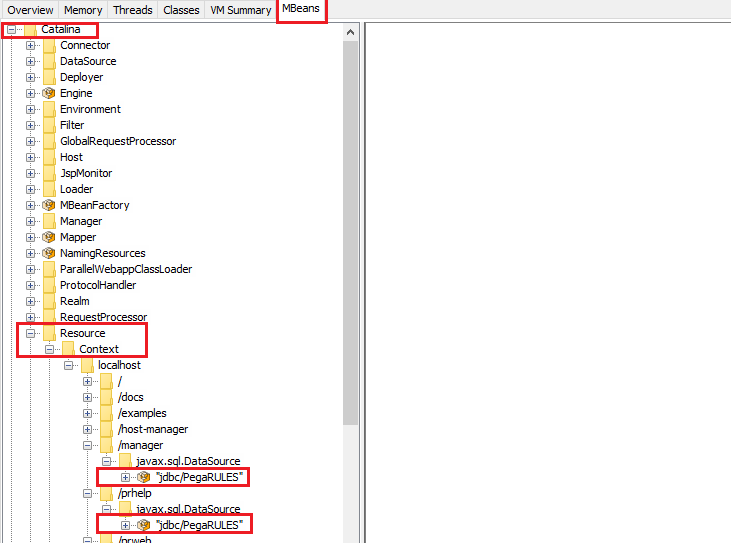
You see the jdbc resource is available for all the apps that are part of the tomcat server since the jdbc/PegaRULES is specified in the tomcat/conf context.xml
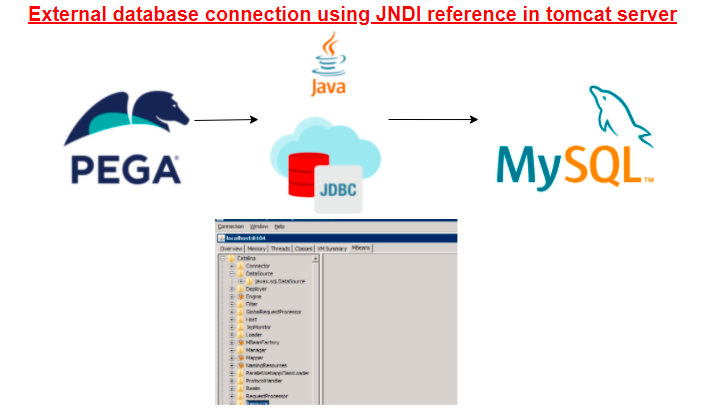
Requirement: Pega application needs to connect to external database server – MySQL .
Pre-requisites
For this tutorial, I am going to use the MySQL 8.0.26 version
a) Start the MySQL server
Step 1: Download the binaries for your operating system – https://dev.mysql.com/downloads/installer/
Step 2: Remember to use the setup types as Developer Default option.
Using this option, you will get server together with other tools needed to administer the MySQL database.

Step 3: Select all the defaults, download and install the tools.
Note: For this tutorial, we need MySQL server, MySQL workbench and Connection/J tools. If you don’t want to bulk download, then you can individually download these three components.
Step 4: Only the installation is success for the three components, start the MySQL server first
Switch to bin directory and run the mysqld.exe using option –initialize –console
./ mysqld –initialize –console

Note the temporary password for root user.

Now start the server
./mysqld –console
You should see the ready for connections message in the console.

b) Create schema and user using MySQL workbench
Step 1: Start the MySQL workbench
Step 2: Add a new database connection.
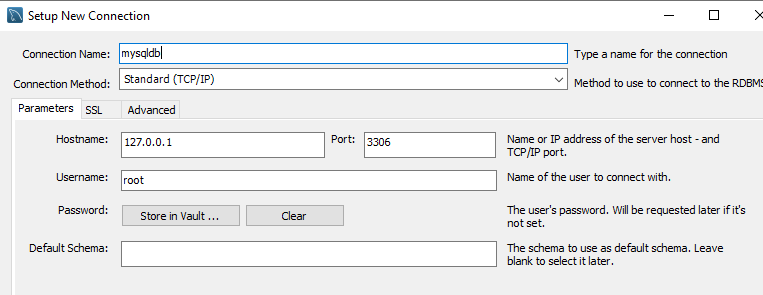
You will prompted with the root password and change password window. Use the password noted from the console and change to your own password.
Step 3: Add a new schema – mysql_schema
In mysql, schema is synonymous with database.
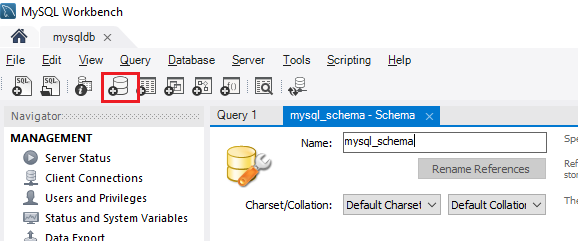
Click apply and execute the SQL query to create the new schema.
Step 4: Add a new user – mysql_user
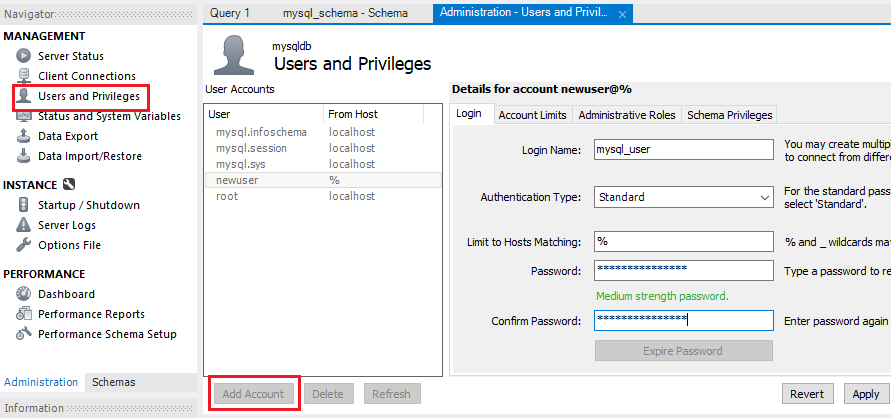
Note: In the administrative roles tab, make sure to provide the user with all the admin roles.
Click Apply.
So till now, we started the MySQL server and created a new schema – mysql_schema and a user credentials – mysql_user to connect.
We are done with setting up the pre-requisites. Let’s do the configuration for the pega application to make a connection to the mysql database.
How to make an external database connection?
Step 1: Include the JDBC driver for the database in the Tomcat lib folder.
Find the Java connector jar from the downloaded binaries.

Note: you can also download it individually – https://downloads.mysql.com/archives/c-j/
Place the Jar in the Tomcat lib folder.
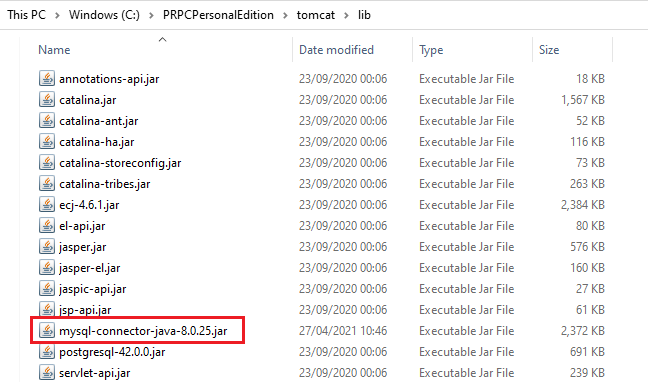
Step 2: Enter the JNDI resource in the context.xml file.
We will use the tomcat server context.xml file. You can also create a context.xml file for each web application.
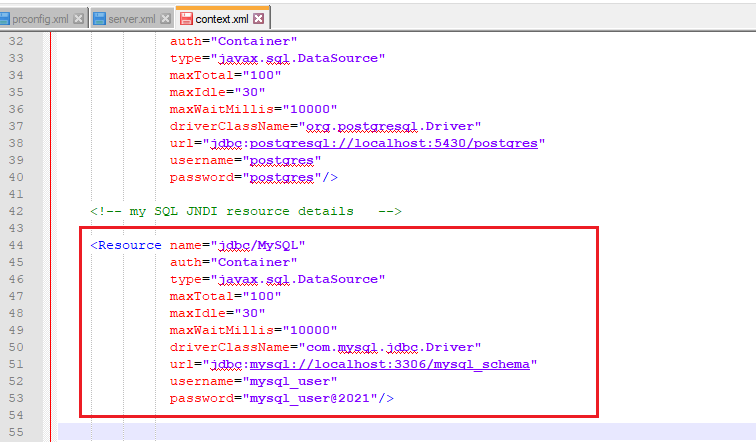
Name – provide resource name
Driver class name for MySQL – com.mysql.jdbc.Driver
url – jdbc:mysql://<hostname:portname/<database name>
also enter the created user credentials.
Step 3: Save the context.xml file and restart the server.
Note: You may find some documentation to include the resource reference in the web applications web.xml file. It is not mandatory in our pega application but may be used in other applications which run may web apps under one server and need to reference the resource separately.
Step 4: Create a new database instance
Records -> SysAdmin -> Database -> Create new
Use JDBC connection pool option

Specify the JNDI name – java:comp/env/jdbc/MySQL
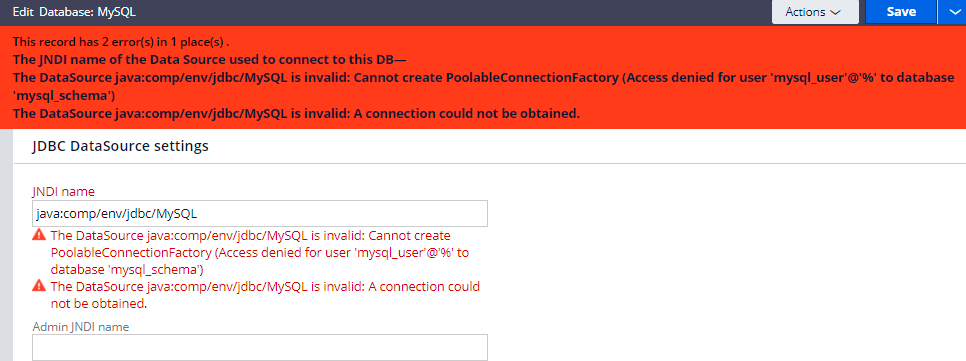
I did something wrong it seems 😁
Cannot create poolable connection factory – Access denied for the user.
Seems I gave case mismatch password in MySQL workbench user creation and context.xml password field.
Updated again and am now able to save the database instance.
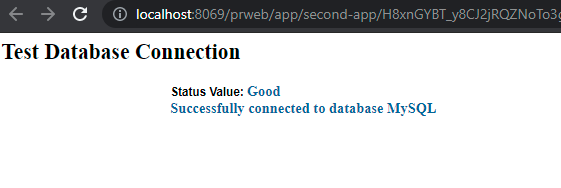
Step 5: Test connectivity.
Do the test connectivity in the database instance.
You can also see the client connection in the MySQL Workbench.
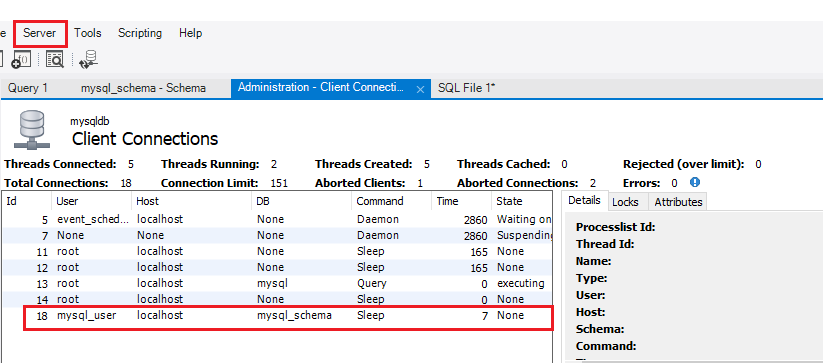
You can just kill this connection and do a save on the pega database instance, then you will see a new entry.
Here in our tutorial, we used the JDBC connection pool option.
As a practice exercise, you can also try to include the JNDI reference in the prconfig.xml and update the database connection to use configuration in preferences.
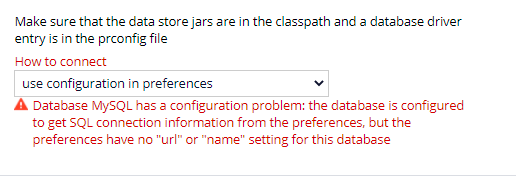
For now, it fails for me because I never configured it in the prconfig.xml file.
As a summary,
– You can specify the external database details in the prconfig.xml file.
– You can specify the JDBC resource details in the context.xml file or in the server.xml file.
– You can also resource reference or resource link from the web.xml file.
– Make sure to use the JDBC driver class in the lib folder so that the Java classes can be used to make a connection to the database.
Hope the article is informative.

