Content storage and content source using Azure storage repository

In this blog artcile, we will see how we can store and manage the case attachments and pulse attachments in Azure blob storage container instead of the default Pega data storage.
This tutorial was implemented using Pega personal edition 8.5, but the core concepts remain the same in higher versions as well
It is recommended to go through the previous articles to understand the basics of cloud storage account.
Each organization or tenant using the Azure cloud subscription can use the storage account with a certain storage space to support their applications. Storage account in azure provide different types of services like – File share, blob storage, Table and queue storage. Here we will use blob storage.
We know that the Pega application’s rules and data reside in pega database. When you move your pega application to Azure, you can make use of database resources like – postgres or MS SQL.
Pega case attachments by default get base64 encoded and get save into database tables. With the cloud storage account, you can also save the case attachments in cloud storage instead of default Pega database storage.

In the above picture, you can see the difference between the Pega storage and the cloud storage. The main difference is in the cloud storage, your base64 encoded stream data is not saved in the attachment table, but instead, the file is uploaded into the Azure cloud storage using repository APIs.
Important note: In the new Pega version, you may have a different linking pin like below, where Pega social document case may come between the work table and the link table.

Let’s see how we can manage to store the files in the cloud repository.
What are the pre-requisites for this tutorial?
1. A Valid Azure subscription
Enjoying this content?
Access the author’s full video courses here at MyKnowAcademy.
Explore Courses →
You can use the free subscription for a month (you need to provide credit card details!!, but will be charged only when you cross certain limit and you can have control on that).
https://azure.microsoft.com/en-in/free/
If you registered for training, you may have Azure pass subscription which you can use as well.
You definitely need a subscription before proceeding.
2. A storage account resource in Azure
Please follow the tutorial, to create a new storage account
I created a new storage account – pegastorage

Note down your storage account access keys, which we will use in this tutorial.

3. A case type to test the case attachments.
My pre-requisites are ready. Let’s start with the configuration part.
What are the steps involved in configuring Azure Blob storage to store Pega attachments?
Step 1: Create a blob container for Pega attachments.
In the left panel, you can click on containers tab and click + Container to create a new blob container.

Created a new container – case-attachments.

I am not going to create sub directories under, and so this container / will be my root directory.
Step 2: Create a Azure repository rule in Pega to connect to the blob container.
Step 2.1: Create a new Azure repository rule.
Important note: Pega uses two access roles to manage the creation and use of repository
PegaRules:RepositoryAdministrator – To create, manage and delete instances.
PegaRules:RespositoryUser – Cannot create or delete but can view, browse and fetch instances.
Include the administrator role in your operator access group.
Records -> Sysadmin -> Repository -> Create new

You can select the repository type as Azure.

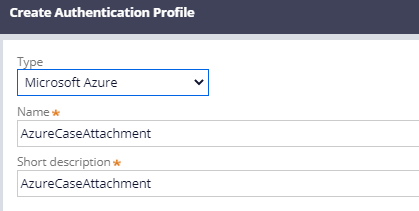
Step 2.2: Create a new authentication profile of type Azure.

In the account name and account key, provide the access keys for the storage account as shown in the pre-requisites block.

Step 2.3: Complete the repository configuration.
Provide the container name as the new container we created in step 1 – case-attachments
Root path – <empty>
Save the instance and click test connectivity.’

You should see a success message as shown above.
Step 3: Configure the application for cloud storage and cloud sourcing
Open your application rule and switch to the integration and security tab.
Under content management, you will see “Store in Pega database” is selected by default.
Select “Store in repository” option and select the newly created Azure repository.

Click on browse option and select the target root folder, under which you want to save the attachments.

I selected my target root folder.
Here is where I am going to store my files.
You also have the option to prompt users for confirmation before deleting the content from the repository.
Ok. Now, We defined a repository which will hold all the case attachments.
What are the sources of the case attachment?
Mostly you create/download a file in your local machine and then upload it as a case attachment.
With case sourcing, Pega provides an option to use files from other repositories (or other sources) to upload as pega case attachments.
You see it is a checkbox and you can select multiple sources.

Here, I am going to use AzureLoanFiles, which is a new Azure container repository which I created in the previous post. So I can use the files from AzureLoanFiles and upload as case attachments.
Provide a valid label to each content resourcing option, so that it can used on choosing the option in case processing
We will see how it works at the end. Save the application rule.
We are done with the configurations.
Let’s test the content storage part.
Step 1: Open a new case and go to attach content action.
Case ID – L3

Here I added a local file from my machine.
Upload the file.
Step 2: Check in the Azure container, you should see the same file properly stored in the root directory.

You see the file name – “Pega 8.5 new” is attached with the Document ID – Doc-4. This is the document ID stored in pega database.
Revisiting the architecture picture –

Step 3: Verify the pega tables
Instance from attachment table –

I will make one separate post on Pega social documents later.
Open the instance, you will see the azure repository.

Instance from Link attachments –

Open the instance, you will see the link between case attachments and pega social document key.

Now we can see the Pega rules involved in handling the content storage in Azure.
1. Declare trigger
On saving the instance Data-WorkAttach-File – pySaveContent.
This gets called every time when the file is attached to the case, with a when condition that checks if external storage is enabled.

2. Activities
pySaveFileContent, pzSaveToRepository
pySaveFileContent – Available rule, that is used for saving the file other than pega database storage.
pzSaveToRepository – prepares the input parameter and calls the savable data page – D_pxNewFile with parameters – repository name and file path.
Note: With file path as input, Pega can take care of stream conversion and uploads it into Azure store via REST APIs

3. Data pages
Invoke repository API
D_pxNewFile – to create a new file in the repository location.
Under class – Embed-Repository-File, you will find the other data pages that are part of repository APIs.

You can find the details usage of those repository APIs in the following link – https://community.pega.com/knowledgebase/articles/data-management-and-integration/84/repository-apis
4. Data page invoking activities
Under Embed-Repository-Type-<repositoryname> class, you find the utilities that invoke the integration function.

5. Library and functions
Under the pxRepositoryManager library, you will find the repository related functions to add, delete, check etc.

The Java functions, set the right request and call the api.

Like the same way, data pages are used to perform other operations.
API call is totally hidden in the engine code and all we have to do is use the data pages with right parameters.
So, how to identify the API specifications?
In the Microsoft documentation, you can find the REST API specification for the operation on blobs –
https://docs.microsoft.com/en-us/rest/api/storageservices/operations-on-blobs
You will find a detailed explanation on the request and responses specifications.
Try exploring other options like – download the attachment, delete the attachment to see the API calls.
Let’s finish this tutorial by testing the content sourcing part.
Open the case pulse and try to upload a document from the Azure external source.
This navigation will list all the labels corresponding to the content sourcing option you selected in the application rule.

Step 2: You can browse through the repository and select the file to upload.

If you trace, you will find the repository APIs getting called.
There are certain restrictions with using storage repositories.
For example,
– It supports only file attachments.
– You cannot modify the repository easily.
Please visit the link for more details on case attachment restrictions –
Requirements and restrictions for case attachments in a file storage repository | Pega
You can also find the upgrade steps to migrate from pega storage to repository storage using OOTB queue processor – pzAttachmentMigrationProcessor.
Migrating case attachments to a repository | Pega
We are at the end of this post.
As a summary,
– Pega can store case file attachments to an external repository.
– Pega uses repository API data pages under class – Embed-Repository-File to perform the repository operations.
– Pega can also source files from external repository to attach with cases.


